background image

Preparations

5

3

Connect the AC power cord to the wall
outlet.

Audio connecting cord  XLR type

Coaxial digital connecting cable VMC-10, etc.

Optical digital connecting cable POC-15A, etc.

Control S cord (supplied)

Relay playback cord (RK-G136, etc.)

1

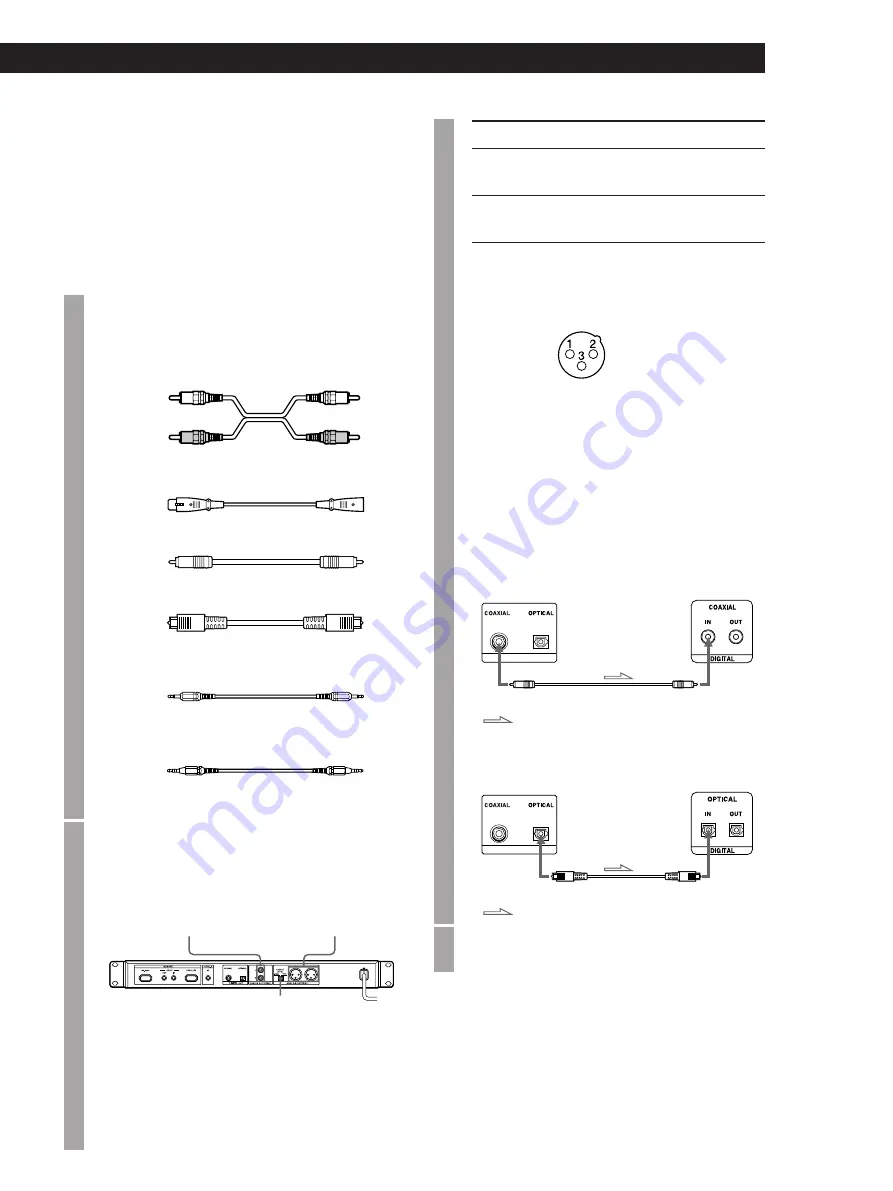
Prepare the necessary connecting
cord.

Audio connecting cord (pin type)

2

Connect the cord.

p

To connect to an analog equipment

Use the terminals and switch as below.

p

To connect to a digital equipment
(MD recorder, DAT recorder, mixer with
digital input terminal, etc.)

Digital recording can be carried out by
connecting to MD or DAT recorder.  Use
coaxial digital connecting cable VMC-10
(optional) or optical digital connecting cable
POC-15A (optional), etc.

When using coaxial digital cable

When using optical digital connecting cable

z

To use the supplied remote control as the
wired remote control

Connect the terminal on the front side of the remote
control and the CONTROL terminal of the main unit
with the CONTROL S cord (supplied).
When the remote control and the main unit is
connected with the CONTROL S cord, the infrared ray
is not set out from the remote control and is not
received at the main unit.
To use as the wireless remote control, disconnect the
plugs from both the main unit and the remote control.

CD player

Digital equipment

: Flow of the signals

Analog output terminal
UNBAL (pin type)

(Mini jack)

(Mini jack)

(Stereo mini jack)

(Stereo mini jack)

Analog output terminal
BAL (XLR type)

OUTPUT LEVEL
switch

z

When BALANCE output (XLR type)
terminal is used, output level can be changed
by OUTPUT LEVEL switch.

Position

+4dBu

-10dBu

Output level

The signal of -20dB in digital is
output in +4dBu level.

The signal of -20dB in digital is
output in -10dBu level.

Specification of the BALANCE output
connector.

Equivalent to XLR-3-32
output terminal

1: GND
2: HOT
3: COLD

CD player

Digital equipment

DIGITAL OUT

DIGITAL OUT

: Flow of the signals

Red

Red

Left (L)

Right (R)

White

White

Left (L)

Right (R)

Summary of Contents for CDP-D11

Page 1: ...ny Sound Tec Corporation CDP D11 Operating Instructions Thank you for purchasing the Sony Compact Disc Player Before operating the player please read this manual thoroughly and retain it for future reference Compact Disc Player ...

Page 2: ... green and yellow To prevent fire or shock hazard do not expose the unit to rain or moisture To avoid electrical shock do not open the cabinet Refer servicing to qualified personnel only About This Manual Conventions Controls in the instructions are those on the player these may however be sub stitutedbycontrolsontheremotethatare similarly named or when different ap pear in the instructions within...

Page 3: ... play 10 Playback in programmed order Programmed play 10 To return to the specified point Locate 12 To pause after playback of each track Auto pause 13 To start the sound immediately Auto cue 14 To change playback speed Variable speed play 15 Timer playback 16 Last mode memory 16 OTHERS Functions of control terminals 18 Functions of REMOTE terminal 18 Precautions 20 Treatment of compact discs 21 T...

Page 4: ...off each equipment Notes Incorrect use of the batteries may causes an electrolyte leakage or a explosion Keep the following Insert the batteries with and directions correctly Do not mix new batteries with old ones or not mix different type of batteries Do not charge the batteries When the remote control is not going to be used for an extended period of time remove the batteries In the event of ele...

Page 5: ...the front side of the remote control and the CONTROL terminal of the main unit with the CONTROL S cord supplied When the remote control and the main unit is connected with the CONTROL S cord the infrared ray is not set out from the remote control and is not received at the main unit To use as the wireless remote control disconnect the plugs from both the main unit and the remote control CD player ...

Page 6: ...e AMS control until PLAY PAUSE is displayed then press the AMS control 3 Turn the AMS control until EJECT Disable is displayed then press the AMS control 4 Press the MENU EXIT button To change so that ejecting function is always workable select EJECT Enable in step 3 2 3 4 Label side up What to be To stop playback To pause playback To skip to the next track To return to the previous track To eject...

Page 7: ... search by listening to the beginning of each track Music scan Z 0 0 p P DISPLAY Press Press Press fl 0 0 p P Remaining time of the whole disc C t 1 T 16 14 54 Index 1 s m REPEAT PLAY MODE A PAUSE A CUE MARK VARI SPEED C t 1 T 16 14 54 54 3 s s m m REPEAT PLAY MODE A PAUSE A CUE MARK VARI SPEED C t 1 T 16 14 20 54 1 s s m m REPEAT PLAY MODE A PAUSE A CUE MARK VARI SPEED C T 16 14 28 54 49 s s m m ...

Page 8: ...AMS control to display SOUND ON or SOUND OFF then press the AMS control 4 Press the MENU EXIT button When OVER is displayed while pressing button in pause mode It shows that playback goes to the end of the last track Turn the AMS control to left or press 0 button Press or 0 button in the remote control Note Playback stops when playback goes to the end of the last track while pressing button during...

Page 9: ... the window and is displayed in the REPEAT position 2 When the ending point of the section comes by playback or pressing button press A B button again The specified section is repeated To cancel A B repeat Press REPEAT or p button To change the section Set the beginning and ending points in the same operation z A B REPEAT can be set with the MENU Mode in the main unit 1 Press the MENU EXIT button ...

Page 10: ... 8 s m REPEAT PLAY MODE A PAUSE A CUE MARK VARI SPEED 1 In stop mode press the SHUFFLE button on the remote control S is displayed in the PLAY MODE position in the display window 2 Press fl button Shuffle play starts To return to the normal play from the shuffle play In stop mode press CONTINUE in the remote control The indicator of the PLAYMODE position in the display win dow turns to C z A track...

Page 11: ...h the MENU Mode in the main unit 1 Press the MENU EXIT button to display MENU Mode 2 Turn the AMS control to display PLAY Mode then press the AMS control 3 Turn the AMS control to display PROGRAM then press the AMS control 4 Press the MENU EXIT button 5 Turn the AMS control to display the track number to be programmed then press the AMS control Repeat this step in the order you want to program To ...

Page 12: ...S MARK button Press the MARK button on the remote control This point is located 2 The point can be marked using the elapsed playing time with the MENU Mode in the main unit 1 Press the MENU EXIT button to display MENU Mode 2 Turn the AMS control to display Direct MARK then press the AMS control 3 Turn the AMS control to display the track number you want to mark in then press the AMS control 4 Turn...

Page 13: ...play may be paused at the point several frames after the marked one due to recording condition of the disc In this case the time of the located point may be 1 second after the marked one if the time of the marked point is very near to the next second During the programmed play if the LOCATE button is pressed though the track in which the point is marked is not included to the playing program Not P...

Page 14: ...MENU EXIT 0 0 p P A CUE fl AMS A CUE A PAUSE P C is displayed z When the track is selected by the number button on the remote control When the track is selected by the number button on the remote control at Auto CUE ON play is paused after the point from which the sound starts is searched out without pressing the button z The sound level threshold level at the point to be auto cued can be selected...

Page 15: ...he remote control 1 Press the VARI SPEED button so that the VARI SPEED indicator lights up 2 Press the VARI SPEED or button to select the desired speed The speed is varied in 0 5 interval To cancel Variable speed play Press the VARI SPEED button so that VARI SPEED disap pears To play in the selected speed again press the VARI SPEED button The selected speed is memorized 0 0 p P VARI SPEED C t 1 10...

Page 16: ...used select OFF of Timer Notes In playing of the programmed play by the timer the program is played up to the 24th track after the power is turned off once When Auto cue or Auto pause is set play is paused at the beginning of the 1st track To play by timer set Auto cue or Auto pause to OFF Last mode memory After turning off the power this unit retains the last setting contents When the power is tu...

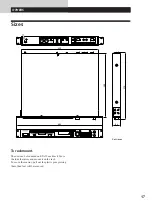
Page 17: ... be mounted on EIA 19 inch rack Move the four feet away and mount it on the rack To move them away pull out the plastic pins piercing them then feet will be removed Unit mm MENU EXIT DISPLAY A CUE VARI SPEED PUSH MARK ENTER LOCATE 430 482 44 350 370 OTHERS ...

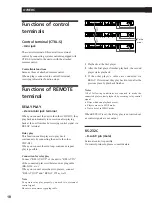
Page 18: ...ay is possible Connection for relay play Connect RELAY OUT of the unit to RELAY IN of the connected player with stereo mini plug cable RK G136 etc When you connect more than two players connect RELAY OUT and RELAY IN as well Note To operate relay play properly you need two systems of control signal Be sure to use a stereo type plug cable 1 Playbacks at the first player 2 After the first player fin...

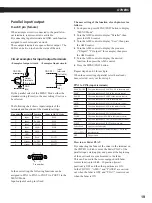
Page 19: ... Turn the AMS control to display the desired function then press the AMS control 6 Press the MENU EXIT button Repeat steps 4 and 5 for each pin When the user setting of parallel select has already been selected carry out from step 4 PIN1 to PIN5 input terminals PLAY PAUSE The same function as PLAY PAUSE in the main unit PLAY The same function as PLAY in the remote control PAUSE The same function a...

Page 20: ...setting functions of the pins are displayed POUT1 to POUT 3 output terminals PLAY Grounding during PLAY operation of the main unit PAUSE Grounding during PAUSE operation of the main unit NO DISC Grounding during NO DISC operation of the main unit OFF Always floating Electrical specifications Input terminal Input system Make contact Input ON voltage Less than 0 5V Input OFF voltage More than 3V Ope...

Page 21: ...fficulties while using the player use this troubleshooting guide to help you remedy the problem Should any problem persist consult your nearest Sony dealer If Disc Error is displayed It shows an unusual status in installing the disc or the disc itself Remove the disc and check it There is no sound The connection cord is not connected firmly The amplifier is not operated correctly The PHONE LEVEL c...

Page 22: ...SPLAY button 6 0 searching back and forth buttons 7 LOCATE button 8 PHONE LEVEL control 9 Remote control sensor 0 EJECT button VARI SPEED indicator AMS control button A CUE button p stop button fl play pause button VARI SPEED button PHONES jack MENU EXIT DISPLAY A CUE VARI SPEED PUSH MARK ENTER LOCATE ...

Page 23: ... models 16W USA models 16W Dimensions approx w h d 482 44 370mm 19 13 4 145 8 in Mass approx 5 2kg 11lbs 8oz Accessories See page 4 The 8cm compact disc can be played back without the adapter as well as the 12cm compact disc Specifications are subject to change without notice Load impedance More than 600Ω More than 10kΩ 32Ω Terminal ANALOG OUT BALANCE ANALOG OUT UNBALANCE PHONES Terminal type XLR ...

Page 24: ...OTHERS 24 Printed in Japan ...

Reviews: