background image

35

 GB

A

d

d

iti

on
a

l I

n

fo

rm
a

tio

n

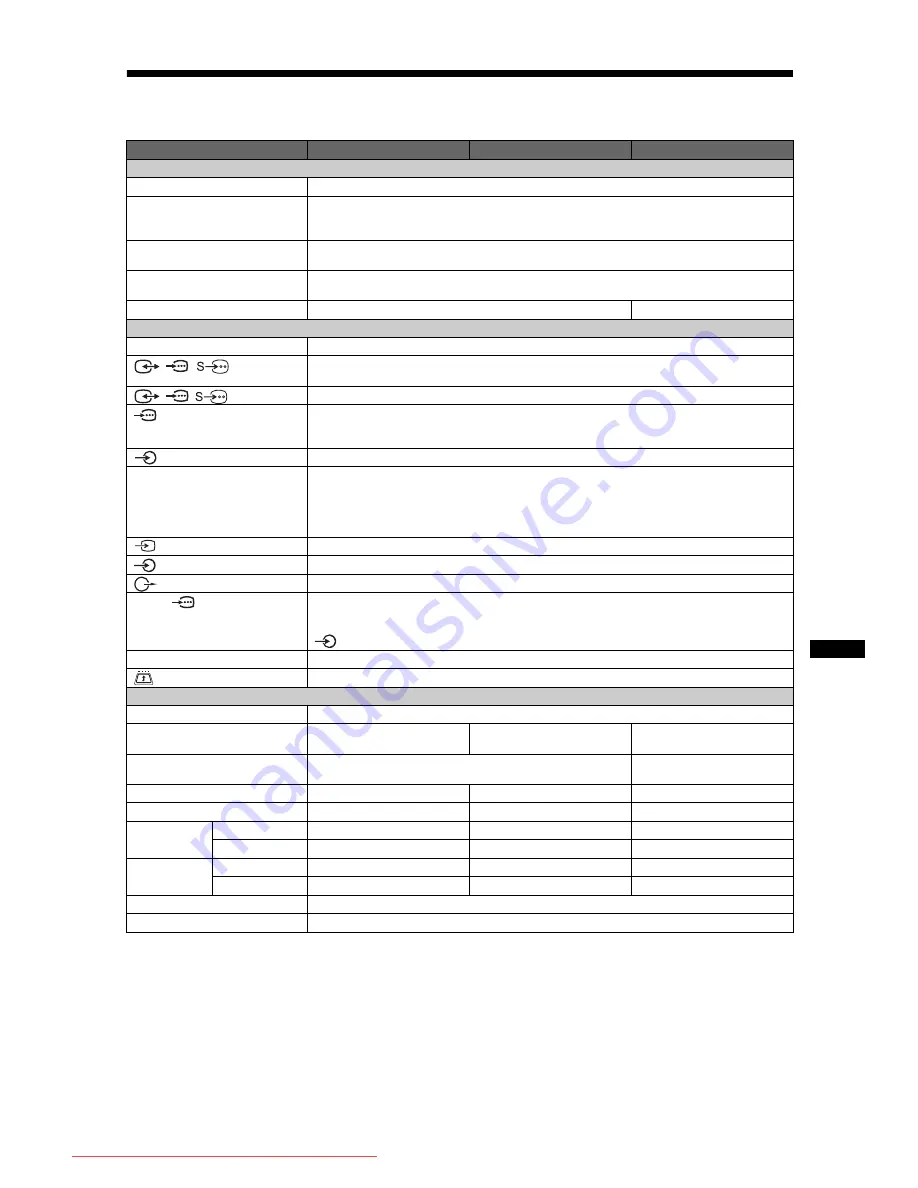
Specifications

*

1

AV1 outputs available only analogue TV.

*

2

AV2 outputs watching screen (except PC, HDMI1,2, Component 1080i).

*

3

Specified standby power is reached after the TV finishes necessary internal processes.

Design and specifications are subject to change without notice.

Model name

KDL-32L40xx

KDL-26L40xx

KDL-19L40xx

System

Panel System

LCD (Liquid Crystal Display) Panel

TV System

Depending on your country/region selection
Analogue: B/G/H, D/K, L, I
Digital: DVB-T

Colour/Video System

Analogue: PAL, SECAM, NTSC 3.58, 4.43 (only Video In)
Digital: MPEG-2 MP@ML

Channel Coverage

Analogue:48.25 - 855.25 MHz
Digital: VHF Band III (177.5 - 226.5 MHz)/UHF E21 - E69 (474 - 858 MHz)

Sound Output

10 W + 10 W (RMS)

5 W + 5 W (RMS)

Input/Output jacks

Aerial

75 ohm external terminal for VHF/UHF

/

/

AV1*

1

21-pin scart connector including audio/video input, RGB input, S-Video input, and Analog TV audio/
video output.

/

/

AV2*

2

21-pin scart connector including audio/video input, RGB input, S-Video input, and audio/video output.

 COMPONENT IN

Supported formats: 1080i, 720p, 576p, 576i, 480p, 480i
Y: 1 Vp-p, 75 ohms, 0.3V negative sync/P

B

/C

B

: 0.7 Vp-p, 75 ohms/

P

R

/C

R

: 0.7 Vp-p, 75 ohms

 COMPONENT IN

Audio input (phono jacks)

HDMI IN 1, 2

Video: 1080i, 720p, 576p, 576i, 480p, 480i
Audio: Two channel linear PCM
32, 44.1 and 48 kHz, 16, 20 and 24 bits
PC (see table)
Analogue audio (minijack) (HDMI IN 2 only)

AV3

Video input (phono jack)

AV3

Audio input (phono jacks)

Audio output (Left/Right) (phono jacks)

PC IN 

PC Input (15 Dsub) (see page 36)
G: 0.7 Vp-p, 75 ohms, non Sync on Green/B: 0.7 Vp-p, 75 ohms, non Sync on Green/
R: 0.7 Vp-p, 75 ohms, non Sync on Green

 PC audio input (minijack)

i

Headphones jack

CAM (Conditional Access Module) slot

Power and others

Power Requirements

220–240 V AC, 50 Hz

Screen Size

32 inches (Approx. 81.3 cm 
measured diagonally)

26 inches (Approx. 66.1 cm 
measured diagonally)

19 inches (Approx. 48.1 cm 
measured diagonally)

Display Resolution

1,366 dots (horizontal) × 768 lines (vertical)

1,680 dots (horizontal) × 1,050 
lines (vertical)

Power Consumption

155 W

98 W

48 W

Standby Power Consumption*

3

0.5 W or less

0.5 W or less

1 W or less

Dimensions 
(w × h × d)

(with stand)

Approx. 80.7 × 58.5 × 24.2 cm

Approx. 67.4 × 51.0 × 24.2 cm

Approx. 47.9 × 41.3 × 19.1 cm

(without stand)

Approx. 80.7 × 54.8 × 10.1 cm

Approx. 67.4 × 47.0 × 9.5 cm

Approx. 47.9 × 37.6 × 7.6 cm

Mass

(with stand)

Approx. 15.0 kg

Approx. 11.7 kg

Approx. 5.8 kg

(without stand)

Approx. 13.0 kg

Approx. 9.5 kg

Approx. 5.3 kg

Supplied Accessories

Refer to “1: Checking the accessories” on page 4.

Optional Accessories

See “Installing the Accessories (Wall-Mount Bracket)” on page 32.

Downloaded From TV-Manual.com Manuals

Summary of Contents for BRAVIA KDL-26L40xx

Page 1: ... 2008 Sony Corporation 3 878 284 14 1 KDL 32L40xx KDL 26L40xx KDL 19L40xx Operating Instructions LCD Digital Colour TV Downloaded From TV Manual com Manuals ...

Page 2: ... for future reference Any functions related to Digital TV will only work in countries or areas where DVB T MPEG2 digital terrestrial signals are broadcasted Please confirm with your local dealer if you can receive a DVB T signal where you live Although this TV set follows DVB T specifications compatibility with future DVB T digital terrestrial broadcasts cannot be guaranteed Some Digital TV functi...

Page 3: ...ictures from connected equipment 19 Using control for HDMI 20 Navigating through menus 21 Picture Adjustment menu 22 Sound Adjustment menu 24 Features menu 25 Set up menu 27 Digital Set up menu 30 Installing the Accessories Wall Mount Bracket 32 Specifications 35 Troubleshooting 37 Start up Guide 4 Watching TV Using Optional Equipment Using MENU Functions Additional Information Table of Contents f...

Page 4: ...to place on a TV stand 1 Take out the Table Top Stand and screws from the carton The screws are found in the accessory bag KDL 32L40xx KDL 26L40xx KDL 19L40xx 2 Gently slide the TV unit onto the neck of the Table Top Stand and align the screws holes When you carry the TV place your hand as illustrated and hold it securely see page 8 Do not put stress on the LCD panel and the frame around the scree...

Page 5: ...iant with the limits set out in the EMC Directive for using connection cables not longer than 3 meters 9 8 feet Coaxial cable Connecting an aerial only AV1 AV2 Connecting an aerial VCR DVD recorder with SCART Scart lead VCR DVD recorder Coaxial cable Coaxial cable 1 2 Connecting an aerial VCR DVD recorder with HDMI HDMI cable Coaxial cable Coaxial cable VCR DVD recorder Continued Downloaded From T...

Page 6: ...ins lead with other connecting cables 6 Selecting the language country region and location 1 Connect the TV to your mains socket 220 240V AC 50Hz 2 Press 1 on the top edge of the TV When you turn on the TV for the first time the Language menu appears on the screen When you turn on the TV the power indicator flashes in green 3 Press F f to select the language displayed on the menu screens then pres...

Page 7: ...ble analogue channels This may take some time so do not press any buttons on the TV or remote while proceeding If a message appears for you to confirm the aerial connection No digital or analogue channels were found Check all the aerial connections and press to start auto tuning again 3 When the Programme Sorting menu appears on the screen follow the steps of Programme Sorting page 27 If you do no...

Page 8: ...e supplied may result in internal damage to the TV set or cause it to fall etc Transporting Before transporting the TV set disconnect all cables Two or more people are needed to transport a large TV set When transporting the TV set by hand hold it as shown below Do not put stress on the LCD panel and the frame around the screen When lifting or moving the TV set hold it firmly from the bottom When ...

Page 9: ...stitutions unstable locations near water rain moisture or smoke Environment Places that are hot humid or excessively dusty where insects may enter where it might be exposed to mechanical vibration near flammable objects candles etc The TV set shall not be exposed to dripping or splashing and no objects filled with liquids such as vases shall be placed on the TV Situation Do not use when your hands...

Page 10: ...ccur Disposal of the TV set Disposal of Old Electrical Electronic Equipment Applicable in the European Union and other European countries with separate collection systems This symbol on the product or on its packaging indicates that this product shall not be treated as household waste Instead it shall be handed over to the applicable collection point for the recycling of electrical and electronic ...

Page 11: ...gital Favourite list that you have specified page 17 qa Previous channel Returns to the previous channel watched qs PROG In TV mode Selects the next or previous channel In Text mode page 14 Selects the next or previous page qd 2 Volume qf Mute the sound qg Text page 14 qh RETURN Returns to the previous screen of any displayed menu qj GUIDE EPG Digital Electronic Programme Guide page 16 qk ANALOG A...

Page 12: ...ains When you turn on the TV the power indicator flashes in green 6 Picture Off Sleep Timer indicator Lights up in green when the picture is switched off page 25 Lights up in orange when the sleep timer is set page 26 7 1 Standby indicator Lights up in red when the TV is in standby mode 8 Power indicator Lights up in green when the TV is turned on 9 Remote control sensor Receives IR signals from t...

Page 13: ...al Electronic Programme Guide EPG see page 16 In digital mode An information banner appears briefly The following icons may be indicated on the banner Additional operations RETURN PROG TOOLS AUDIO ANALOG DIGITAL GUIDE MENU 3 2 2 3 Interactive service is available MHEG Digital Text Interactive service MHEG Digital Text is currently disabled Radio service Scrambled Subscription service Multiple audi...

Page 14: ... position of the picture when selecting Smart Zoom or 14 9 Press F f to move up or down e g to read subtitles Smart Displays conventional 4 3 broadcasts with an imitation wide screen effect The 4 3 picture is stretched to fill the screen 4 3 Displays conventional 4 3 broadcasts e g non wide screen TV in the correct proportions Wide KDL 32L40xx KDL 26L40xx only Displays wide screen 16 9 broadcasts ...

Page 15: ...he Tools menu Picture Mode See page 22 Sound Effect See page 24 Speaker See page 24 Audio Language in digital mode only See page 31 Subtitle Setting in digital mode only See page 31 Sleep Timer See page 26 Power Saving See page 25 System Information in digital mode only Displays the system information screen Downloaded From TV Manual com Manuals ...

Page 16: ...sking for a PIN code will appear on the screen For details see Parental Lock on page 31 Digital Electronic Programme Guide EPG Select Tune Options Today Previous Next 1 day 15 30 16 00 16 30 17 00 BBC ONE BBC TWO ITV 1 Channel 4 five ITV 2 BBC THREE Teletext BBC FOUR Sky Travel UKTV History More 4 001 002 003 004 005 006 007 009 010 011 012 013 Fri 3 Nov 15 39 To Do this Watch a programme Press F ...

Page 17: ...for the first time 1 Press to select Yes 2 Press the yellow button to select the Favourite list 3 Press F f to select the channel you want to add then press Channels that are stored in the Favourite list are indicated by a symbol 4 Press RETURN to finish setting up Watch a channel 1 Press the yellow button to navigate through your Favourite lists 2 Press F f to select the channel then press Turn o...

Page 18: ...les are not supplied AV3 PC IN COMPONENT IN 1 AV1 AV2 2 Video game equipment DVC camcorder Headphones DVD player with component output DVD recorder Decoder VCR Video game equipment DVD player Decoder PC PC HDMI output Blu ray disc player Digital video camera DVD player Hi Fi audio equipment CAM card Downloaded From TV Manual com Manuals ...

Page 19: ...able When HDMI control compatible equipment is connected communication with the connected equipment is supported Refer to page 20 to set up this communication AV3 To see the equipment connected to H PC To see the equipment connected to G z It is recommended to use a PC cable with ferrites like the Connector D sub 15 ref 1 793 504 11 available in Sony Service Centre or equivalent To connect Do this...

Page 20: ...ngs must be set on both the TV side and connected equipment side See HDMI Set up on page 28 for the TV side settings For settings on the connected equipment refer to the operating instructions for that equipment Control for HDMI functions Turns the connected equipment off interlocked with the TV Turns the TV on interlocked with the connected equipment and automatically switches the input to the eq...

Page 21: ...6 5 External Inputs Selects equipment connected to your TV To watch the desired external input select the input source then press 6 Settings Displays the Settings menu where most of the advanced settings and adjustments are performed 1 Press F f to select a menu icon then press 2 Press F f G g to select an option or adjust a setting then press For details about settings see page 22 to 31 The optio...

Page 22: ...ages Text For text charts or tables Backlight Adjusts the brightness of the backlight Contrast Increases or decreases picture contrast Brightness Brightens or darkens the picture Colour Increases or decreases colour intensity Hue Increases or decreases the green tones and red tones z Hue can only be adjusted for an NTSC colour signal e g U S A video tapes Sharpness Sharpens or softens the picture ...

Page 23: ...ture noise snowy picture in a weak broadcast signal High Medium Low Modifies the effect of the noise reduction Off Turns off the Noise Reduction feature MPEG Noise Reduction Reduces the picture noise in MPEG compressed video Reset Resets all Picture Adjustment settings except Picture Mode and Display Mode only in PC mode to the factory settings Downloaded From TV Manual com Manuals ...

Page 24: ...s to the factory settings Dual Sound Selects the sound from the speaker for a stereo or bilingual broadcast Stereo Mono For a stereo broadcast A B Mono For a bilingual broadcast select A for sound channel 1 B for sound channel 2 or Mono for a mono channel if available z If you select other equipment connected to the TV set Dual Sound to Stereo A or B Auto Volume Keeps a constant volume level even ...

Page 25: ...h the picture off RGB Centre Adjusts the horizontal picture position so that the picture is in the middle of the screen z This option is only available if an RGB source has been connected to the Scarts connectors AV1 or AV2 on the rear of the TV PC Adjustment Customizes the TV screen as a PC monitor z This option is only available if a PC signal is received Phase Adjusts the screen when a part of ...

Page 26: ... into standby mode When the Sleep Timer is activated the Sleep Timer indicator on the TV front panel lights up in orange z When you turn off the TV and turn it on again Sleep Timer is reset to Off A notification message appears on the screen one minute before the TV switches to standby mode Downloaded From TV Manual com Manuals ...

Page 27: ...n analogue mode Changes the order in which the analogue channels are stored on the TV 1 Press F f to select the channel you want to move to a new position then press g 2 Press F f to select the new position for your channel then press AV Preset Assigns a name to any equipment connected to the side and rear sockets The name will be displayed briefly on the screen when the equipment is selected You ...

Page 28: ...ode Changes the available analogue channel setting Press F f to select the programme number you want to modify Then press System Presets programme channels manually 1 Press F f to select System then press 2 Press F f to select one of the following TV broadcast systems then press G B G For western European countries regions I For the United Kingdom D K For eastern European countries regions L For F...

Page 29: ...ching mono programmes If you do not experience any sound distortion we recommend that you leave this option set to the factory setting Off Audio Filter is not available when System is set to L Skip Skips unused analogue channels when you press PROG to select channels You can still select a skipped channel using the number buttons Confirm Saves changes made to the Manual Programme Preset settings D...

Page 30: ...on Press the number buttons to enter the known three digit programme number of the broadcast you want 2 Remove or change the order of the digital channels as follows To remove the digital channel Press After a confirmation message appears press G to select Yes then press To change the order of the digital channels Press g then press F f to select the new position for the channel and press G 3 Pres...

Page 31: ...nstructions of PIN Code below 2 Press F f to select the age restriction or None for unrestricted watching then press 3 Press RETURN PIN Code To set your PIN for the first time 1 Press the number buttons to enter the new PIN code 2 Press RETURN To change your PIN 1 Press the number buttons to enter your existing PIN code 2 Press the number buttons to enter the new PIN code 3 Press RETURN z PIN code...

Page 32: ...Detaching the Table Top Stand from the TV page 7 Refer to TV installation dimensions table page 33 Refer to Screw and Hook locations diagram table page 34 Place the TV on the Table Top Stand when securing the Mounting Hook SU WL500 for KDL 32L40xx SU WL100 for KDL 26L40xx KDL 19L40xx Sufficient expertise is required for installing this product especially to determine the strength of the wall for w...

Page 33: ...hat of the TV Refer to Specifications page 35 for its weight TV installation dimensions table Model Name Display dimensions Screen centre dimension Length for each mounting angle Angle 0 Angle 20 A B C D E F G H KDL 32L40xx 807 548 172 485 167 304 532 513 KDL 26L40xx 674 470 92 352 153 258 456 357 KDL 19L40xx 479 376 125 339 136 215 362 340 Screen centre point Screen centre point Screen centre poi...

Page 34: ... in the table above KDL 26L40xx KDL 19L40xx Screw and Hook locations diagram table Model Name Screw location Hook location KDL 32L40xx e g c Model Name Hook location KDL 26L40xx a KDL 19L40xx b Screw location Hook location b a c b a Downloaded From TV Manual com Manuals ...

Page 35: ...s HDMI IN 1 2 Video 1080i 720p 576p 576i 480p 480i Audio Two channel linear PCM 32 44 1 and 48 kHz 16 20 and 24 bits PC see table Analogue audio minijack HDMI IN 2 only AV3 Video input phono jack AV3 Audio input phono jacks Audio output Left Right phono jacks PC IN PC Input 15 Dsub see page 36 G 0 7 Vp p 75 ohms non Sync on Green B 0 7 Vp p 75 ohms non Sync on Green R 0 7 Vp p 75 ohms non Sync on ...

Page 36: ...zontal Pixel Vertical Line Horizontal frequency kHz Vertical frequency Hz Standard VGA 640 480 31 5 60 VGA SVGA 800 600 37 9 60 VESA Guidelines XGA 1024 768 48 4 60 VESA Guidelines WXGA 1280 768 47 8 60 VESA Signals Horizontal Pixel Vertical Line Horizontal frequency kHz Vertical frequency Hz Standard VGA 640 480 31 5 60 VGA SVGA 800 600 37 9 60 VESA Guidelines XGA 1024 768 48 4 60 VESA Guidelines...

Page 37: ...away from other connecting cables Picture or sound noise when viewing a TV channel Adjust AFT Automatic Fine Tuning to obtain better picture reception page 28 Some tiny black points and or bright points appear on the screen The picture of a display unit is composed of pixels Tiny black points and or bright points pixels on the screen do not indicate a malfunction No colour on programmes Select Res...

Page 38: ...Downloaded From TV Manual com Manuals ...

Page 39: ...Downloaded From TV Manual com Manuals ...

Page 40: ... Sony products Instructions on Installing the Wall Mount Bracket are not supplied in the form of a separate leaflet with this TV These installation instructions are included within this TV s instructions manual Downloaded From TV Manual com Manuals ...

Reviews: