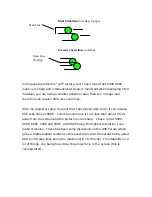
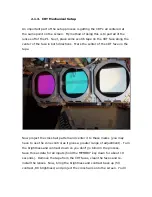


•
Measure the distance from the green tube to the screen or wall, this is
your projection distance.
2.1.2.
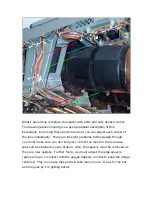
Mount Setup
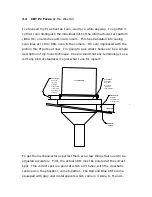
This second order of business is to get the projector pointing in the right
direction. There are a few parameters which need to be addressed. The PJ
needs to be pointing perpendicular to the screen horizontally and vertically, if
a standard setup is being used. Using the focus techniques described later,
you can point at different angles, if you like. I use a 4’ level on top of the
projector (hanging from the ceiling) to ensure that the PJ is level. This, of
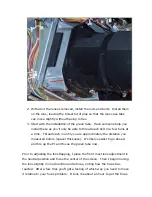
course assumes that your screen is vertical. Next, you need to ensure the
green tube is projecting and image perpendicular to the screen. The way I
do this is to measure from the wall to the center hole in the bottom of the
projector. Next I mark the front and rear of the projector along the center
line. I ensure that both of these marks are the same distance from the side
wall. I also mark this same distance on the screen or screen wall. With the
cross hair test screen projected from the green tube only, (ensure you center
it on the phosphor with the lens removed prior to all of this, this is included
later) ensure that it hits the wall on this mark. Fine tune as needed. The
projector should now be set up reasonably well. The success of this all
hinges on whether your walls are straight and square. I don’t know of a
better way to do this.


