5
Quick Start Guide for Tempo-X eSATA 8
Drive Formatting—Individual Drives (continued)
7.
When the
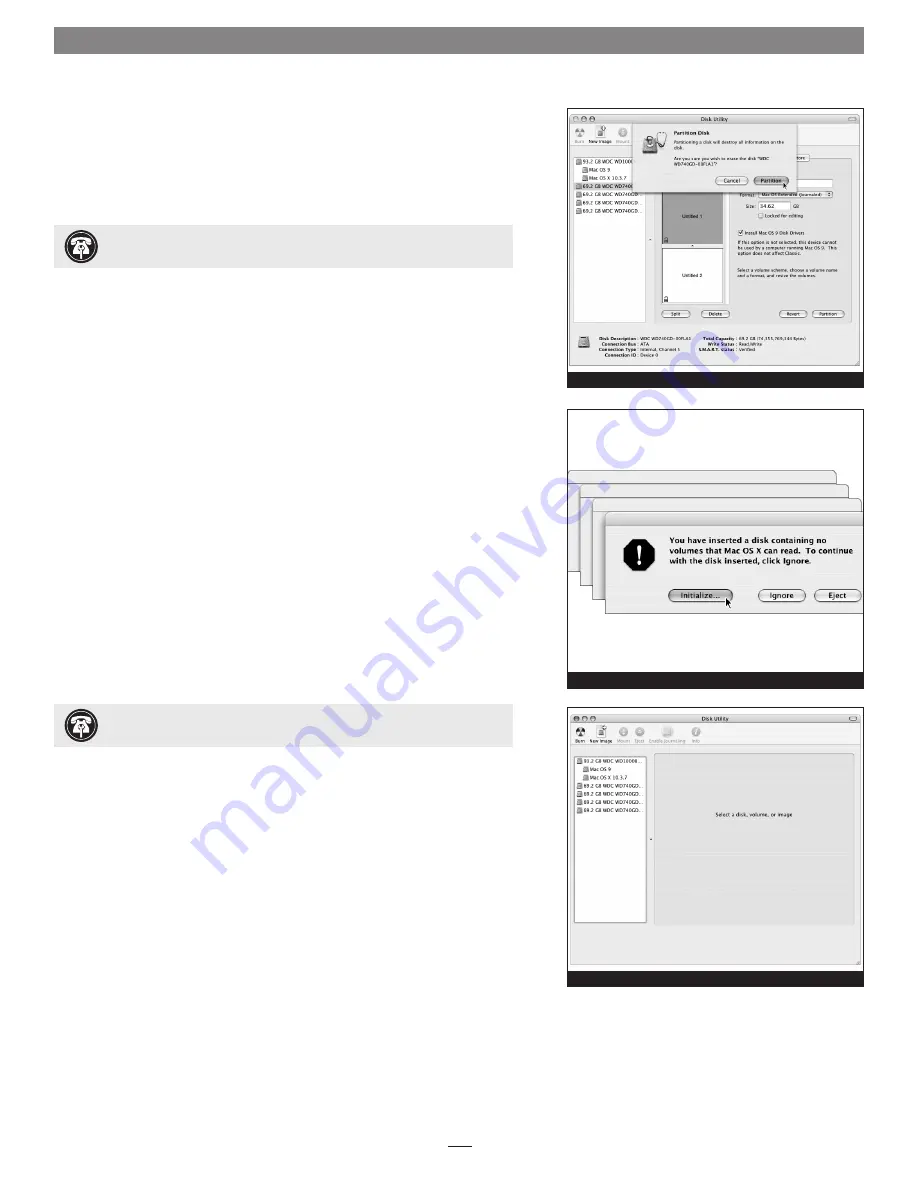
Partition Disk
window appears, click the Partition button
(Figure 6)
. If necessary, repeat steps 3–6 to partition any other drives con-
nected to the Tempo-X card. When partitioning and formatting are com-
plete, close the Disk Utility application; you can now use your drive(s).
Drive Formatting—RAID Arrays
This section describes the process of formatting (initializing) individual hard
drives connected to the Tempo-X eSATA 8 using Disk Utility under Mac OS X
Version 10.3; the process under Versions 10.4 and 10.2 are similar. If you
choose to do so, you may format your drives using SoftRAID 3.1 or later; refer
to that product’s documentation for instructions.
1.
Turn on your computer. During startup, your computer may display a
message(s) referring to unreadable volumes; click Initialize… to launch
Disk Utility
(Figure 7)
.
2.
If it is not already open, launch Disk Utility
(Figure 8)
. Note that all
attached drives appear in the information window, regardless of being for-
matted or not.
Figure 6
Figure 7
Figure 8
Support Note:
All hard drives connected to the Tempo-X card will be
described by Disk Utility as having an internal connection
(Figure 8)
.
Support Note:
See page 7 for port identification and information on
Tempo-X eSATA 8’s status LEDs.


