background image

Installing the Presto PPC – Quadra 605, LC, and
Performa 470 Series

Note: European LC 475 Owners

Some European LC 475 machines require a replacement power supply in order to reliably use the
Presto PPC. To check your power supply:

1. Remove the power cord and the case cover.

2. Locate the power supply on the right hand side of the machine.

3. A specifications label should be visible on its top. The output for the unit at +5V (volts)

should be 3.75A (amps) or greater.

If your power supply needs to be upgraded, contact an Apple service provider for a replacement.
Once you have replaced the power supply, or have verified that it is the correct model, you may
proceed with the installation.

1. The Presto PPC installs into the motherboard's CPU socket. For this reason, the Macintosh’s

original 68040 CPU must be removed using the CPU remover tool (CRT) packaged with the
Presto PPC card.

2. Locate the 68040 CPU in the center portion of the machine.

3. Locate the PDS slot. If there is a PDS card already installed, remove it.

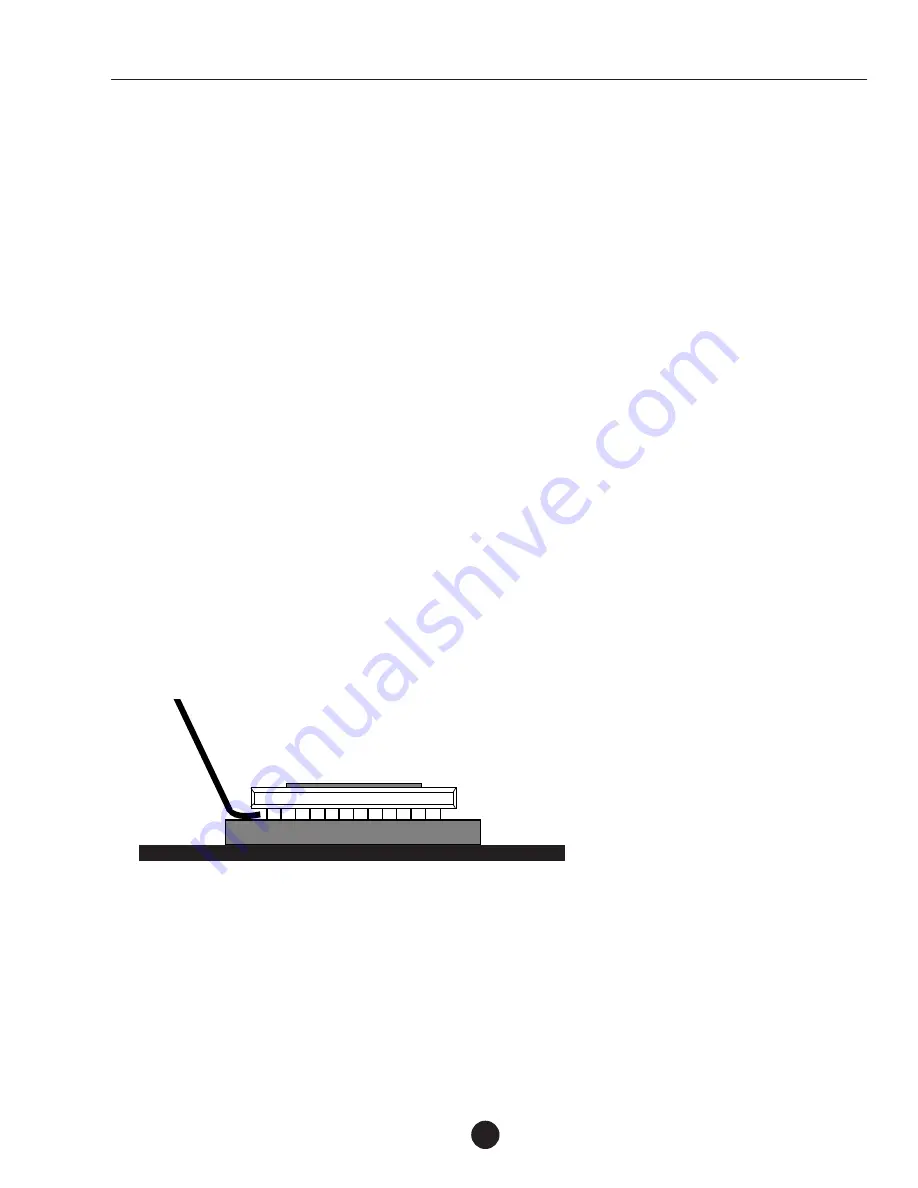
4. Insert the CRT between the 68040 CPU and the CPU socket. Lift the CPU out of the socket

by slowly moving around the perimeter of the chip while gently pushing downward.
Carefully remove the CPU from the socket, making sure not to bend any of the pins on the
bottom of the chip and set it aside. You will install it onto the Presto PPC card in a later step.

5. Remove the Presto PPC processor upgrade card from the anti-static package, making sure to

handle the card by the edges.

Presto PPC Installation Instructions

2

68040 CPU

CPU Remover Tool

Socket

Summary of Contents for Presto PPC

Page 1: ... to PowerPC recommended To take full advantage of the PowerPC processor you may need to reinstall or upgrade your applications as PowerPC native For further upgrade instructions refer to your applications documentation or contact the software manufacturers Step 4 Upgrade to Mac OS 8 5 optional If you wish to upgrade to Mac OS 8 5 a PowerPC processor must be present and running in your computer Not...

Page 2: ... 1 The Presto PPC installs into the motherboard s CPU socket For this reason the Macintosh s original 68040 CPU must be removed using the CPU remover tool CRT packaged with the Presto PPC card 2 Locate the 68040 CPU in the center portion of the machine 3 Locate the PDS slot If there is a PDS card already installed remove it 4 Insert the CRT between the 68040 CPU and the CPU socket Lift the CPU out...

Page 3: ...Presto PPC Installation Instructions 3 ...

Page 4: ... like to upgrade to Mac OS 8 5 please refer to the Presto PPC software installation instructions that are included The Presto PPC LC diskette will also be required for this upgrade Presto PPC Installation Instructions 4 ...

Page 5: ...already installed remove it 4 Locate the 68040 CPU in the center portion of the machine 5 Insert the CPR between the 68040 CPU and the CPU socket Lift the CPU out of the socket by slowly moving around the perimeter of the chip while gently pushing downward Carefully remove the CPU from the socket making sure not to bend any of the pins on the bottom of the chip and set it aside You will install it...

Page 6: ...Presto PPC Installation Instructions 6 Installing the Presto PPC Card ...

Page 7: ...you would like to upgrade to Mac OS 8 5 please refer to the Presto PPC software installation instructions that are included The Presto PPC LC diskette will also be required for this upgrade Installing the Presto PPC Quadra LC and Performa 630 Series ...

Page 8: ...PU in the center portion of the machine 4 Insert the CPR between the 68040 CPU and the CPU socket Lift the CPU out of the socket by slowly moving around the perimeter of the chip while gently pushing downward Carefully remove the CPU from the socket making sure not to bend any of the pins on the bottom of the chip and set it aside You will install it onto the Presto PPC card in a later step 5 Remo...

Page 9: ...lation Instructions 9 Note If you would like to upgrade to Mac OS 8 5 please refer to the Presto PPC software installation instructions that are included The Presto PPC LC diskette will also be required for this upgrade ...

Page 10: ...ystem Folder on the hard drive The Presto PPC 8 5 Enabler will be placed into the System Folder The Presto PPC ID extension will be placed into the Extensions Folder located inside the System Folder 3 Eject the Presto PPC floppy diskette Keep the Presto PPC diskette readily available You will need it to conclude the installation of Mac OS 8 5 in a later step 4 Restart your Quadra or Centris As the...

Page 11: ...e screen click Start Figure 9 12 A dialog box may appear stating that the Mac OS Installer will automati cally quit all running applications to begin the software installation Click Continue to begin with the installation Figure 10 Installation instructions continued on next page Mac OS 8 5 Installation Instructions Presto PPC Processor Upgrade Card 2 Figure 7 Important Information screen Figure 8...

Page 12: ...older on the hard drive Locate the 601 Processor Upgrade control panel double click on it and verify it is turned on Figure 13 Close the control panel 18 Locate and double click the Apple System Prof 2 1 1 patcher on the Presto PPC diskette You will be prompted to locate the Apple System Profiler application It is located inside the Apple Menu Items Folder inside the System Folder on your hard dri...

Page 13: ...l panel preferences are reset to Apple default settings if the battery is low or the PRAM is zapped by holding down the Command Option P R keys at startup until the Mac restarts itself a second time If the PRAM is reset the 601 Processor Card setting defaults to off 68040 is default processor If this occurs you will need to boot your computer from the Presto PPC diskette open the 601 Processor Car...

Reviews: