background image

1

Sonnet eGFX Breakaway Box Developer Edition Quick Start Guide

Introduction

Congratulations on your purchase! The eGFX Breakaway Box 
Developer Edition is a Thunderbolt™ 3-to-PCI Express card 
expansion system. This product will enable you to test the 
included Sapphire Pulse Radeon RX 580 graphics card with 
your Mac

®

 with Thunderbolt 3 ports. The External Graphics 

Development Kit supports 60W USB-PD charging in order to 
charge your MacBook Pro

®

 while using it. It does not support 

charging at 87W, so 15-inch MacBook Pro computers may 
not charge at full speed in all situations. The 8-pin auxiliary 
power connector inside the Breakaway Box supports GPU cards 
requiring 225W or less power.

Mac Compatibility

• Mac with Thunderbolt 3 Ports 
• Latest macOS

®

 beta software (10.13.0 beta or later)

System Requirements

While the eGFX Breakaway Box requires no drivers of its own, the 
included Sapphire Pulse Radeon RX 580 card you will install does; 
Thunderbolt-compatible drivers to enable it to work properly are 
required. Beta drivers are included in macOS 10.13.0 beta, or later. 
Visit http://developer.apple.com to obtain the software.

Setup Overview


1. 

Confirm your computer is running, and updated to the 
latest version of macOS 10.13.0 beta.


2.

 Install the Sapphire card into the eGFX Box.


3.

 Using the included Thunderbolt 3 (40Gbps) cable, connect 

the Breakaway Box directly to your computer, power on the 
box and then the computer.


4.

 Connect the included Belkin USB hub to your computer; 

refer to the documentation included with the hub.


5.

 Using System Report, confirm the Breakaway Box and 

graphics card are recognized by your computer; see online 
user guide for details, if necessary.


6.

 Configure the card, and any other settings for your setup; 

refer to the documentation included with the Sapphire card 
for more information.


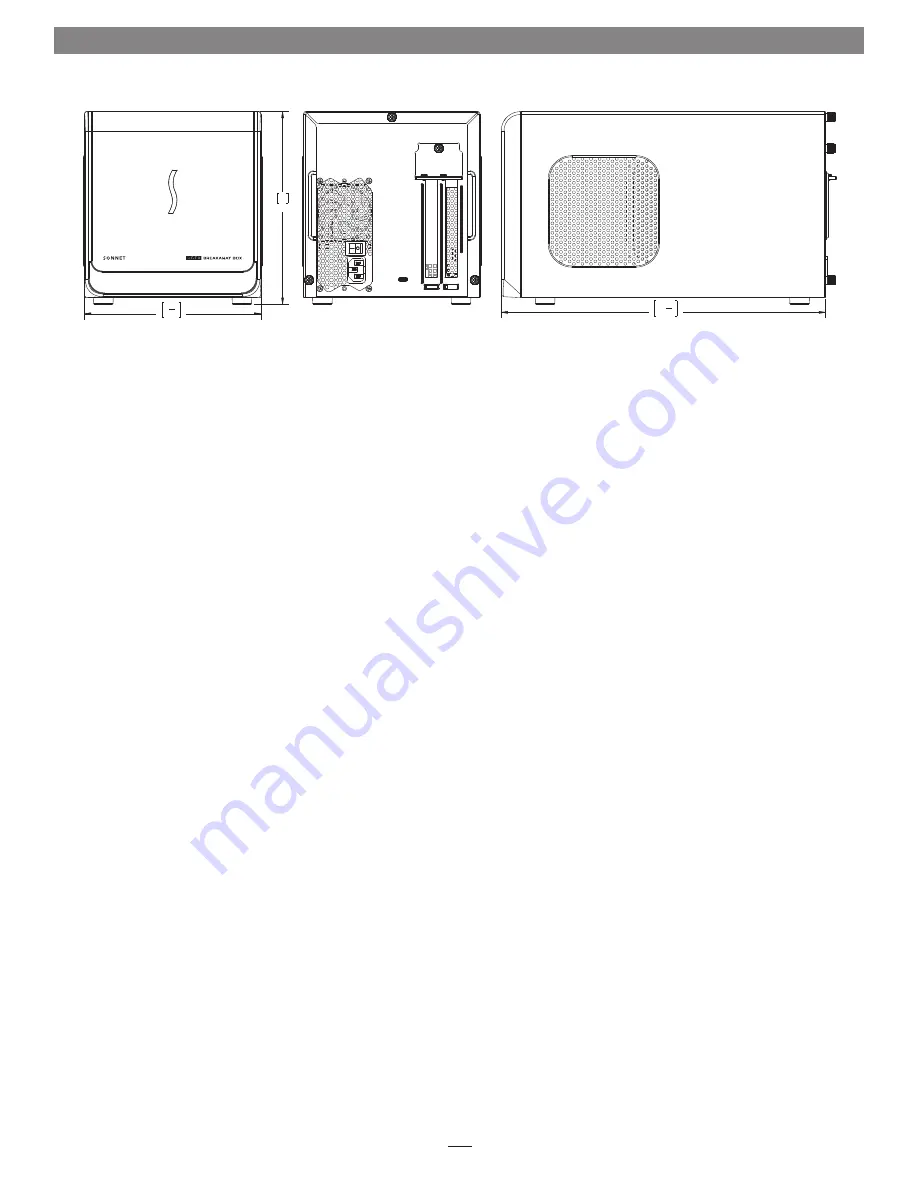
7 14 "

185  


8"

202 


13 38 "

340  

Support

If you encounter an issue with your External Graphics 
Development Kit, please use http://bugreport.apple.com to report 
the issue to Apple. 

You can also ask questions and discuss issues with other 
developers also using the External Graphics Development Kit on 
the Developer Forums at http://forums.developer.apple.com/.

For issues related to the any of the hardware in the kit (eGFX 
Breakaway Box Developer Edition, Sapphire Pulse Radeon RX 580 
Card or the Belkin 4-Port USB 3.0 Hub), please contact Sonnet 
Technologies Customer Service.

Contacting Customer Service

If further assistance is needed, please contact 

Sonnet Customer 

Service

 at:


Tel

: 1-949-472-2772  

(Monday–Friday, 7 a.m.–4 p.m. Pacific Time) 

E-mail

[email protected]

When you call Sonnet’s Customer Service, have the following 
information available so the customer service staff can better 
assist you: 
• Product name  
• Serial number of that product 
• Computer model  
• Operating system version you’re using

Visit Our Web Site

For online support files related to the eGFX Breakawy Box, visit 
the Sonnet Web site at www.sonnettech.com/support/. Click the 
Downloads, Manuals & Knowledge Base link, then Thunderbolt, 
and then eGFX Breakaway Box.


         QSG-GPU-350WD-TB3-E-A-052417

Summary of Contents for eGFX Breakaway

Page 1: ...t the included Belkin USB hub to your computer refer to the documentation included with the hub 5 Using System Report confirm the Breakaway Box and graphics card are recognized by your computer see online user guide for details if necessary 6 Configure the card and any other settings for your setup refer to the documentation included with the Sapphire card for more information 7 1 4 185 8 202 13 3...

Page 2: ...op cover toward you until it stops Figure 2 4 Lift the top cover straight up pull the sides apart slightly and then remove and set aside the cover Figure 2 5 Remove and set aside the two screws securing the PCIe card bracket locking plate to the inner assembly Figure 3 6 Remove and set aside the thumbscrew securing the PCIe card bracket locking plate and then remove the port access cover Figure 3 ...

Page 3: ...rd s connector and the slot for damage and then try inserting the card again Figure 4 9 Connect the 8 pin auxiliary power connector to the card 10 Secure the card using the previously removed PCIe card bracket locking plate screws and thumbscrew Figure 5 Figure 4 Figure 5 WARNING When handling computer products take care to prevent components from being damaged by static electricity avoid working ...

Page 4: ...gure 7 14 Connect the included Thunderbolt cable between the Thunderbolt 3 port on the box and a Thunderbolt 3 port on your computer When using a MacBook Pro 13 inch Late 2016 Four Thunderbolt 3 Ports connect to one of the left hand ports for full 40Gbps PCIe bandwidth 15 Connect the included power cord between a wall outlet or power strip and the box s power socket and then flip the power switch ...

Page 5: ...ttez à la boîte et le Mac 4 Connectez le hub USB Belkin inclus à votre Mac Reportez vous à la documentation fournie avec le hub Utile avec casques VR 5 En utilisant System Report confirmez que le Breakaway Box et la carte graphique sont reconnues par votre Mac Consultez le guide de l utilisateur en ligne pour plus de détails si nécessaire 7 1 4 185 8 202 13 3 8 340 6 Configurez la carte et tout au...

Page 6: ... arrête Figure 2 4 Soulever le capot supérieur vers le haut écarter légèrement les côtés puis retirer et mettre de côté le couvercle Figure 2 5 Enlever et séparer les deux vis de fixation du support plaque de fixation carte PCIe a l assemblage intérieur Figure 3 6 Retirez et mettez de côté la vis pouce fixant la plaque de verrouillage du support de la carte PCIe puis retirez le couvercle d accès d...

Page 7: ...s puis essayez d insérer la carte à nouveau Figure 4 9 Connectez le connecteur d alimentation auxiliaire à 8 pin à la carte 10 Fixez la carte à l aide de la plaque de fixation carte PCIe précédemment retirée des vis et de la vis à oreilles Figure 5 Figure 4 Figure 5 ATTENTION Lors de la manipulation de produits informatiques veillez à éviter que les composants ne soient endommagés par l électricit...

Page 8: ...es précédemment Figure 7 14 Connectez le câble Thunderbolt inclus entre le port Thunderbolt 3 sur la boîte et un port Thunderbolt 3 sur votre Mac Lorsque vous utilisez un MacBook Pro 13 pouces fin 2016 quatre Thunderbolt 3 ports se connecter à l un des ports à la main gauche pour la bande passante PCIe pleine 40Gbps 15 Connectez le cordon d alimentation fourni et mettez l interrupteur d alimentati...

Page 9: ...n siehe Dokumentation die dem Hub beigefügt ist 5 Öffnen Sie den macOS Systembericht und stellen Sie sicher dass die Breakaway Box und die Grafikkarte von Ihrem Computer erkannt werden falls erforderlich siehe online Guide für mehr Informationen 7 1 4 185 8 202 13 3 8 340 6 Konfigurieren Sie die Karte sowie andere Einstellungen für ihr persönliches Setup siehe Dokumentation die der Grafikkarte bei...

Page 10: ...bdeckung gerade nach oben greifen Sie die Seiten der Abdeckung und spreizen Sie diese etwas anschließend nehmen Sie die Gehäuseabdeckung ab Siehe Abbildung 2 5 Öffnen Sie die beiden Schrauben welche das PCIe Karten Sicherungsblech befestigen und legen Sie diese zur Seite Siehe Abbildung 3 6 Öffnen Sie die Rändelschraube welche das PCIe Karten Sicherungsblech hält und legen Sie diese zusammen mit d...

Page 11: ...ecker und den PCIe Steckplatz auf Beschädigungen probieren Sie es anschließend erneut Siehe Abbildung 4 9 Verbinden Sie den Acht Pin Stromanschluss mit der Karte 10 Sichern Sie die Karte mit dem vormals entfernten PCIe Karten Sicherungsblech und dessen Schrauben Siehe Abbildung 5 Abbildung 4 Abbildung 5 Achtung Stellen Sie sicher dass elektrische Komponenten nicht durch statische Elektrizität besc...

Page 12: ...Rändelschrauben um die Gehäuseabdeckung zu sichern Siehe Abbildung 7 14 Verbinden Sie das mitgelieferte Thunderbolt Kabel mit dem Thunderbolt 3 Anschluss der eGFX Box sowie mit dem Thunderbolt 3 Anschluss ihres Computers Falls Sie ein MacBook Pro 13 Zoll Ende 2016 Vier Thunderbolt 3 Anschlüsse verwenden dann schließen Sie das Thunderbolt Kabel an einem der linken Anschlüsse an um die volle 40 Gbps...

Page 13: ... Consulte la documentación incluida con el concentrador Útil con auriculares VR 5 Utilizando el Información del Sistema confirme que el Breakaway Box y la tarjeta gráfica son reconocidas por su Mac Consulte la guía del usuario en línea para obtener más información si es necesario 7 1 4 185 8 202 13 3 8 340 6 Configure la tarjeta y cualquier otra configuración para su configuración Consulte la docu...

Page 14: ... que se detenga Figura 2 4 Levante la cubierta superior hacia arriba separe ligeramente los lados y a continuación retire y separe la cubierta Figura 2 5 Retire y aparte los dos tornillos que fijan la placa de fijación del soporte de la tarjeta PCIe al conjunto interior Figura 3 6 Retire y ponga a un lado el tornillo de apriete que asegura la placa de bloqueo del soporte de la tarjeta PCIe y luego...

Page 15: ...años e intente volver a insertar la tarjeta Figura 4 9 Conecte el conector de alimentación auxiliar de 8 pin a la tarjeta 10 Asegure la tarjeta usando la placa de bloqueo de la tarjeta PCIe previamente retirada los tornillos y el tornillo de mariposa Figura 5 Figura 4 Figura 5 ADVERTENCIA Cuando maneje productos informáticos tenga cuidado de evitar que los componentes sean dañados por electricidad...

Page 16: ...tó previamente Figura 7 14 Conecte el cable Thunderbolt incluido entre el puerto Thunderbol 3 en la caja y un puerto Thunderbolt 3 en su Mac Cuando se utiliza un MacBook Pro 13 pulgadas finales de 2016 cuatro puertos Thunderbolt 3 se conectan a uno de los puertos de la mano izquierda para el ancho de banda de 40 Gbps PCIe 15 Conectar el cable de alimentación incluido y encienda el interruptor de e...

Reviews: