


9
10
Front Panel
Front View
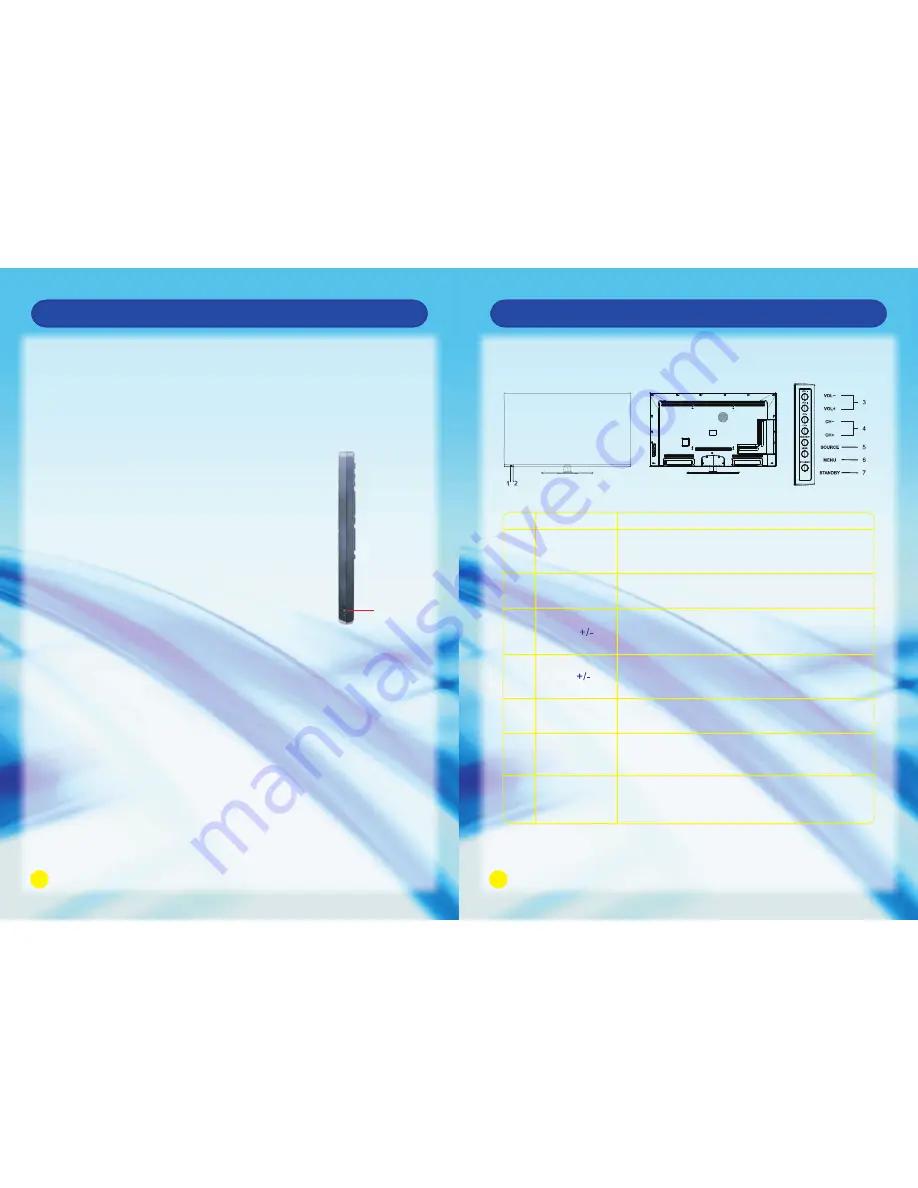
Back View
No.
1
2
3
4
5
6
7
Name
Remote Control
Sensor Window
Power Indicator
Description
Receives the signal from the Remote Control. Do not
put any objects in front of the window in order not to
hinder the reception of signal.
Flashes red when the unit is powered on:
Lights up red when the unit is in standby mode.
Press VOL + to increase volume, or VOL - to decrease.
At the OSD menu, press these buttons to move the
selection focus left and right to change settings.
Press these buttons to sequentially select channels.
When the OSD menu is on, press these buttons to
move the selection focus up or down to change settings.
Press to display all possible input signal sources.
Press to cycle through various sources.
Press this button to display the OSD menu.
When the OSD menu is on, press this button to exit the
menu.
Press this button to turn the unit on when it is in standby
mode.
Press this button once more to put it to standby mode.
SOURCE
MENU
STANDBY
VOL
CH
RF Remote Control pairing
Power
Switch
Side View
Remote Control Function
The Remote Control has been paired completely for your convenience. Users do not
need to process this step again under normal condition, but if it does not work with
battery fully charged or if you have replaced Remote Control or RF Dongle before
operating you should follow the below steps for paring:
1. Turn on the power at the left side of Remote Control
(pairing can be effective in one minute), as RF has low
power consumption during pairing, distance must be
controlled within half an meter.
2. Press and hold RF Button for 2 seconds, indicator
light3 will flash and light up together with indicator light 2.
3. Plug RF Dongle to the USB port on TV/USB port on the
computer.
4. Pairing can be finished within 3 minutes, if indicator
light 3 and 2 flashes 3 times, that means two devices
have been paired successfully. If indicator light lights up
all the time or goes out, that means failed pairing.
So please unplug the RF Dongle, and repeat the above
steps for pairing.
Main Unit Control
When using the Remote Control, please note:
· Do not strike or drop the Remote.
· Do not expose the Remote Control to liquids and do not
place it in humid environments.
· Do not install or place the Remote Control in direct sunlight,
· the heat may damage the Remote Control.