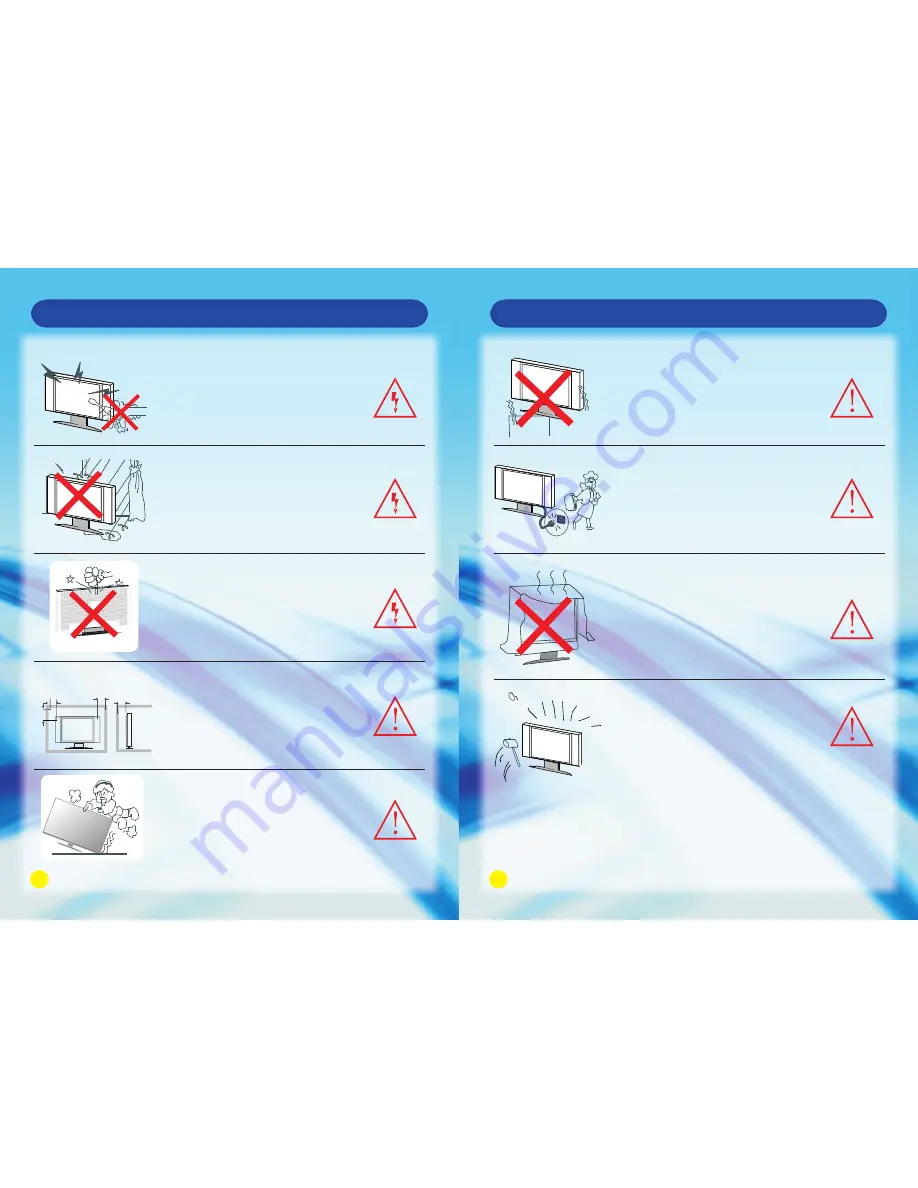
SONIQ E42S14A Manual Download Page 2

3

4

Safety Instruction

WARNING

High voltages are used in the operation of
this product. Do not remove the back cover
of the cabinet. Refer servicing to qualified
service personnel.

WARNING

To prevent fire or electrical shock hazard,
do not expose the main unit to rain or
moisture.

WARNING

Do not drop or push objects into the 
television cabinet slots or openings. Never
spill any kind of liquid on the television 
receiver.

CAUTION

If the television is to be built into a 
compartment or similarly enclosed. The
minimum distances must be maintained.
Heat build up can reduce the service life
of your television, and can also be 
dangerous.

CAUTION

Never stand or lean on product or its stand
or push suddenly. Always pay special attention
when children are near product to avoid harm.

Minimun  Distances

10cm

20cm

10cm

5cm

CAUTION

Do not place the main unit on an unstable
cart stand, shelf or table.

CAUTION

When the product is not used for an 
extended period of time, it is advisable to
disconnect the AC power cord from the 
AC outlet.

CAUTION

Avoid exposing the main unit to direct sunlight 
and other sources of heat. Do not position 
television receiver directly on other products 
which give off heat.E.g. video cassette players, 
audio amplifiers. Do not block the ventilation
holes in the back cover.Ventilation is essential 
to prevent electrical failure.Do not squash power
supply cord under the main unit.

CAUTION

The panel used in this product is made of
glass.
It can break when the product is dropped
or applied with force. 

Safety Instruction

Summary of Contents for E42S14A

Page 1: ...ructions should be read before operating 2 Retain Instructions The safety and operating instructions should be retained for future reference 3 Warnings All warnings on the appliance and in the operati...

Page 2: ...uct or its stand or push suddenly Always pay special attention when children are near product to avoid harm Minimun Distances 10cm 20cm 10cm 5cm CAUTION Do not place the main unit on an unstable cart...

Page 3: ...urn back to the previous menu under Smart function Exit all OSD menu 3D Button Press to open 3D setting menu NAVIGATION OK Button Scrolls through menus or options OK Selects menus or options and confi...

Page 4: ...unction F2 F1 F3 F4 Fn Shift SPACE RF Remote Control Function Remote Control 1 Connect 2 4G QT166 RF Dongle Support signal reception of 360 degrees to the USB port on the TV 2 Turn the power switch to...

Page 5: ...nction The Remote Control has been paired completely for your convenience Users do not need to process this step again under normal condition but if it does not work with battery fully charged or if y...

Page 6: ...signal Connect the audio and video output of your AV equipment to the unit using the AV cable included in the spare part Connect to external antenna Connect USB device such as USB disk HID and so on C...

Page 7: ...of DVD player DVD player included included Green Yellow White Red Blue Red Audio AV Cable Component YPbPr Connection ANT IN VGA AUDIO IN USB VGA 1 2 ETHERNET Y Pb Pr AV 1 IN R L VIDEO ANT IN VGA AUDI...

Page 8: ...t have an external power supply the USB device may not be detected So be sure to connect the external power supply 5 The recommended capacity is 2TB or less for a USB external hard disk and 32GB or le...

Page 9: ...information release 2 Favourites Weather Description HOME Button Operation for adding application Select your favourite application from the ALL APPS interface Press and Hold the Left Return Button on...

Page 10: ...up network settings HOME Settings Network and location settings Ethernet settings 1 Automatically connect the Ethernet Ethernet has been confirmed mark on Obtain IP address automatically the TV will a...

Page 11: ...rt is required when using a wired connection to this TV If your internet service does not allow for such a connection you will not be able to connect the TV ADSL modem is required to use DSL service a...

Page 12: ...cation that you want to uninstall or move through the method of HOME Settings Application management All applications System provided application can not be uninstalled 2 Open the application then sel...

Page 13: ...Settings then enter Environment selection for closing Browser Add the Bookmark Click on the Star Icon at the top right of the page to display a page from which you can add bookmarks view visited histo...

Page 14: ...ion effect and interval time of playing the picture Description OK Button Music Playback Enter this function by HOME Media then select your favourite song for playing Press OK to play the music and Ex...

Page 15: ...n System Update In order to enhance the network quality of the TV regularly update the software from official website Auto network updating 1 Click on Download to download the software it may take som...

Page 16: ...uto network updating as above ATV Manual Tuning Program Edit Press Up and Down to select Channel Edit then press OK Button to enter sub menu 1 Press Green Button to rename the current channel only ava...

Page 17: ...or HDMI Press Up and Down to choose Screen Mode press OK to confirm Press Left and Right to select PC Video 8 PC Settings available under VGA or HDMI Press Up and Down to select PC Settings press OK...

Page 18: ...Channel Lock Press Up and Down to select Channel Lock then press OK to enter the sub menu press Up and Down to select the program that you want to lock then press OK to confirm 3 Parental Guidance Pa...

Page 19: ...r USB memory device has multiple partitions of if you use a USB multi card reader you can use up to 4 partitions or USB memory devices 10 If the USB memory device does not work properly disconnect and...

Page 20: ...er run into knocked down or fallen over Being startled or deluding yourself into thinking that the 3D images are real may cause you to crush a nearby object or get injured when trying to move your bod...

Page 21: ...om the other eye We recommend sitting with the viewer s eyes at the same level as the screen If your eyes show signs of fatigue or dryness or if you have any of the above symptoms immediately disconti...

Page 22: ...ings 3D Off 3D Auto 3D 2D 2D 3D 3D Effect Adjustment Manual Confirm OK Select Return Exit Supported 3D Signal Format Signal 89 1 90 75 720P 44 955 45 37 5 44 955 45 37 5 33 72 33 75 28 125 53 946 54 6...

Page 23: ...y Check whether remote control is pointing at sensor window Check for any obstacle between the Remote Control and Remote Control sensor Check that the Remote Control sensor window is not under strong...

Page 24: ...A VIDEO IN VIDEO IN Digital Audio Out Optical LAN SD CARD AV Out 6W 6W 42 E42S14A 47 E47S14A Unit Dimension including the size of the base Wireless LAN Specification 55 E55S14A Standard Frequency Band...

Reviews: