


Page 78 SonicWALL TELE3 SP Administrator’s Guide
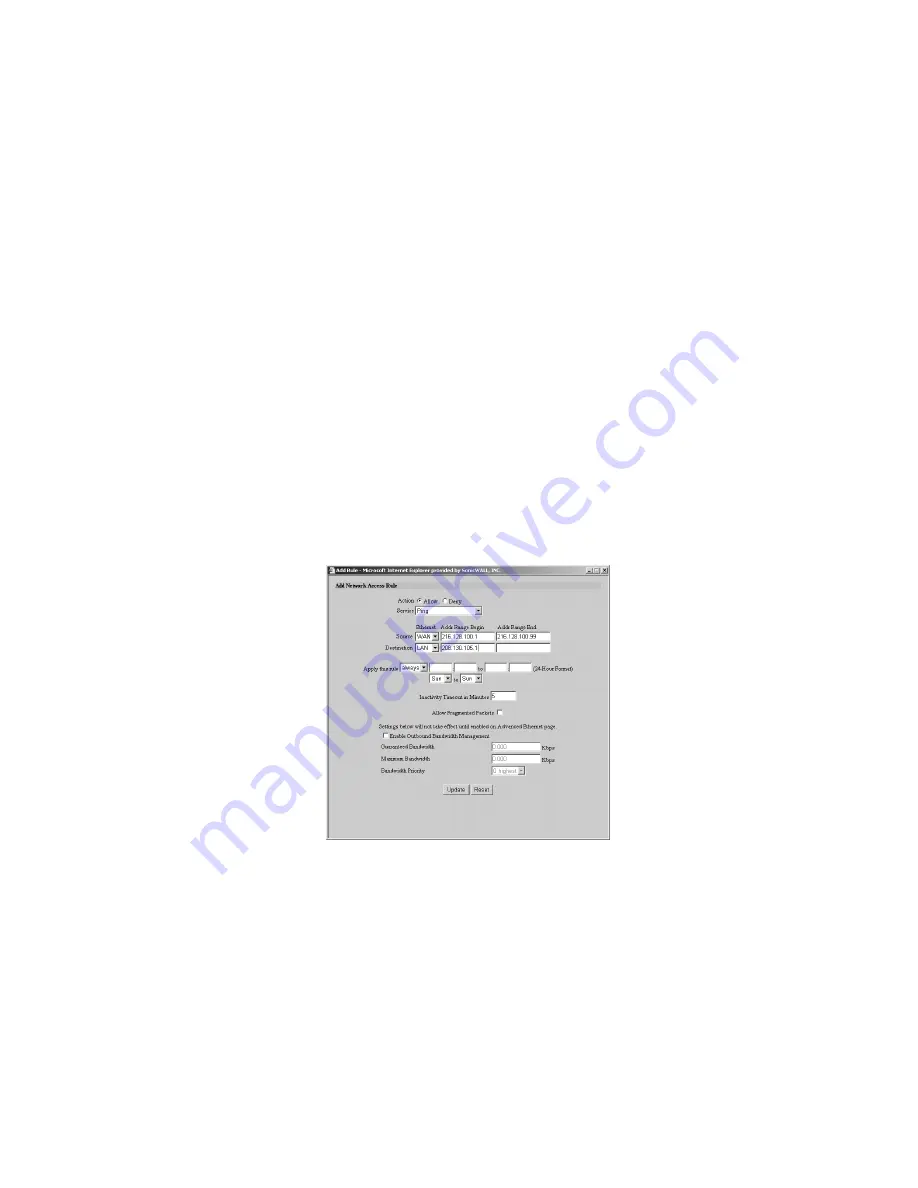
Enabling Ping
By default, your SonicWALL does not respond to ping requests from the Internet. This Rule
allows ping requests from your ISP servers to your SonicWALL.
1. Click
Add New Rule
in the
Rules
window to launch the
"Add Network Access Rule"
window.
2. Select
Allow
from the
Action
menu.
3. Select
Ping
from the
Service
menu.
4. Select
WAN
from the
Source Ethernet
menu.
5. Enter the starting IP address of the ISP network in the
Source Addr Range Begin
field
and the ending IP address of the ISP network in the
Source Addr Range End
field.
6. Select
LAN
from the
Destination Ethernet
menu.
7. Since the intent is to allow a ping only to the SonicWALL, enter the SonicWALL LAN IP
Address in the
Destination Addr Range Begin
field.
8. Select
Always
from the
Apply
this
rule
menu to ensure continuous enforcement.
9. Click
Update
to add your new Rule.
HTTPS Management of the SonicWALL
To enhance the security of the TELE3 SP,
HTTPS Management
using Secure Socket Layer
(SSL) is supported when you log into the SonicWALL using https://IP Address where the IP
address is the SonicWALL LAN IP address. For example, if the LAN IP address of your
SonicWALL appliance is 192.168.168.1, you can log in using HTTPS by entering
<https://192.168.168.1>. Access is encrypted using SSL technology for a secure connection.
HTTPS Management
allows secure access to the SonicWALL without a VPN client. It is a
simple and secure way to manage your SonicWALL from both the LAN and the WAN.


