EQUINOX INTEGRATION GUIDE
©Vantage Equinox
Somfy: URTSI 2
page 3 of 7
VI. Design Center Setup
Follow these instructions to add the Somfy URTSI 2 to your Design Center project and configure its settings appropriately.
1.
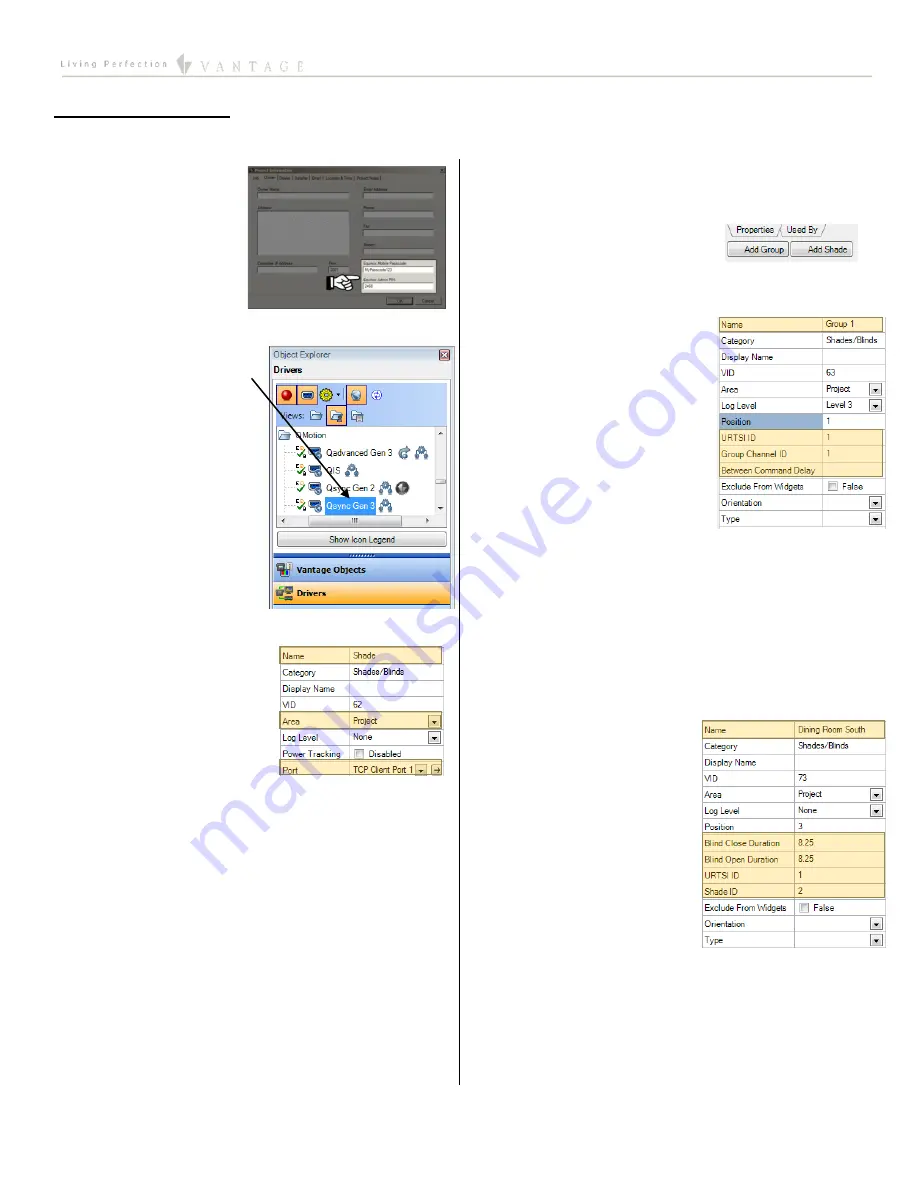
Project Settings
– Click
on
Settings | Project
Information| Owner
(tab). Fill out the
Equinox Mobile
Passcode:
(alpha/numeric) and the
Equinox Admin PIN:
(numeric).
2.
Add Somfy URTSI 2
- In the
Object Explorer
, select
Drivers
and double click or
drag the URTSI 2 to add it
to the appropriate
Area
(i.e. room).
TIP:
The URTSI 2
is added
to the room currently
selected when double
clicking.
3.
Name the URTSI 2
– In the
Object Editor
, give the URTSI 2
a user-friendly
Name
. If an
alternative or shorter
Display
Name
is desired, assign that
as well.
TIP:
The
Name
(or the
Display
Name
, if given) will appear in
the shade widget
4.
Set the Area
– Set the area for each shade. Also, set the
area for the system.
5.
Add Port
–
Add a new RS-485 port
(or RS-232 port with
a station as described above)
. This will correspond to
the port that you connected the Somfy to the
InFusion Project with.
6.
Add Groups
– Add the number of groups you
programmed during installation.
7.
Add Shades
– Add the number
of shades you have in each group.
8.
Setup Group
– In the
Object
Editor
, fill in the information
for each group programmed
during installation.
a.
Enter the
Name
b.
If the group has been
programmed with a group
address, enter URTSI ID
and Group Channel ID. If
they are left blank
commands will be sent
individually to each shade.
c.
If shades are having trouble responding as a group
and do not have a group address, extend the
Between Command Delay.
The lowest value it can
have is 600 which implies 0.6 seconds.
d.
Select the desired
Orientation
and
Type
to reflect the
appearance of the shade.
9.
Setup Shade
– In the
Object Editor
, fill in the
information for each shade
in the desired group.
a.
Enter the
Name
b.
Enter the
Blind Close
Duration
and
Blind
Open Duration
to the
number of seconds the
shade takes to open
and close (a stopwatch
or smartphone may be
used to time the full duration).
c.
Enter the
URTSI ID
as shown on the channel dial on
the URTSI
d.
Enter the
Shade ID
(set during installation).
e.
Select the desired
Orientation
and
Type
to reflect the
appearance of the shade.


