


4
© 2012 Observint Technologies, Inc. All rights reserved.
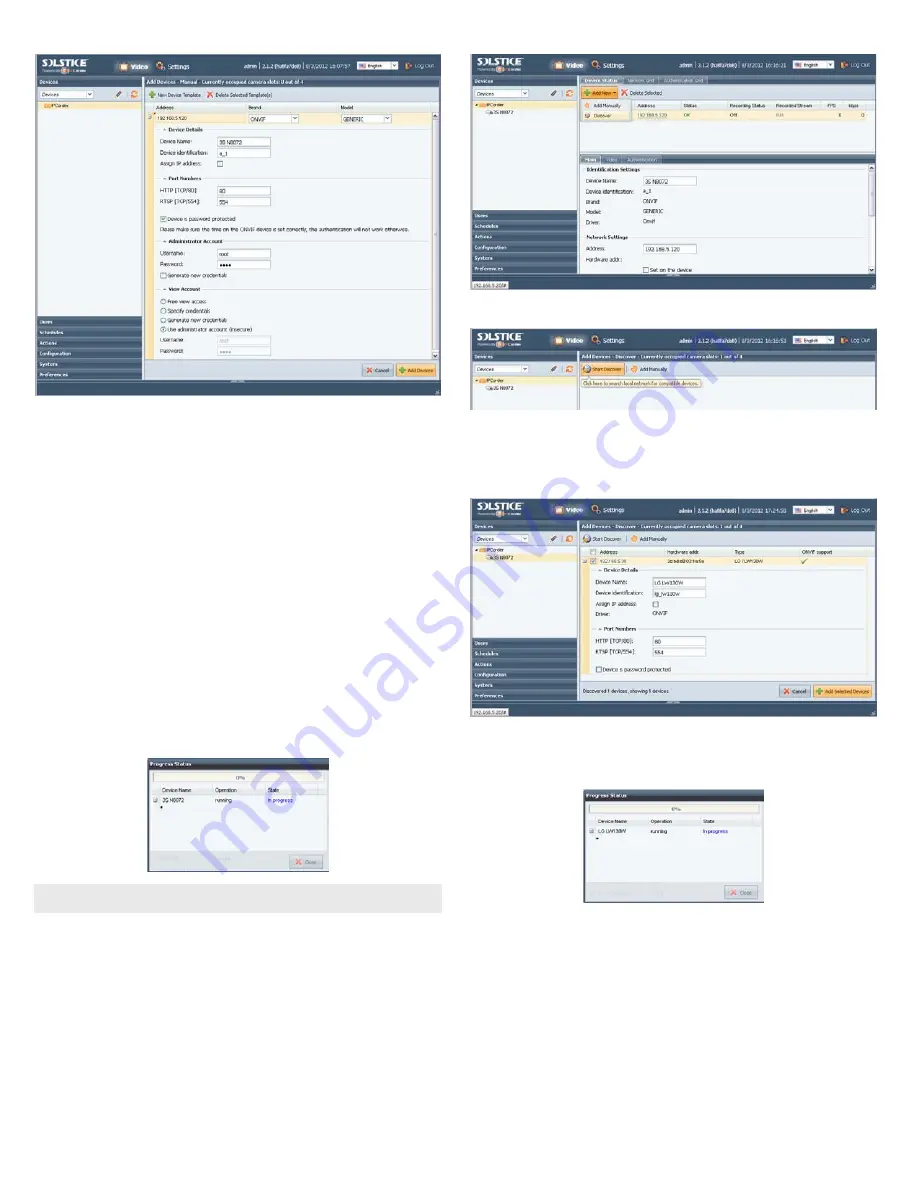
b.
Brand
. Open the drop-down list and select the brand of the device you are adding. If the device
is ONVIF compatible, select ONVIF.
c.
Model
. Open the drop-down list and select the model of the brand you are adding. In the
example above with the ONVIF brand, only one option, GENERIC, is selectable. Here, click
GENERIC to select it.
d.
Device Name
. Enter a device name. The device name can be composed of alpha-numeric
characters
e.
Device identification
. You can enter an identification for the device, or use the one generated
by the NVR. The identification code can contain only alpha-numeric characters.
f.
HTTP
and
RSTP
ports. Change the port numbers if necessary.
g.
Device is password protected
.
IMPORTANT
: If the device requires a user name and
password to login, check this box, then include the username and password information in the
sections below to administer and view the device.
h. After all information on the screen is entered, click the
Add Devices
button in the lower right
corner. If the addition was successful, the following pop-up window will open, and a dot will
appear under the device name as shown below. If it was not successful, an error expression will
be shown.
NOTE
To configure recording options, continue with “Step 5. Setting recording options” on page 5.
Discover method
1. After logging into the NVR as an administrator, click the
Settings
option in the header of the screen.
2. In the right pane, click the
Add New
button to open the drop down list, then click
Discover
.
3. On the following screen, click the
Start Discover
button in the page header.
4. For each camera discovered on the network that you want to add to the NVR system, check the select
box to the left of the IP address, then enter the appropriate information required in the configuration
menu as described above.
IMPORTANT
: If the device is password protected, click the checkbox (see
below), then scroll down to enter the
username
and
password
information required.
5. Click the
Add Selected Devices
button in the lower right corner. If an addition was successful, the
following pop-up window will open and a dot will appear under the device name as shown below. If
it was not successful, an error expression will be shown.
6. After a camera is added to the NVR, it appears in the
Settings
|
Devices
|
Device Status
tab.
Verify that all
Status
indication for each is
OK
.


