background image

12 


1.  Remove flat end of the hose by squeezing the large clamp and pulling it to-

ward you. 

2.  Remove hose from drainage joint and cut hose to appropriate length. 
3.  Once cut is completed, refer to installing the Drain Hose to re-install dehu-

midifier drain hose. 


USING THE DRAIN PUMP 
 

1.  Plug into grounded electrical outlet. 
2.  Place the other end of the pump hose where you would like to empty the wa-

ter (floor drain, water container or through a basement window). The pump 
will automatically start and begin pumping the water that drains into it. Check 
hose for kinks or other obstructions. 

3.  Before and after each use, check hose connections to make sure they are 

properly secured. 

NOTE: Make sure the drain hose is lower than the horizontal plane of the drain on 
the dehumidifier as seen in the illustration below. Drain hose should be as short as 
possible and all kinks in the drain hose should be eliminated for proper pump opera-
tion. 

NOTE: If you need to cut the dehumidifier drain hose, only cut on the flat end of the 
hose. Do not cut the angled end as it is designed for insertion into the pump. 

CUT 

DO NOT CUT 

USING THE PUMP 

3ft. Dehumidifier Drain Hose 

(FIG. 17) 

9  


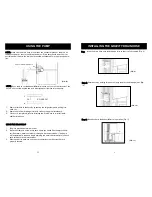
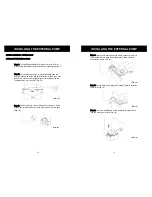
Step 6: Place bucket in the dehumidifier for operation. (Fig. 11) 


INSTALLING THE GRAVITY DRAIN HOSE 

(FIG. 10) 

(FIG. 11) 

Step 5: Secure hose by pushing large hose clamp towards the drainage joint. (Fig. 
10) 


(FIG. 9) 

Step Insert the drain hose onto the drainage joint so that it is fully seated. (Fig. 9)


Summary of Contents for DP2-70EP-03

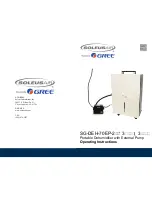
Page 1: ...ADDRESS Soleus International Inc 20035 E Walnut Dr N City of Industry CA 91789 WEBSITE www soleusair com TEL 888 876 5387 SG DEH 70EP 2 3 3 Portable Dehumidifier with External Pump Operating Instructi...

Page 2: ..._____________ _____________________________________________________________________ _____________________________________________________________________ ______________________________________________...

Page 3: ..._____________________________________________________________________ _____________________________________________________________________ ____________________________________________________________...

Page 4: ...he ground pin from the plug Do not use an adapter Do not use an extension cord Failure to follow these instructions can result in death fire or electrical shock 3 prong grounded plug Power supply cord...

Page 5: ...g this appliance KEY FEATURES WARNING CHOOSING THE PROPER LOCATION Use the dehumidifier in the basement to help prevent moisture damage in the kitchen laundry room bathroom and spa exercise areas that...

Page 6: ...f The 2 Hrs 7 timer indi cator will light up when the timer key is pressed Press the timer key once more for a 4 hour auto matic shut off The 4 Hrs 7 timer indicator will now light up Press the timer...

Page 7: ...desired in the room or set the dehumidifier to CO for continuous operation Doors and windows may not be closed tightly Check that all doors windows and other openings are securely closed Water is not...

Page 8: ...e back of the unit 2 Remove the filter and clean with warm soapy water Rinse and allow the filter to dry before placing back in the unit 3 Place the filter back into dehumidifier Plug unit back into o...

Page 9: ...e connections to make sure they are properly secured NOTE Make sure the drain hose is lower than the horizontal plane of the drain on the dehumidifier as seen in the illustration below Drain hose shou...

Page 10: ...g 13 FIG 12 FIG 13 OPTION 3 EXTERNAL VERTICAL PUMP INSTALLING THE EXTERNAL PUMP Step 1 To install Dehumidifier Drain Hose refer to Gravity Drain Using Dehumidifier Hose instructions starting on page 9...

Reviews: