background image


Replace Filter 

-


The filter will need to be changed periodically as dirt visible ac-

cumulates. This can vary greatly depending on air quality and amount of use. 
When the filter is dirty, replace it with a Soleus Air Replacement Filter. 


CAUTION: DO NOT OPERATE THE DEHUMIDIFIER WITHOUT A FILTER.


Clean the Unit Housing 

1)   Keep the unit from being exposed directly to the sun to prevent color 
fading.


2)   Clean the surface with a damp cloth and dry it with a soft towel.


Storage / Transporting the Unit


How to Drain the Internal Water Tank


1)


Place a collection under the Drain Port or lead the installed Drain Tube to a sink or drain.


2)


Press the Drain Button—This will drain remaining water in the Internal Water Tank (approximately 
40 seconds)


3)


Unplug the unit and remove the power cord from the back of the unit


4)


Inspect the filter and replace if needed.


5)


Your dehumidifier is now ready for storage or transportation.


6)


The unit should be stored in a cool dry place.


MAINTENANCE


Summary of Contents for DMG-135-60

Page 1: ...V 170405 Model Number DMG 135 60 5008441...

Page 2: ...ual carefully Store this manual in a safe place for future reference 1 Always place the unit on a level surface 2 Never use or store gasoline or other flammable vapor or liquid near this unit unless i...

Page 3: ...more and more stable Due to the stable humidity level in the area the dehumidifier will need to remove less and less moisture over time Please do not be concerned if the dehumidifier is removing less...

Page 4: ...ONDUCT ED INDEPENDENT TEST TO THE INFORMATION AND THE SPECIFICATIONS PRESENTED HEREWITHIN 1 Commercial Low Grain Refrigerant Dehumidifier 1 Operating Instructions 1 Pump Drain Hose 19 Feet 1 Power Cor...

Page 5: ...maximum dehu midifying power or quiet operation Loss of power protection remembers all settings even when power is interrupted High Airflow Filter protects the unit against damage from air borne parti...

Page 6: ...Knobs on either side of the handle to secure the handle at the customized height 2 Automatic Draining Insert the included 19 foot Drain Tube onto the Drain Port locat ed on the back of the unit The Dr...

Page 7: ...the control panel For fast dehumidification choose High For moderate dehumidification choose Medium For quiet operation choose Low 5 Drain Button The dehumidifier will automatically drain when the in...

Page 8: ...increment will flash indicat ing that it has been set Once the set time increment is reached the unit will automatically turn off 7 SD Card Recording Insert an SD Card into the SD Card Slot with the p...

Page 9: ...ich may reduce performance Use the dehumidifier in cooking laundry bathing and dishwashing areas that have excessive moisture NOTE Place the dehumidifier away from a clothes dryer Use the dehumidifier...

Page 10: ...fading 2 Clean the surface with a damp cloth and dry it with a soft towel Storage Transporting the Unit How to Drain the Internal Water Tank 1 Place a collection under the Drain Port or lead the inst...

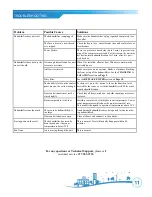
Page 11: ...on on Page 10 The humidity level on the control panel may not be set low enough For drier air press the button to lower the humidity level desired for the room or set the dehumidifier to CO for maxi m...

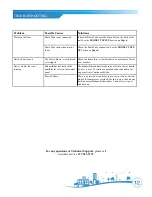
Page 12: ...box and replace fuse or reset breaker Unit is on but fan is not running Dehumidifier has reached the humidity level set on the control panel The dehumidifier automatically turns off when the set humi...

Page 13: ...E4 Bucker Full Indicator Press Drain button to remove water from internal bucket If the error code still appears please call Customer Services at 877 665 9765 E2 Temperature Sensor Failure Please cal...

Page 14: ...andling provisions in the instructions Damage to the finish of the case or other appearance parts caused by wear Damage caused by repairs or alterations of the unit by anyone other than those authoriz...

Page 15: ......

Reviews: