


Configuring an AUTOTEST
44
© Copyright 2018 Softing IT Networks
has been set to OFF.
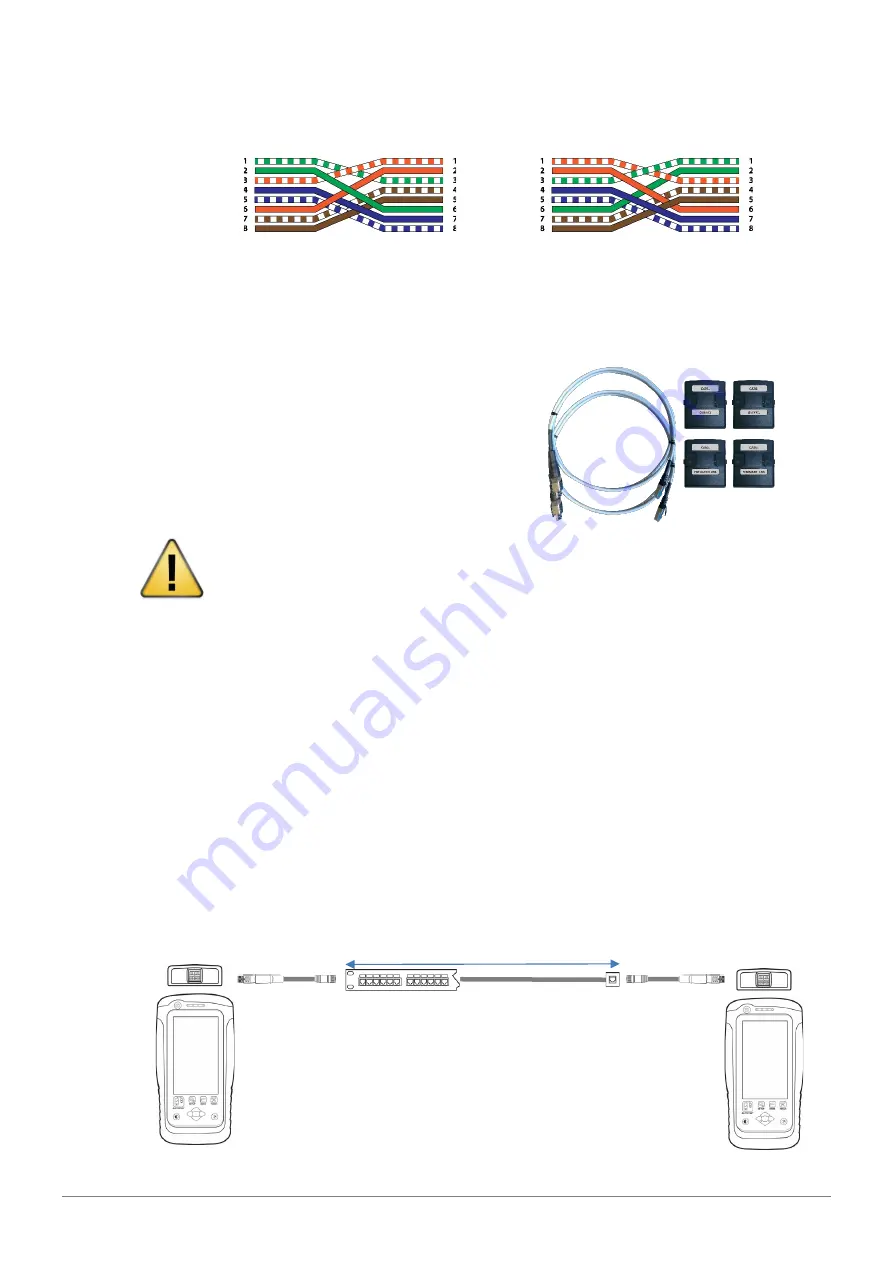
T568A Crossover Cabling
T568B Crossover Cabling
Please ensure you have the following components before conducting the test;
•
WireXpert, LOCAL&REMOTE units (WX4500 or WX500-CU)
For Permanent Link Testing
•
2 x Permanent Link Adapter (WX_AD_6APL2)
•
2 x Patch Cord (WX_AC_6ALCORD2)
For Channel Testing
•
2 x Channel Adapter (WX_AD_6ACH2)
CAUTION
Do not connect WireXpert to a voltage source such as an active telephone jack.
Excessive voltage will damage the units and the adapter and void the warranty.
6.2
Testing Guide for Permanent Link Testing
Permanent Link (PL) test is comprised of the connection from a patch panel to a telecommunication
outlet (horizontal cabling) using Permanent Link test adapters at each end of the link under test.
1.
Insert the Permanent Link adapters into the LOCAL and REMOTE units of the WireXpert.
2.
Power ON WireXpert. Check that WireXpert is in Copper testing mode.
3.
Set reference is required if the units are being paired for the first time.
4.
Choose the Permanent Link limits and configure other settings if necessary.
5.
Connect the LOCAL unit to the patch panel and REMOTE unit to the outlet using the patch cord
provided.
6.
Press the
[AUTOTEST]
button to begin AUTOTEST.
PL adapter
PL adapter
Patch Panel
Horizontal Cabling
Outlet
Link under test
LOCAL
REMOTE


