SNEED Coding Solutions SNEED-JET Titan User Manual Download Page 12

11 


(

.)  

12.


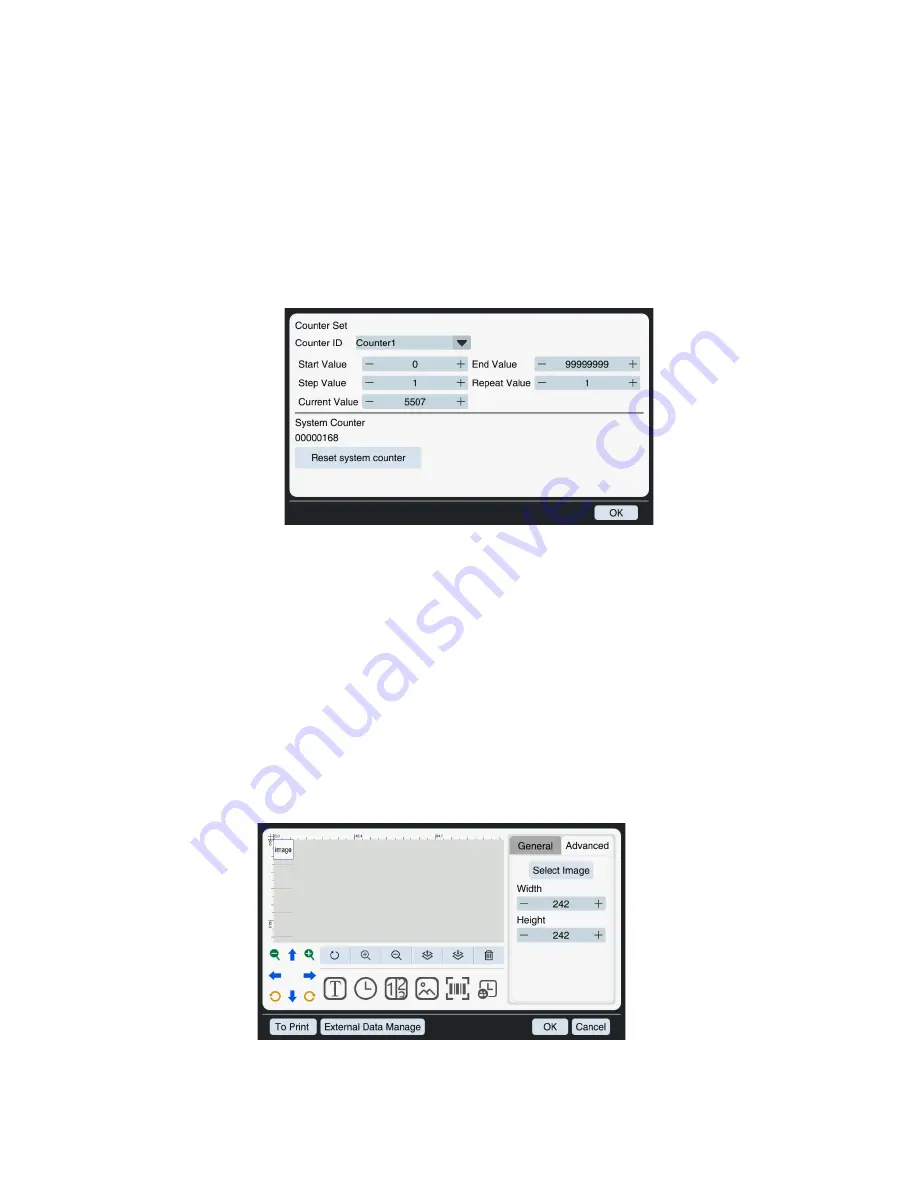
To program each of the four counters you will need to navigate back to the 
main menu and select the calculator Icon form the top of the screen. (You 
will need to have loaded the message containing the counter you want to 
print first). 


13.


Start Value 

 The value at which you would like to begin your counter 

14.


Step Value 

 The incremental value at which the counter increases between 

prints  

15.


Current Value 

 allows for on the fly incremental adjustments as well as 

showing the current count  

16.


End Value 

 Stops the counter  

17.


Repeat value- The number of times each count will be repeated   

(

.)  

Uploading Images & logos  

TIP: 

All images must be converted to a monochrome bitmap file (.bmp) before the 

printer can recognize them. 


Summary of Contents for SNEED-JET Titan

Page 1: ...0 User Guide Sneed Coding Solutions Inc 22315 Gosling Rd Spring TX 77389 833 926 3464 www sneedcoding com V 2 SNEED JET Titan 4...

Page 2: ...1 To schedule a call Click to schedule a call Help desk and support videos Click to visit our support desk...

Page 3: ...tting changes when the printer is in print mode or printing Always remove the ink cartridge when not in use and cap it with the provided plastic clip to ensure cartridge longevity https www youtube co...

Page 4: ...g Started 7 Section 4 Programming a message 8 Programming Text 8 Time Date 9 Counter 10 Uploading Images logos 11 Barcodes QR codes and data matrix 12 Shift codes 13 Section 5 Loading a message 14 Sec...

Page 5: ...Original 42mL Ink Cartridge 8 Ink Cartridge Color Black White Red Yellow Green Blue Invisible 9 Character Height 1mm Maximum 50 8mm 10 Print Distance 2mm 5mm Can Guarantee the Best Printing Quality 1...

Page 6: ...s ex Print speed and Print delay System settings ex Time date network settings Counter settings program product counters Password entry User level password entry Note Please use the correct shut down...

Page 7: ...ements 2 System Time Displays the current date and time Tap to set 3 User Level Displays the current user level 4 Status Bar The status bar displays the current message name as well as indicating by c...

Page 8: ...trigger method is set And that your sensor is firmly installed Click the link here for video instruction on setting up your product sensor 1 Select Print settings from the top of the main menu 2 Sele...

Page 9: ...rom the main menu The objects in the red box represent the different programmable items for your message Text Time Date Counter Image Barcode Shift code Programming Text 1 To program text into your me...

Page 10: ...to meet your requirements 7 To program your manufacture date you need only to set your required date format The charts below show the various options for date formatting d Date number without leading...

Page 11: ...med counters from the drop down menu to insert into your message You can also set the base system number of total digits in the counter and a prefix h Hour without leading zero 0 to 23 displayed as 1...

Page 12: ...value at which you would like to begin your counter 14 Step Value The incremental value at which the counter increases between prints 15 Current Value allows for on the fly incremental adjustments as...

Page 13: ...al drive and select load Image to insert it into your message Tip Items in the message creation screen can be clicked and dragged into position Barcodes QR codes and data matrix Sneed Coding recommend...

Page 14: ...or example there isn t much limitation to what you can program into a QR code but a UPC A code can only take an 11 digit numeric code 4 Now that you have programmed your barcode you need only to adjus...

Page 15: ...eturn to the main interface having loaded the message to print Section 6 Print Settings Now that you have programmed your message you need to spend a little time adjusting your print settings Ensuring...

Page 16: ...le lines this option allows you to choose which of the two you are using to print with This is a useful tool if you damage one row of nozzles as well as for troubleshooting your cartridge Print Head s...

Page 17: ...ion Choose the direction of print Print Mode 6 Trigger mode Select between an external product sensor and automatic Internal Signal print modes Internal signal selecting this option will cause the pri...

Page 18: ...ave not purchased one make sure to set the encoder slider to the off position Pulses per revolution PPR the default setting for the Sneed Coding approved encoder kit is 2500 ppr Wheel diameter the def...

Reviews: