68
|
Quick Start Guide
|
69
CNC Carving
1. Install the Software and Complete the Initial Setup
Download our software Snapmaker Luban at
https://snapmaker.com
and install it. Then connect to a Wi-Fi
network: Enter the Workspace
-> Connection -> Select
Wi-Fi
-> Click
-> Select your machine -> Click
Open
-> Tap
Yes
on the touchscreen.
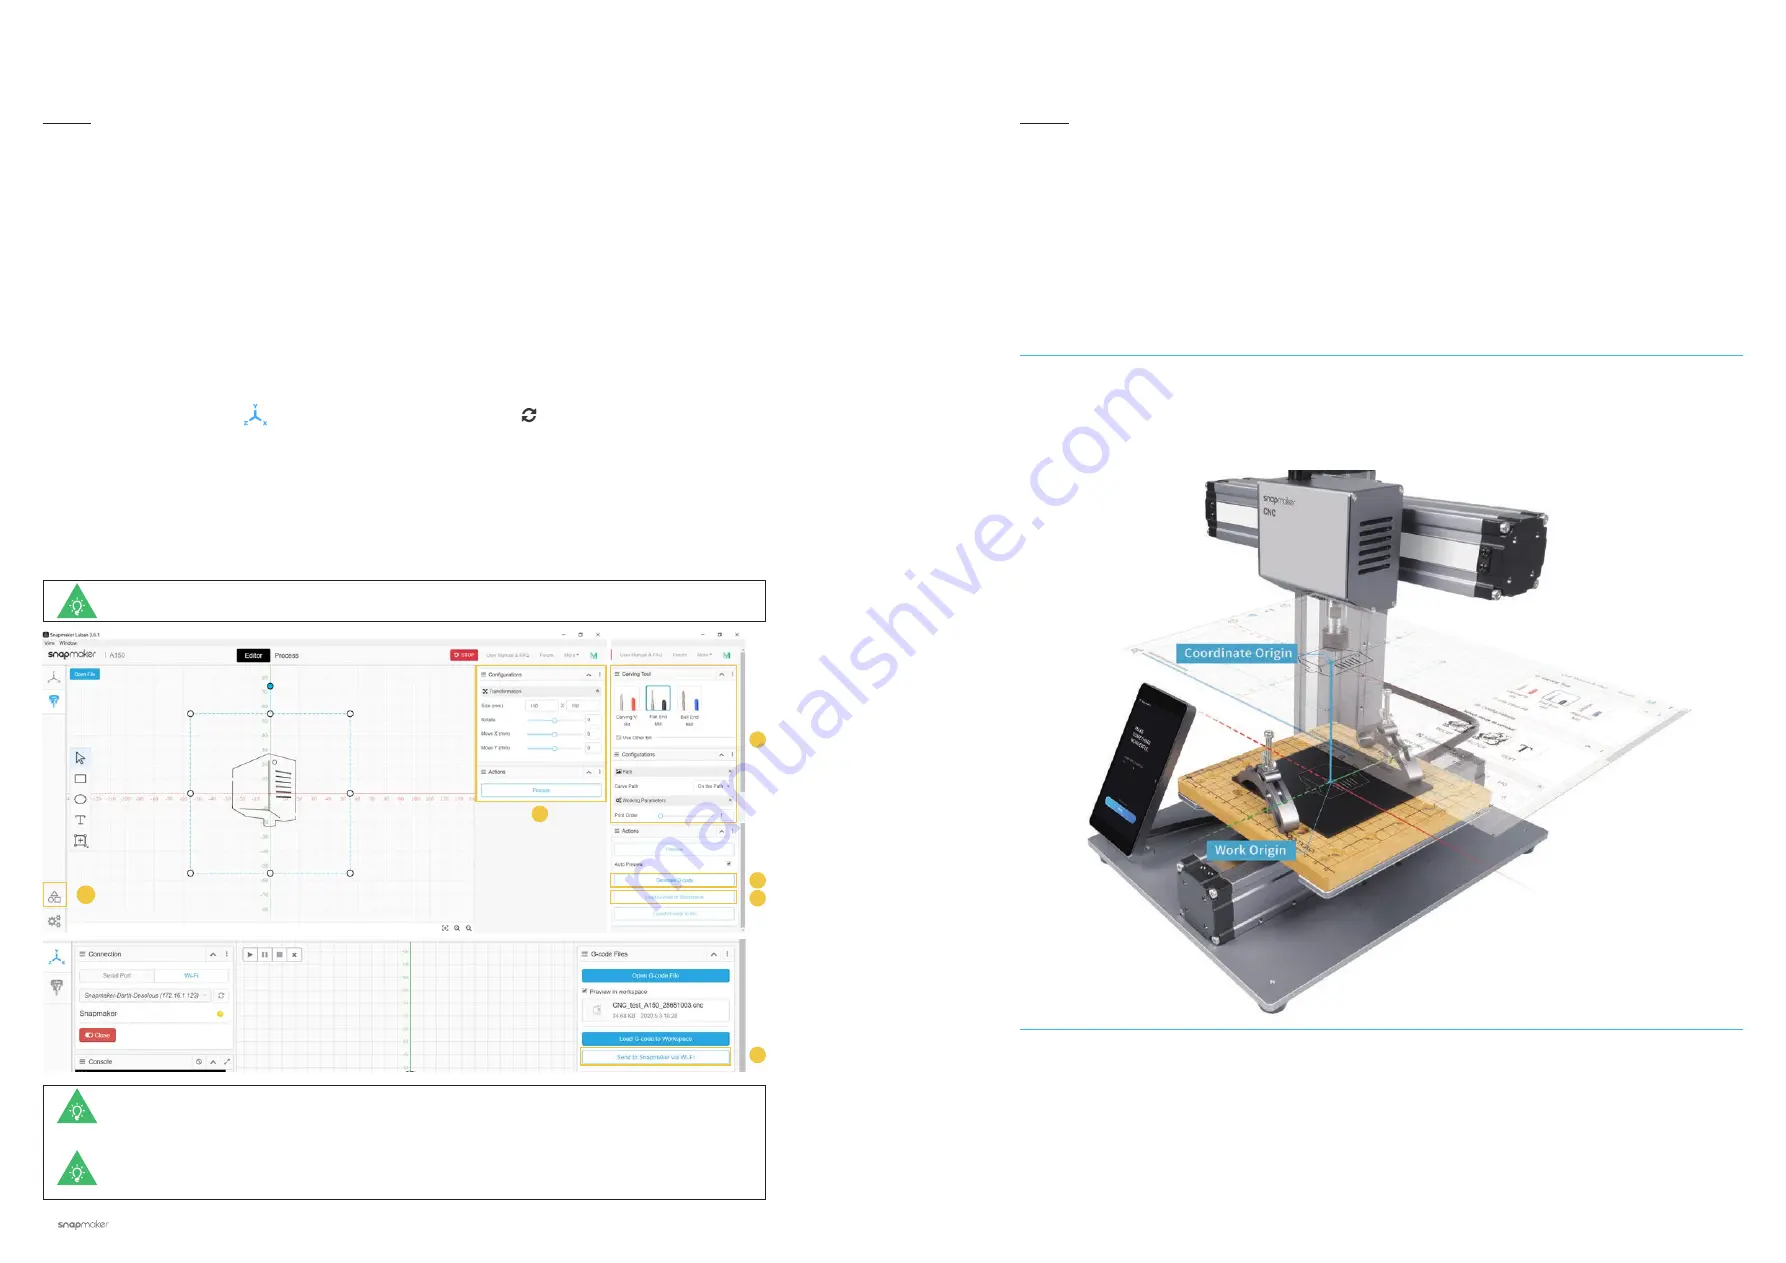
2. Generate the G-code File and Send It to the Machine
① Open the test file from
Case Library
-> ② Click
Process
after configuring the settings in
Configurations
section -> ③ Use the default settings specifically configured for the test file -> ④ Generate the G-code file ->
⑤ Load G-code to
Workspace
-> ⑥ Send G-code to the machine via Wi-Fi.
5.3.1 Prepare the G-code File
Guides & Pictures
/ Snapmaker
Files sent by Wi-Fi can be found on the touchscreen:
Files
>
Local
.
You can also send the G-code files to the machine via the USB disk. Click
Export G-code to file
in Snapmaker Luban and save it to the USB disk, then insert the USB disk into the controller
and select
Files
>
USB
on the touchscreen.
You can also upload your own files by clicking
Open File
in
Editor
and configure the file settings.
How It Works: Work Origin
Find out where the carving will be by setting the work origin. The work origin corresponds to the (0, 0)
coordinate origin in the software.
5.3.2 Set the Work Origin and Start Carving
Guides & Pictures
/ Snapmaker
2
1
3
4
5
6
Summary of Contents for A150
Page 1: ......
Page 10: ...12 Quick Start Guide 13 Machine Assembly MACHINE ASSEMBLY ...


