background image

7

ZCTBTSR9050 

 (02/21)

Battery Charging 

1.  Insert the power cord plug into the socket of the charger.
2.  Plug the other end of cord plug into power source 

outlet.

3.  Insert battery pack in the charger. Position the battery 

pack so that the battery sits flush with the top of the 

charger.


—The green light will start flashing. This indicates 

the charger is charging the battery pack.

4.  The fuel gauge on the battery pack will display the 

charge percentage % value status. Standard fast 

charging time is 60 minutes.


—When the battery is 25% charged, one light will be 

solid green.

5.  When the fast charge is complete all (4) lights on the 

battery pack will be solid green indicating battery is fully 

charged and charger will indicate solid green light.

6.  If the LED on the right hand side is flashing a yellow light 

then the battery pack is either hot or cold. The charger 

will not fast charge the battery if it is too hot or cold. The 

charger goes into a fast charge mode when the battery 

temperature is between 32°F (0°C) and 113°F (45°C). 

7.  If the LED on the right hand side is flashing a red light, 

the battery pack is faulty and the charger will not charge 

the battery.

8.  When the fast charge is complete, battery voltage is 

detected by the charger and it automatically turns off to 

prevent an over-charge and all four lights on the battery 

fuel gage will be on and charger will indicate solid green 

light

9.  The charger has one USB port, its output current is 0.5 A 

and output voltage is 5 VDC. Do not connect to an 

appliance requiring over 0.5 A.

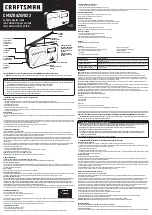
Figure 1

: Inserting the Battery

A

B

B

C

Figure 2

: Battery Pack (CTB185)

A –  Terminal

B –  Latch Button

C –  Fuel Gauge

L1  L2  L3  L4

Figure 3

: Fuel Gauge (CTB185)

L1 - Solid Light 25% Charge

L2 - Solid Light 50% Charge

L3 - Solid Light 75% Charge

L4 - Solid Light 1001% Charge

Summary of Contents for CTBTSR9050

Page 1: ...ker 1 ZCTBTSR9050 04 21 ORIGINAL INSTRUCTIONS TRADUCTIONDES INSTRUCTIONS ORIGINALES TRADUCCIÓN DE LAS INSTRUCCIONES ORIGINALES ES FR READ AND SAVE THESE INSTRUCTIONS LIRE ET SAUVEGARDER CES INSTRUCTIONS LEA Y CONSERVE ESTAS INSTRUCCIONES E508280 ...

Page 2: ... power tool Keep cord away from heat oil sharp edges or moving parts Damaged orentangledcordsincreasetheriskofelectricshock When operating a power tool outdoors use an extension cord suitable for outdoor use Use of a cord suitableforoutdoorusereducestheriskofelectricshock If operating a power tool in a damp location is unavoidable use a residual current device RCD protected supply Use of a RCD red...

Page 3: ... grinding drilling and other construction activities contains chemicals known to cause cancer birth defectsorotherreproductiveharm Inhaling hazardous dust can cause injury Power tools can cause flying particles during use Wear safety goggles user and bystanders Flying particles can cause injury Power tools generate noise Wear hearing protection user and bystanders Prolonged exposure to noise can c...

Page 4: ...ts eyes additionally seek medical help Liquid ejected from the batterymaycauseirritationorburns Ensure the switch is in the off position before inserting battery pack Inserting the battery pack into power tools thathavetheswitchoninvitesaccidents When battery pack is not in use do not place it in a clothing pocket Battery leakage or sparks may cause burnsorfire Risk of short circuit and fire Donot...

Page 5: ...charger read all instructions and cautionary markings on battery charger battery and product using battery 3 CAUTION To reduce risk of injury charge only CTB185 CTB8185 type rechargeable batteries Other types of batteries may burst causing personal injury and damage 4 Do not expose charger to rain moisture or snow 5 Use of an attachment not recommended or sold by the battery charger manufacturer m...

Page 6: ... charger as follows 100 120 Volt Charger Cord Length feet Wire Size AWG 25 50 100 18 18 18 220 240 Volt Charger Cord Length meters Wire Size mm 50 75 0 75 1 0 Recommended Extension Cord Length Battery Pack Specifications Type CTB185 CTB8185 CTB8187 Lithium Ion Voltage CTB185 CTB8185 CTB8187 18 VDC 3 6 V x 5 cell pairs Weight CTB185 CTB8185 CTB8187 1 5 lbs 0 68 kg Charge Time CTB185 90 min CTB8185 ...

Page 7: ...low light then the battery pack is either hot or cold The charger will not fast charge the battery if it is too hot or cold The charger goes into a fast charge mode when the battery temperature is between 32 F 0 C and 113 F 45 C 7 If the LED on the right hand side is flashing a red light the battery pack is faulty and the charger will not charge the battery 8 When the fast charge is complete batte...
Page 8: ...ry voltage discharge amperage and temperature When the battery voltage falls below the usable range the battery will shut off and the 1st LED will flash for ten 10 seconds The battery needs charging If the battery s discharge amperage limit is reached due to excessive load the protection circuit will shut down the tool and the illumination LED will remain on until the trigger is released Tool oper...

Page 9: ...onditionstheusefullifeofalithium ionbatterypackisaround1000charge dischargecycles Impropercareandmaintenanceshortensbatterylifeand theamountoftimethebatteryholdsacharge Use only with Snap on charging equipment that specifiesaCTBseriesbatterypack Avoid short circuiting the battery pack Permanent damage to the pack can occur from high current discharge Unplug charger from outlet before starting the ...

Page 10: ...10 minutes then resume work Overcurrent Let tool sit 5 10 minutes then resume work Motor wire break Return to dealer for repair Controller fault Return to dealer for repair Controller overtemperature Let tool sit 5 10 minutes then resume work Hardware fault Return to dealer for repair Hall effect error Return to dealer for repair CTL failure Replace battery with a fully charged battery ...

Page 11: ... laboratory type testing with the stated standards and are not adequate for use in risk assessments Values measured in individual work places may be higher Values and risk of harm experienced by an individual user are unique and depend upon the environment and manner in which the user works the work piece and the workstation design as well as upon the exposure time and the physical condition of th...

Page 12: ...ill also turn off automatically if there is no activity or connection for 5 minutes Connecting a Bluetooth Enabled device 1 Confirm the battery is connected or an AC power cord is plugged into an AC power source 2 Place the speaker and device approximately 3 ft 1 m of each other 3 Confirm the Bluetooth function is enabled and set to automatically pair on the device Consult your device manufacturer...

Page 13: ...ess the Bluetooth Pair Button G on the unit and accept CTBTSR9050 on you external device 4 The BT indicator light on the unit will turn solid and an audible confirmation you are now connected 5 Press the Bluetooth Pair Button G again TWS indicator will display and flash 6 Press the Bluetooth Pair Button G on another CTBSR9050 This will connect automatically TWS indicator will turn solid and an aud...

Page 14: ...CTBTSR9050 02 21 Incoming Calls This speaker is equipped with an incoming call feature which pauses audio once a call is accepted This feature activates automatically and play will resume when call is ended ...

Page 15: ...ame B 13 PVC sticker 14 The port bracket 15 S LOGO plate 16 S LOGO bracket 17 USB Earphone AUX PCBA Key Number Part name 18 Loud speaker L 19 Front shell 20 Snap on logo 21 Decorative strip 22 Button 23 Decorative strip B 24 Volume knob 25 Main PCBA 26 LCD Key PCPA 27 Radio anenna 28 Loud speaker R 29 Right frame A 30 Right frame B 31 S logo plate 32 S logo bracket 33 Screw 34 Handle Cordless Radi...

Page 16: ...d level Adjust volume of connected device Sound Distortion Volume level set too high Volume level of the connected device too high AUX IN Bluetooth Mode Reduce volume level by the VOL knob Reduce the volume level of the connected device Bluetooth Reception Failure Not properly connected via Bluetooth The connected device is not in playback mode Check that Bluetooth is activated on your device and ...

Page 17: ...use or tampering B alteration modification or adjustment of the Equipment by other than Seller s authorized representatives e installation repair or maintenance other than specified other than Seller s authorized representatives D improper or negligent use application operation care cleaning storage or handling E fire water wind lightning or other natural causes F adverse environmental conditions ...

Page 18: ...radio or television reception which can be determined by turning the equipment off and on the user is encouraged to try to correct the interference by one or more of the following measures Reorient or relocate the receiving antenna Increase the separation between the equipment and receiver Connect the equipment into an outlet on a circuit different from that to which the receiver is connected Cons...

Reviews: