Garmin GPSMAP 530, Owner'S Manual
The Garmin GPSMAP 530 is a reliable GPS navigation system perfect for outdoor adventures. Ensure you have all the information you need by downloading the free Owner's Manual from manualshive.com. This comprehensive manual will guide you through all the features and functionalities of the device.
Share
Download


Reviews:
No comments
Related manuals for GPSMAP 530

Sure Cross MultiHop
Brand: Banner Pages: 6

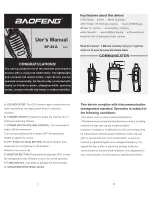
UV-82
Brand: Baofeng Pages: 74
BF-88A
Brand: Baofeng Pages: 3
UV-B5
Brand: Baofeng Pages: 2

SR-C146
Brand: Standard Radio Pages: 18

GDI-IR2600
Brand: Grace Digital Pages: 52

airFiber AF-24
Brand: Ubiquiti Pages: 36

Easy Hunt
Brand: Zodiac Pages: 60

TK5
Brand: Intaride Pages: 4

HTD-828
Brand: Olywiz Pages: 3

19 Ultra III
Brand: Cobra Pages: 11

HAV-SR20
Brand: König Electronic Pages: 8

i-Talk T90
Brand: Intek Pages: 2

LX218
Brand: Midland Pages: 3

ML802
Brand: Midland Pages: 20

GXT444
Brand: Midland Pages: 16

VX-1700 Series
Brand: Vertex Standard Pages: 32

ITTF STARCOM21 XTS1500 B-Series
Brand: ILEAS Pages: 2


