


4
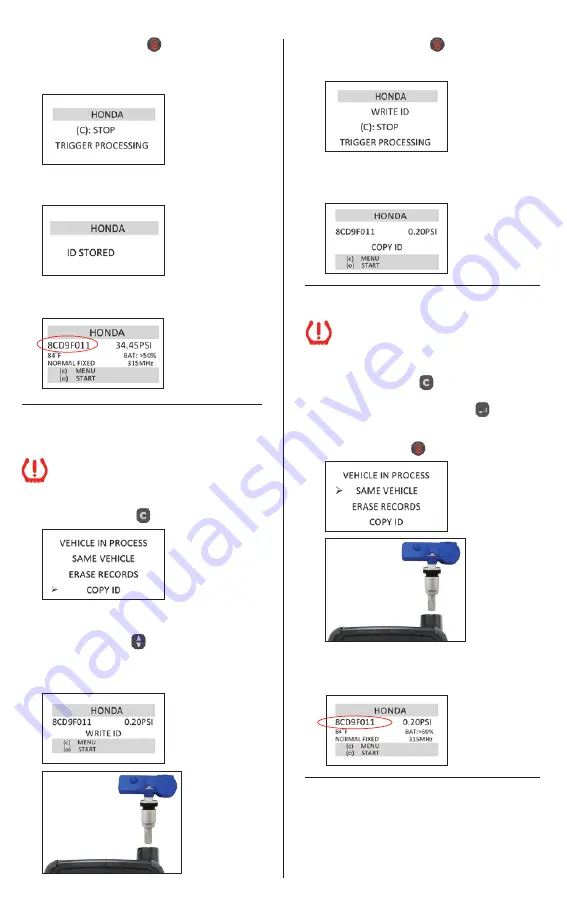
(7) Press the Transmit Key
. The tool will begin
to locate and receive data from the selected
tire sensor, indicated by the message
“TRIGGER PROCESSING”.
(8) The screen will indicate that the OE sensor ID
number has been stored into the tool’s memory.
(9) Display will show sensor information. Log OE ID
number and tire location.
Write ID to Clone-able sensor or
QWIK-SENSOR
™
Ensure the car being worked on is at least
10 feet from other vehicles and TPMS sensors
(OE, Clone-able, or QWIK-SENSOR
™
).
(10) Press the Cancel Key
to display sensor menu.
(11) To write the OE sensor ID that was just detected
to a new Clone-able sensor or QWIK-SENSOR
™
,
use the Arrow Keys
and select “COPY ID”
to display OE sensor information. Place the
Clone-able sensor or QWIK-SENSOR
™
in front of
T55003 antenna or in the cradle, as shown.
(12) Press the Transmit Key
to begin writing
the OE sensor ID number onto the Clone-able
sensor or QWIK-SENSOR
™
.
(13) The tool will display “COPY ID” and write the OE
sensor ID number onto the new Clone-able sensor
or QWIK-SENSOR
™
.
ID Verification
Ensure the car being worked on is at
least 10 feet from other vehicles and
TPMS sensors (OE, Clone-able, or
QWIK-SENSOR
™
).
(14) Press the Cancel Key
to go back to the
“VEHICLE IN PROCESS” menu. Scroll to “SAME
VEHICLE” and press Selection Key
. Hold the
programmed Clone-able sensor or QWIK-SENSOR
™
in front of the antenna or the cradle, as shown and
press Transmit Key
.
Match this number with the number recorded in step
(9) to verify that the correct OE ID number has been
written onto the Clone-able sensor or QWIK-SENSOR
™
.
Installation
(15) Break down tire in accordance with vehicle
manufacturer’s specifications, remove OE
sensor, install new sensor on wheel, replace tire
on car and pressurize. Ensure tire pressure is at
or above the minimum tire pressure listed on
the placard of the car.


