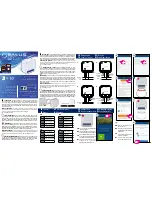
Electrical Panel
(Remove x5 screws)
Front Panel
(Remove x4 screws)
Installing the harness or harnesses to link a maximum of four machines together.
The harness should only be used to link heaters together when the master controller has been
removed from the master heater and mounted on the wall.
It is possible to connect the slave heaters into the spare plug on the harness adjacent to the
wall mounted controller or the spare plug on the harness inside the master heater.
1. Connect the harness to the spare plug adjacent to the wall mounted controller or the
spare plug in the heater. If using the plug in the heater feed the harness out through
the square aperture in the rear of the heater (See Fig 6). Ensure the cable is then fed
through one of the round slotted holes at the bottom of the aperture and secure the
black plastic bush already fitted to the cable in the slotted hole.
2. Route the harness to the heater to be connected (slave) and feed the cable in
through the square aperture at the rear of the heater and secure black plastic boss.
3. Disconnect the 4 way plug(s) connecting the fan(s) (depending on model) to the
controller in the slave heater and connect the motor plugs to the harness.
4. Secure the harness to the electrical panel with the clamp and screws provided.
If connecting another slave unit repeat procedure as above.
5. Secure front panels and switch on electric supply to heaters.
6. Ensure boiler is turned on and any other external controls are calling for heat.
7. Adjust master controller to desired speed and check that heaters are working
correctly.
(See page 5, Figure 7 for a diagram of linking multiply units together)
6
Follow these instructions when using the harness to mount the controller externally
from the heater:
ENSURE THAT THE ELECTRICAL SUPPLY TO THE PRODUCT HAS BEEN ISOLATED
1. Identify the front panel and the electrical panel (Shown in red, Fig 1).
FIG 1
2. Remove the screws attaching the front panel (retain this panel for later), then remove
the electrical panel to the chassis so that it becomes free (See fig 1).
Do not disconnect any wires at this point.
3. Turn the electrical panel over to reveal the circuit board of the speed controller.
Remove the four wires connected to the speed controller and trace the lead back to
the 4 way plugs which connect to the fans (This lead will be referred to as a “Control
Harness”). Separate this harness from the rest of the heaters wiring and remove it.
(Controller shown attached to a wall plate)
4. Turn the electrical panel back over and remove the screw securing the control knob.
Unscrew the nut securing the controller to the electrical panel and remove controller.
Retain all parts for future use. (Figure 4)
5. Connect the Control Harness to the 12m harness included in this kit. There are three
plugs on this end of the 12m harness and you can use any of these. Depending on
the model one or two of these will not be used.
3
VR1 HIGH
VR2 LOW
Back
Front
Figure 3
Note:
If your heater was built before
20/09/14 or the colours shown
in Fig 2 do not match those on
your unit please refer to the
below Key:
+10V (
Red
) =
Blue
Control (
Yellow
) =
Grey
Ground (
Blue
) = Black
Tacho (White) =
Brown


