5
6
Hold Down Br Operating Your Blind
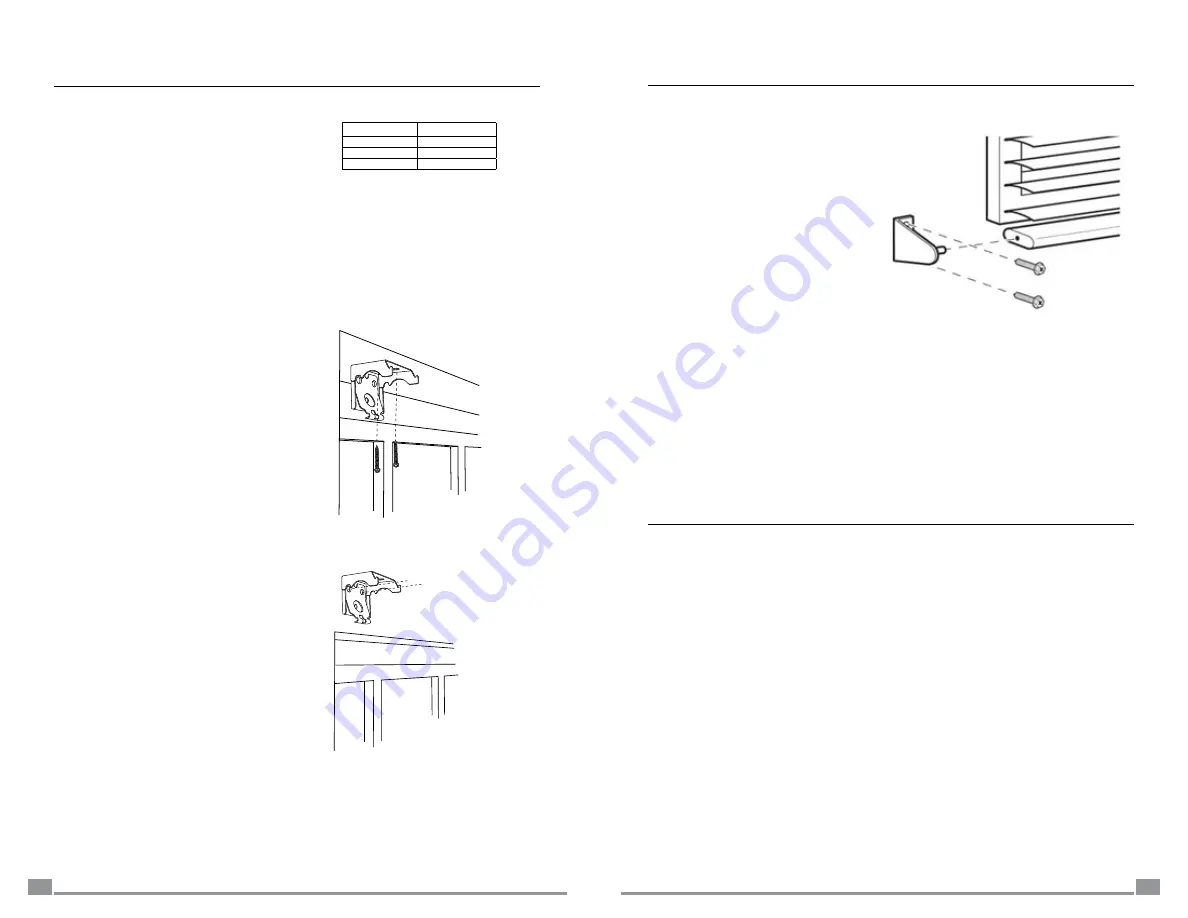
Attaching the Brackets
Attaching the Brackets
Position the first two
installation brackets along the
mounting surface and at each
end of the headrail.
Each bracket should be set 2"
from each end of the headrail.
When using a third or fourth
installation bracket if the width
requires, center it between the
end brackets. Make sure the
brackets will not interfere with
the cord mechanism or any
other internal parts.
Inside Mount
Center the shade in the
window frame. Mark the
bracket for mounting hole
locations, making sure they
are square and equally spaced.
Screw brackets into wall or
window jamb as required.
Outside Mount
Center the blind over the
window opening at the desired
height. Mark the position of
the bracket on the wall. Make
sure the brackets are level.
With the hold-down brackets
attached to the bottom rail,
lower the blind to the hold
down bracket mounting
surface and mark the bracket
locations. Attach the hold
down brackets at the bottom
of the window or door with the
included screws as shown. To
attach the bottom rail, gently
pull the brackets out slightly,
and insert the pins into the
holes on the bottom rail of
the blinds.
Operating Your Blind
To lower the blind,
pull the cord down and towards the center of the
shade to unlock the cord. Then, slowly release the cord until the shade
reaches the desired location. Move the cord past the outer edge of the
shade and let go to lock the cord.
To raise the blind,
pull the cord straight down until the shade reaches
the desired location. Move the cord past the outer edge of the shade
and let go to lock the cord.
Hold Down Brackets (optional)
BRACKET CHART
Blind WIDTH
# OF BRACKETS
Up to
60
"
2
60
1
/
8
" to
77
3
/
4
"
3
77
7
/
8
" and up
4
Summary of Contents for Metal Blinds
Page 6: ...9 10 Notes Notes...


