


3
4
Remove the blind from the
packaging.
Do not dispose of packaging
until the blind is operating to
your satisfaction.
Check the diagram to make sure
you have all the parts indicated
for the appropriate type of
installation.
NOTE
: Do not lower the blind yet.
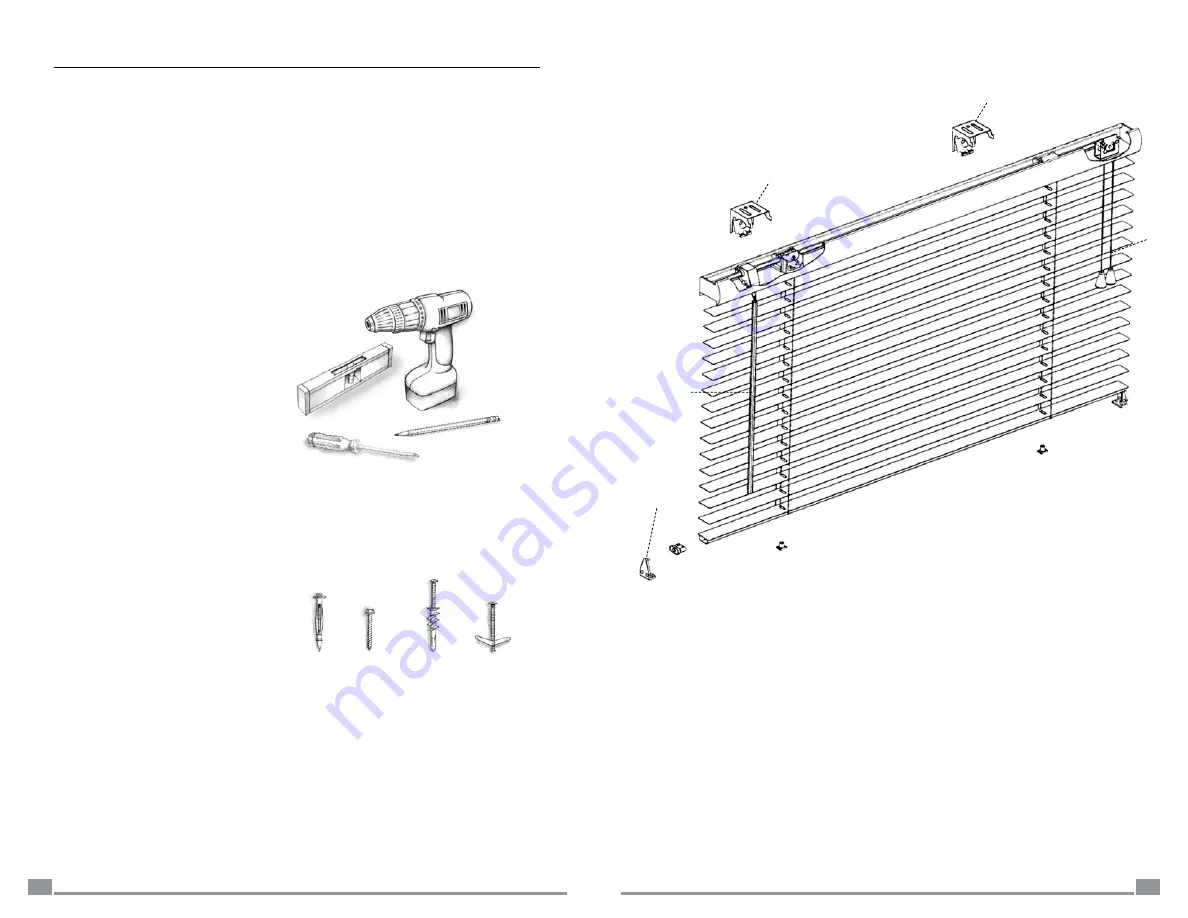
Tools
you will need to install
your blind: pencil, screwdriver,
1
/
4
" nut driver, level, pliers and a
drill with
1
/
8
" drill bit.
Your brackets must be securely
attached to the mounting
surface. When screwing into a
surface, the included screws
must hit wood studs. Otherwise,
use a secure fastener as
illustrated (not included).
Wallboard Or Plaster:
Use a secure fastener designed
for hollow wall applications.
Metal:
Pre-drill holes and use
the included screws.
Concrete, Stone, Brick Or
Tile:
Use a masonry drill and
appropriate plugs, anchors or
screws.
When selecting a fastener, make
sure it is designed to support
the weight of the product being
installed. Follow the fastener
manufacturer’s instructions for
proper installation.
Getting Started
screws
(included)
toggle
bolt
self drilling
anchor
molly
bolt
Getting Started
Parts of your Shade
note
: When installing screws with a drill,
be careful not to over-tighten. This may
cause the screw to break off in the wall
or window frame.
Metal Blinds
tilt
wand
hold down
bracket
(optional)
bracket
bracket
lift
cords
Summary of Contents for Metal Blinds
Page 6: ...9 10 Notes Notes...


