NOTE: Installation processes such as this may require the use of your original, licensed
copy of Windows. Please have your Windows CD available before proceeding with the
installation.
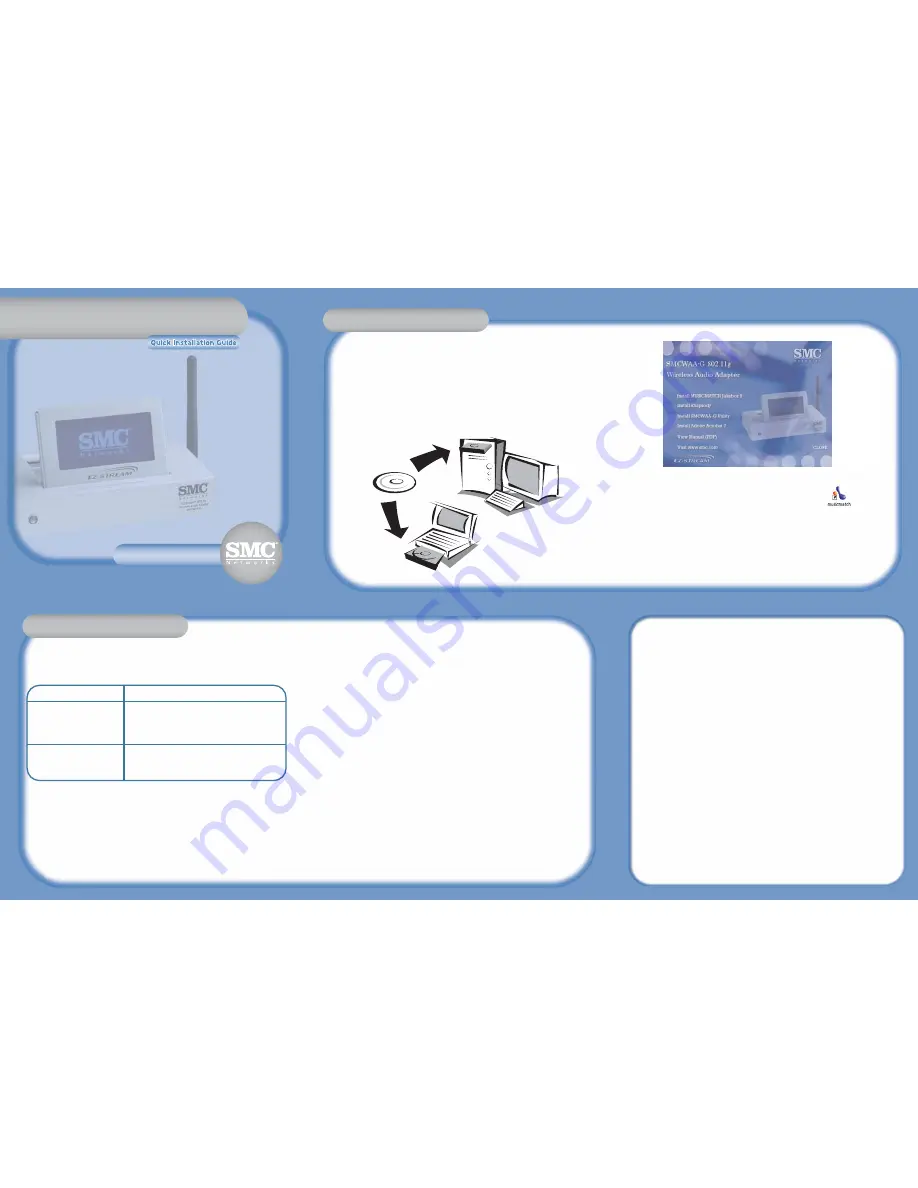
1. Insert the EZ Installation Wizard and Documentation CD.
Hardware Installation
Using The EZ 3Click Wizard
SMCWAA-G
EZ-Stream™ 802.11g
Wireless Audio Adapter
Installing Musicmatch Jukebox
Installing Wireless Audio Adapter
EZ Installation CD
Remote Control
Using the Remote Control
Software Installation
Software Installation
Hardware Installation
Using The EZ 3Click Wizard
SMCWAA-G
EZ-Stream™ 802.11g
Wireless Audio Adapter
EZ-Stream™ 802.11g
Wireless Audio Adapter
EZ-Stream™ 802.11g
Wireless Audio Adapter
EZ-Stream™ 802.11g
Wireless Audio Adapter
EZ-Stream™ 802.11g
Wireless Audio Adapter
Installing Musicmatch Jukebox
Installing Wireless Audio Adapter
EZ Installation CD
Remote Control
Using the Remote Control
Software Installation
Hardware Installation
Using The EZ 3Click Wizard
SMCWAA-G
SMCWAA-G
SMCWAA-G
SMCWAA-G
EZ-Stream™ 802.11g
Wireless Audio Adapter
Installing Musicmatch Jukebox
Installing Wireless Audio Adapter
EZ Installation CD
Remote Control
Using the Remote Control
Software Installation
Information furnished by SMC Networks, Inc. (SMC) is believed to be accurate and reliable.
However, no responsibility is assumed by SMC for its use, nor for any infringements of
patents or other rights of third parties, which may result from its use. No license is granted
by implication or otherwise under any patent or patent rights of SMC. SMC reserves the
right to change specifications at any time without notice.
SMC Networks, Inc.
38 Tesla
Irvine, CA 92618
Copyright © SMC Networks, Inc., 2005. All rights reserved.
SMC is a registered trademark; and EZ-Stream is a trademark of SMC Networks, Inc.
Other product and company names are trademarks or registered trademarks of their
respective holders.
The wireless network should be installed and running before you attempt to install the
Wireless Audio Adapter. See table below for descriptions of different network
environments.
Network Environment
Description
Wireless, via an Access Point
•
DSL/cable modem
or wireless router
•
Access Point (AP) or wireless router
•
PC with wireless connection to AP
•
Wireless Audio Adapter connects wirelessly to AP
Wired, Via Broadband Router
•
DSL/cable modem
•
PC with wired adapter
•
Wirerless Audio Adapter connected
to the router by CAT-5 ethernet cable
1. Insert the provided batteries into the remote control.
2. Connect the provided RCA audio cable from the SMCWAA-G to your home audio
system.
3. Plug the provided power supply into your wall socket and connect the power cable
to the SMCWAA-G.
4. Wait for the SMCWAA-G to power up. It will attempt to connect automatically to your
wireless network using its built-in default settings. If it is not able to connect, the
LCD will display a list of available wireless networks for you to choose from. Scroll
down the list and select the desired WLAN.
5. If SSID broadcast is disabled on your router, you will need to configure the SSID
manually.
6. If encryption is enabled on your wireless network, you will be prompted to enter a
Key. Enter the correct encryption key. Once completed, the SMCWAA-G will save
the settings and reboot.
7. A welcome screen will be displayed while the SMCWAA-G is connecting to the
network. After a connection has been successfully established, the top level menu
will be displayed. Scroll down, select your Music Server and choose your audio
content (i.e. – genre, artist, album, playlist, song). Start streaming!
* For more detailed instructions, please refer to the manual on the documentation CD.
Hardware Installation
Using The EZ 3Click Wizard
SMCWAA-G
EZ-Stream™ 802.11g
Wireless Audio Adapter
Installing Musicmatch Jukebox
Installing Wireless Audio Adapter
EZ Installation CD
Remote Control
Using the Remote Control
Software Installation
2. Click the [Install MUSICMATCH Jukebox 9] button to continue.
3. Please wait while the utility begins to load. Then follow the instructions
on the PC screen until the installation is complete.
4. Start the Musicmatch Jukebox software by clicking this icon:
5. From the “View” menu, click “My Library”. From the “File” menu, choose “Add New
Tracks… and select music files from your own collection. Click “Add”.
6. From the “Options” menu, choose “Settings”. Click “CD Lookup/Connectivity” and verify
that the UPnP Music Server is enabled. If it is in a [Not Running] state, select the
“Enable Music Server” checkbox and you should then see the message [Running] appear.
NOTE: If you also have a SMCWMR-AG installed on your network, please remember
that it only works with the Media Server software that came with it. You must disable
the Musicmatch UPnP Music Server in order for the SMCWMR-AG to operate properly
with the EZ-Stream Universal Media Server software that came with it.
FOR TECHNICAL SUPPORT, CALL:
From U.S.A. and Canada
(24 hours a day, 7 days a week)
(800) SMC-4-YOU; Phn: (949) 679-8000;
Fax: (949) 679-1481
From Europe : Contact details can be found
on www.smc.com
INTERNET
E-mail addresses:
Driver updates:
http://www.smc.com/index.cfm?action=tech
support drivers downloads
World Wide Web:
http://www.smc.com/
If you are looking for further contact
information, please visit
www.smc.com
38 Tesla
Irvine, CA 92618
Phone: (949) 679-8000
Model Number: SMCWAA-G
Hardware Installation
Using The EZ 3Click Wizard
SMCWAA-G
EZ-Stream™ 802.11g
Wireless Audio Adapter
Installing Musicmatch Jukebox
Installing Wireless Audio Adapter
EZ Installation CD
Remote Control
Using the Remote Control
Software Installation
Hardware Installation
Hardware Installation
Using The EZ 3Click Wizard
SMCWAA-G
EZ-Stream™ 802.11g
Wireless Audio Adapter
Installing Musicmatch Jukebox
Installing Wireless Audio Adapter
EZ Installation CD
Remote Control
Using the Remote Control
Software Installation