background image

CAT-601S Auto Transmission Cleaner and Fluid Exchanger User’s Manua

l

6

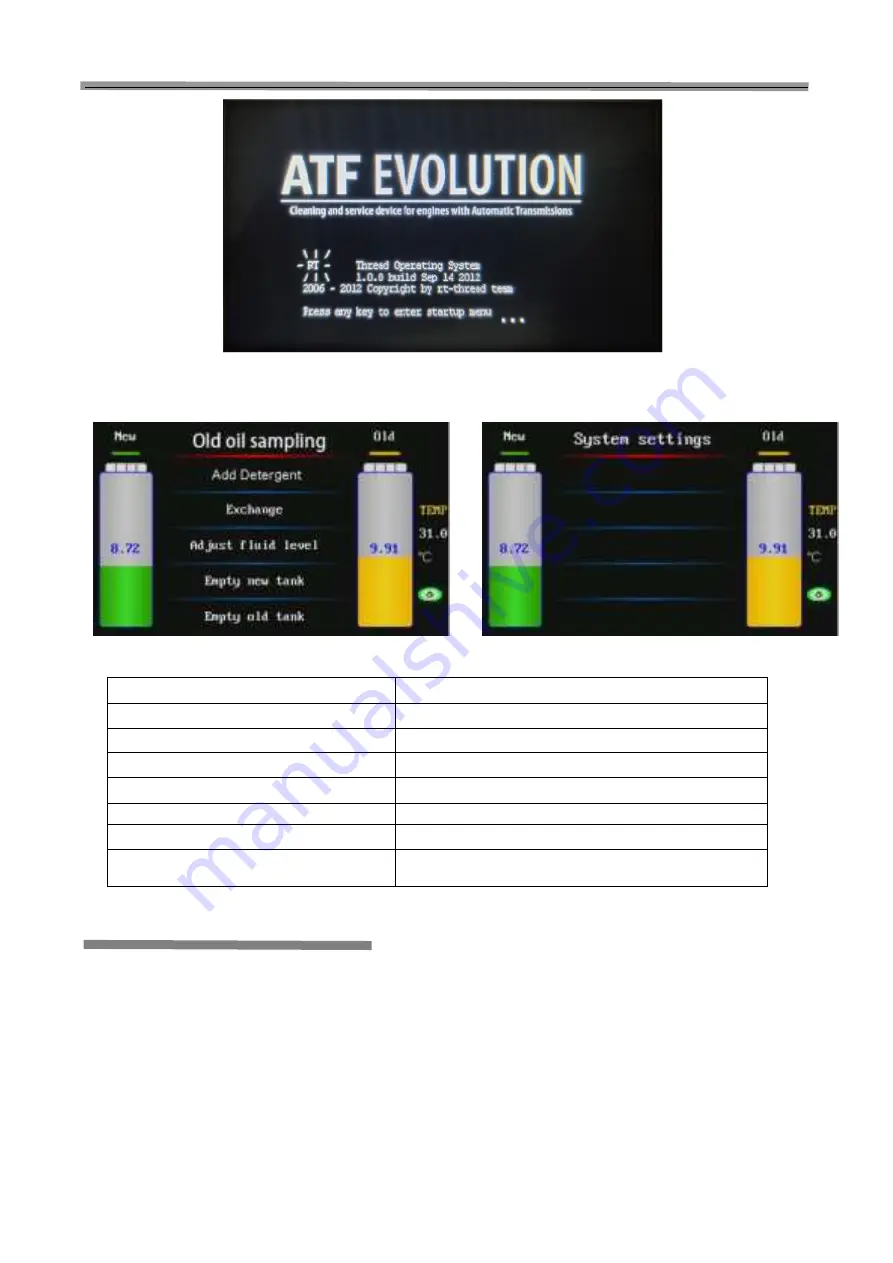
Fig.6

2. The main menu of display screen is as shown in Fig.7.

Fig.7

Item

Description

Old oil sampling

Sampling the oil from AT

Add detergent

Add ATF detergent to AT

Exchange

Exchanging ATF

Adjust fluid level

Adjusting the quantity of fluid inside AT

Empty new tank

Draining left fluid inside new fluid tank

Empty used tank

Draining used fluid inside used fluid tank

System setting

Modifying the system parameter, e.g.: Calibration of electronic

scale, adjusting contrast, language selection, database entry.

Operations

Note:

During the unit is in operation, it will produce the

vibration with a certain frequency and noise. This is

the normal performance. Do not take it as the
malfunction.

1. Preparation

1.1 Jack vehicle

Jack the vehicle to keep the drive wheel off the ground

at least 200mm, apply the parking brake and block the

driven wheels in front and behind.

1.2 Connecting hose

1)

Locate the fluid hose that is connected between the

radiator and transmission at the most convenient

location and then disconnect the adaptor. Locate the

matched connector inside the connector box and

connect it to the disconnected adapter.

2)

Connect

the

two

hoses

marked

“TO

TRANSMISSION” of CAT-601S to the disconnected

two ends of the hoses of automatic transmission (no

necessary to consider the direction of the fluid flow).

Refer to Fig.7.

Summary of Contents for CAT-601S

Page 1: ...CAT 601S Auto Transmission Cleaner and Fluid Exchanger User s Manual i Version V1 00 000 Revised date 06 10 2021 ...

Page 2: ...ngdong P R China to request written permission to use Materials on this manual for purposes or for all other questions relating to this manual Copyright Information Copyright 2021 by SHENZHEN SMARTSAFE TECH CO LTD All rights reserved No part of this publication may be reproduced stored in a retrieval system or transmitted in any form or by any means electronic mechanical photocopying recording or ...

Page 3: ...ld be placed vertically and should not be placed upside down When changing fluid the operation should be performed by properly trained personnel The quality of the selected ATF must conform to the direction as specified in the manual of the auto to be operated Otherwise SMARTSAFE shall not be liable for any direct or consequential damages Note specifying operations that require attention when oper...

Page 4: ...oil 8 4 Circulating cleaning 8 3 1 Fill detergent to auto transmission 8 3 2 Circulating cleaning 8 3 3 Finish circulating cleaning 8 5 ATF exchange 8 5 1 Direct Input 9 5 2 Vehicle Selection OK 9 6 Adjusting fluid level 10 6 1 Increase fluid amount 10 6 2 Decrease fluid amount 11 7 Empty new fluid tank 11 8 Empty used fluid tank 11 9 System setting 11 9 1 Sensor calibration 12 9 2 Select transmis...

Page 5: ...full automatic equivalent exchange of new and used fluid Manually adding and upgrading database function Various special adapters are applicable to vehicle types made in Europe America and Asia Effectively resolve the incomplete fluid exchange of manual operation It improves the working performance of auto transmission It prolongs the work life of transmission Working Conditions Ambient temperatur...

Page 6: ...uel hopper 23 501020008 Left column 6 501020014 Back door 24 501020010 Roof 7 501020012 Partition plate 25 501020013 Bottle clip 8 501020028 Socket guard 26 501020004 Left side board 9 501020023 Rear wheel cover 27 501020015 Operation Panel 10 Rear wheel 28 501020021 Cleaning liquid tank 11 501020020 Around the tube rack 29 501020011 Sump 12 501020019 Rear axle 30 501020016 Oil filter plate 13 503...

Page 7: ...for fluid draining 21 Temperature sensor 22 Old oil sampling valve 4 Circuit connection diagram The circuit connection diagram is as shown in Fig 4 Fig 4 J8 To solenoid V2 J25 To unit serial port cable J12 To solenoid V1 J14 To temperature sensor J17 To solenoid V3 J15 To used fluid tank sensor J22 To solenoid V4 J16 To new fluid tank sensor J78 To solenoid V5 ATN1 To Bluetooth antenna J21 To oil ...

Page 8: ... one time to stop current operation and press once more to return to previous interface DEL Press to delete the previous character in focused window and in database interface press it you can delete some menu item 1 In main menu you can switch on off the lights of sight indicators 2 In focused window press it you can OK the character of 3 When OKing some menu option on database interface press it ...

Page 9: ...ing the unit is in operation it will produce the vibration with a certain frequency and noise This is the normal performance Do not take it as the malfunction 1 Preparation 1 1 Jack vehicle Jack the vehicle to keep the drive wheel off the ground at least 200mm apply the parking brake and block the driven wheels in front and behind 1 2 Connecting hose 1 Locate the fluid hose that is connected betwe...

Page 10: ...ing Preparation please connect the inlet outlet oil pipe of device with vehicle transmission and prepare the bottle for sampling open the valve of old oil samplingor manually open the valve on the 10 second countdown interface 1 Click Old oil sampling and enter old oil sampling currently the default countdown is 10 seconds 2 It prompts whether to perform old oil sampling or not Press OK to continu...

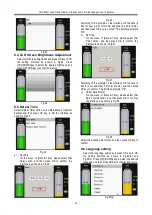
Page 11: ...ting Refer to Fig 12 Fig 12 4 Print is completed or cancelled will pop up 10 minutes cycle cleaning countdown Refer to Fig 13 Fig 13 4 2 Circulating cleaning After the detergent is filled into the hose start the engine and the fluid will circulate from the CAT 601S pipelines to the Automatic Transmission In order to speed up the circulating process it is advisable to perform the gear shift operati...

Page 12: ...in Fig 15 Fig 15 Be sure that there is no leak in the pipelines and press OK key to exchange as shown in Fig 16 Fig 16 After the exchange operation is finished the system will automatically pop up print menu Press OK key select print press RETURN key to cancel printing Refer to Fig 17 Fig 17 Print is completed the system will return to the interface as shown in Fig 14 5 2 Vehicle Selection OK Sele...

Page 13: ...for the detailed operation 2 Disconnect the unit and resume the hoses of the transmission 3 Start the engine and check if there is oil leakage in the on vehicle pipelines Note Switch each gear when exchanging The time of each shift should stay about half minute which depends on actual situation the ATF inside fluid control pipeline can be exchanged To ensure the exchange quality the quantity of ne...

Page 14: ...t the two hoses marked with TO TRANSMISSION are not connected with the vehicle to be maintained 2 Open the handle valve on the fluid hose marked with EMPTY and then place the hose into container 3 The system will OK into the interface for Empty new tank and automatically start fluid draining operation as shown in Fig 29 Fig 29 4 The unit will drain fluid until the hose marked with Empty has no oil...

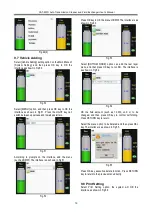
Page 15: ...he interface is as shown in Fig 34 Fig 34 5 Put the weight on the plate When the value displayed on the interface is stable please press OK key to continue The interface is as shown in Fig 35 Fig 35 6 When the value displayed on the interface is stable please press OK key again to save the data The interface is as shown in Fig 36 Fig 36 7 Remove the weight and then place the empty new fluid tank o...

Page 16: ...ng cup and then press OK key to continue The interface is as shown in Fig 40 Fig 40 13 According to the prompts on the interface OK the amount such as 0 3L of detergent to be added into the system and then press OK key to start adding The interface is as shown in Fig 41 Fig 41 14 Observe the measuring cup s scale change status press OK key to save the speed value when the detergent amount in the s...

Page 17: ...for year 2 bits for month and other 2 bits for date and then press OK key to confirm The interface prompts OK b Set Time On the menu of Date Time please select Set Time option and then press OK to confirm the interface is as shown in Fig 47 Fig 47 According to the prompts on the interface OK the time 2 bits for hour and other 2 bits for minute and then press OK key to confirm The interface prompts...

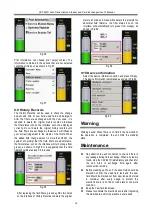
Page 18: ...terface is as shown in Fig 51 Fig 52 Press OK key to OK the menu of BMW The interface is as shown in Fig 53 Fig 53 Select BOTTOM NODE option can add the last layer menu and then press OK key to confirm The interface is as shown in Fig 54 Fig 54 OK the fluid amount such as 12 000 unit L to be changed and then press OK key to confirm performing Press RETURN key to return Select the menu option to be...

Page 19: ...ter replacing the fluid filters press key DEL two times on the interface of History Records to delete the original history records and mean while delete the prompts for abnormal fluid filters i e the filter status icon on the interface will automatically turn green from orange as shown in Fig 59 Fig 59 9 10 Device information Select the device information option and press OK key The device informa...

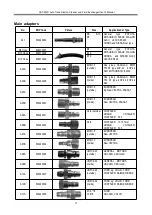
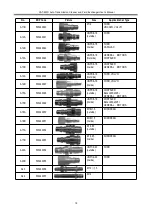
Page 20: ...e group CADILLAC BMW 750 AT type 4HP 22 4HP 24 A42 A05A 503240029 M18 1 5 outside EUROPEAN Eg New VECTRA PASSAT A05B 503240030 M18 1 5 inside EUROPEAN New VECTRA PASSAT A06A 503240031 G1 4 outside CHRYSLER GRAND VOYAGER CHRYSLER 300 A06B 503240032 G1 4 CHRYSLER 13 157mm GRAND VOYAGER CHRYSLER 300 A07A 503240033 M18 1 5 outside EUROPEAN New VECTRA A07B 503240034 M18 1 5 inside EUROPEAN New VECTRA A...

Page 21: ... Inside CHRYSLER GENERAL MOTORS A14A 503240046 UNF5 8 18 Outside FORD VOLVO A14B 503240047 UNF5 8 18 Inside FORD VOLVO A15A 503240048 UNF5 8 18 outside CHRYSLER Benxc200 s325i GENERAL MOTORS A15B 503240049 UNF5 8 18 inside CHRYSLER Benxc200 s325i GENERAL MOTORS A16A 503240050 M18 1 5 outside EUROPEAN A16B 503240051 M18 1 5 inside EUROPEAN A17A 503240052 Φ14 85 outside A17B 503240053 Φ14 95 inside ...

Page 22: ...ve of SMARTSAFE has any authority to bind SMARTSAFE to any affirmation representation or warranty concerning SMARTSAFE automotive meters except as stated herein Disclaimer THE ABOVE WARRANTY IS IN LIEU OF ANY OTHER WARRANTY EXPRESSED OR IMPLIED INCLUDING ANY WARRANTY OF MERCHANTABILITY OR FITNESS FOR A PARTICULAR PURPOSE Order Information Replaceable parts can be ordered directly from your SMARTSA...

Reviews: