background image


NAVIGATING THE ON SCREEN DISPLAY (OSD) 

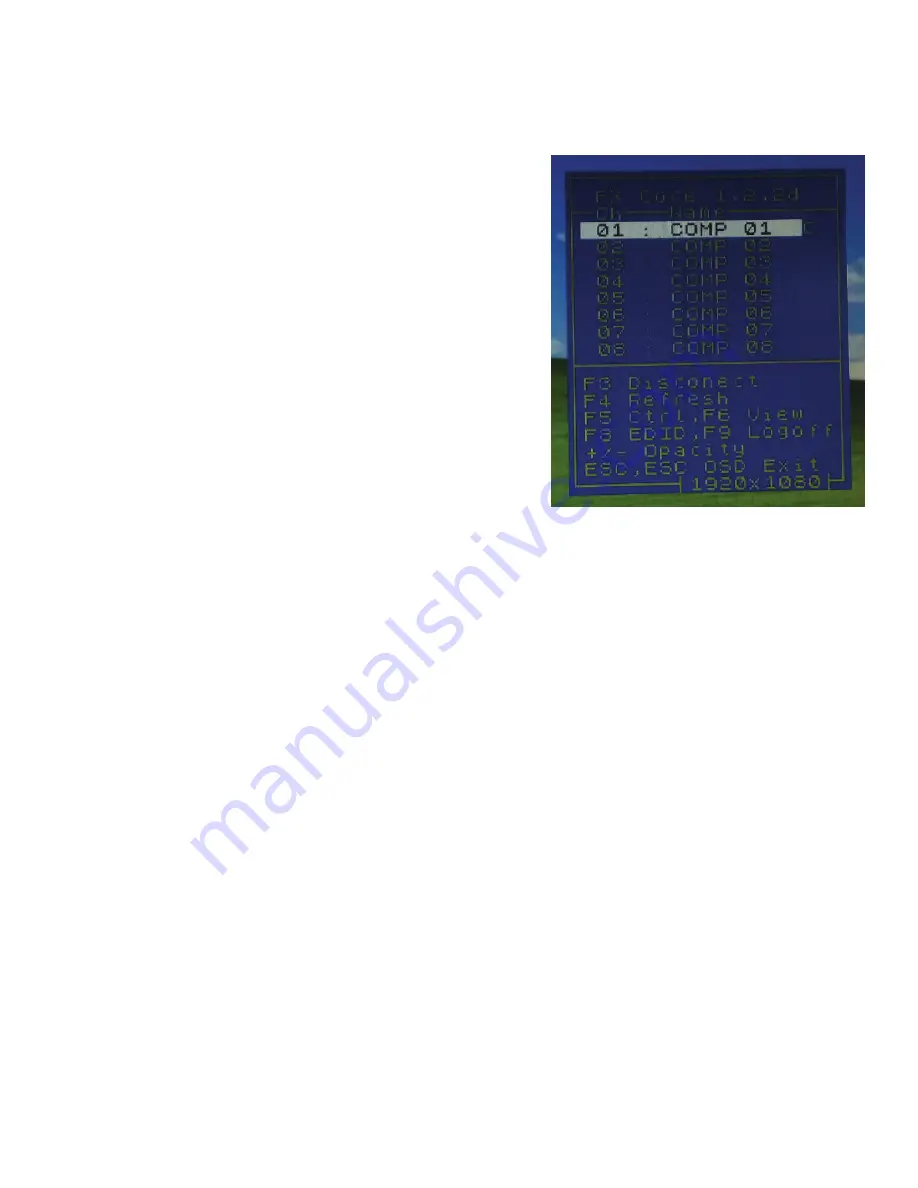
To access the OSD menu, use the keyboard attached to the FDX-3000-MX Receiver and press 
the Hot Keys Ctrl+Ctrl+'o'. The OSD menu will display all of the inputs in a list. Commands can 

be performed in the OSD menu through the use of the keys outlined on the bottom of the menu.  
 
The commands include: 
Ctrl+Ctrl+'o' (Activate the OSD Menu) 

F3 Disconnect 
F4 Refresh 
F5 CTRL (Control) 
F6 View 

F8 EDID (Learn EDID) 
F9 Logoff 
+/- Opacity (Makes the OSD Menu more or less transpar-
ent) 
ESC+ESC (Exit OSD Menu) 

 
Use the up and down arrow keys to navigate through the 
selections in the menu and press the respective key to 
perform that command. You are not able to control a de-

vice while on the OSD menu. To exit the OSD menu press 
the keys Esc+Esc on the keyboard.    


Figure 6-1 

EDID Learning 

To learn the EDID of a monitor,  
1.  Connect a USB Keyboard and Mouse to the receiver connected to that monitor. 
2.  Enter OSD on that monitor using the Hot Keys Ctrl+Ctrl+'o'.  

3.  On the OSD menu, navigate to the desired device and enter "Control Mode" by pressing F5.  
4.  While in control mode, press F8 "EDID". Learning the EDID should only take a few seconds.  
5.  Afterwards, exit OSD mode by pressing ESC+ESC and the EDID will have been learned. 
 

Controlling a remote computer 

1.  Connect a USB Keyboard and Mouse to the receiver connected to your monitor. The receiver must be 

connected to the transmitter connected to the computer you want to control via the FXCORE. 

2.  Enter OSD on that monitor using the Hot Keys Ctrl+Ctrl+'o'.  
3.  Press the up and down arrow keys to highlight the computer you want to control. 
4.  Press F5 “CTRL” to select the computer. 
5.  Press ESC+ESC to exit the OSD menu. 
6.  Your keyboard and mouse are now connected to the selected computer. 

If your display is viewing a different computer than the one you want control of, when you hit F5 on the 
selected computer, your display will switch to that computer. 
 

Change Display from one computer to another 

Press Ctrl+Ctrl+'o' to activate the OSD menu. 
Press the up or down arrows to highlight the computer output you want to view. 
Press F6 to display that systems output on the display. 

Press ESC+ESC to exit the OSD menu. 


Summary of Contents for FXCORE MX88

Page 1: ...Made in U S A www SmartAVI com 1 800 AVI 2131 FXCORE MX88 User Manual 8X8 KVM Fiber Optic Matrix Switch Delivers KVM Operations Uncompressed HD Signal Routing Long Distance KVM Fiber Optic Matrix Swit...

Page 2: ...ON FXCM MX0808S 1 FXCore Fiber Optic Multimode 8x8 KVM Matrix Switch CCPWR06 1 6 Power Plug Cable 1 Quick Start Guide EN QKVM EAR P 2 Mounting Brackets CCRS232MF06 1 RS 232 Cable Male to Female WHAT S...

Page 3: ...actured in the USA FEATURES Available in Multi mode and Single mode models Device to Matrix routing distance of 15 miles with the single mode model 30 miles from device to device Device to Matrix rout...

Page 4: ...rower diameter that virtually eliminates distortion or signal overlap because there is only 1 sig nal This provides the least signal attenuation and provides transmission over much longer distances th...

Page 5: ...TX Output Optical Power Average 10dBm RX Input Optical modulation amplitude min 17dBm Channel Routing 8x8 Non blocking Control RS232 9600bps Operating Distance Single mode Up to 15 miles 30 miles tran...

Page 6: ...Audio cables from up to 8 Audio speakers to the FDX 3000 MX Receivers 8 Optionally connect up to 8 RS 232 devices to the FDX 3000 MX Receivers 9 Connect Duplex Fiber Optic cables from each Transmitter...

Page 7: ...OSD menu navigate to the desired device and enter Control Mode by pressing F5 4 While in control mode press F8 EDID Learning the EDID should only take a few seconds 5 Afterwards exit OSD mode by press...

Page 8: ...ough the Com mand mode using a Terminal How to properly create an RS 232 connection between a PC and the FXCORE Establish a connection to the FXCORE 1 Connect a straight through male to female RS 232...

Page 9: ...CccuuD CR Broadcast Port Broadcast video and audio to all outputs with C or V per mission FnnBcc uu CR Disable Broadcast Port Disable the broadcast port cross point FnnBD CR View Port View an input fr...

Page 10: ...Password Pass Commands for Debug mode only Permissions as follows C Control user can control and view this PC V View user can view only can not control this PC D Disabled access to this PC is disabled...

Page 11: ...t AVI Any replacement product could be new or like new provided that it has functionality at least equal to that of the product being replaced Smart AVI limited warranty is valid in any country where...

Page 12: ...arranties of merchant ability and fitness for particular purpose SmartAVI will not be liable for errors contained herein or for inci dental or consequential damages in connection with the furnishing p...

Reviews: