background image


15 

4K-Wall TCP/IP control is a feature that allows mode switching and other configurations to be con-
trolled remotely via HTTP or TELNET. Manage the switching functions of your 4x4 matrix with ease 
from anywhere in the world. You can save input/output configuration presets for easy access. 
TELNET access provides transparent command control of your 4K-Wall, perfect for use with auto-
mated third-party control software.  

 
For more information, visit 

www.smartavi.com

 
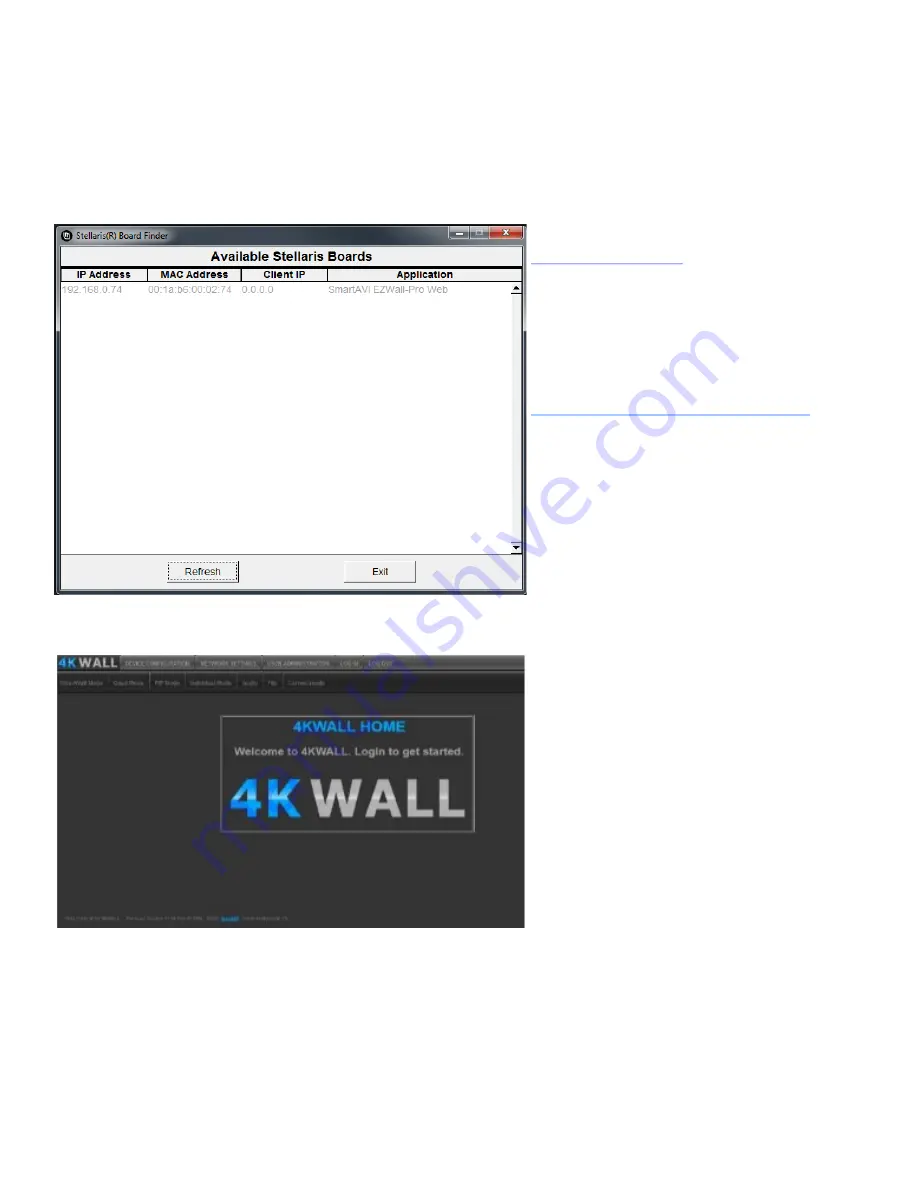
Start by downloading our software that 
can detect the IP address for the 4K-
Wall. This software is conveniently avail-
able on our website; please visit: 
 

https://smartavi.com/helpful-links/


Download and install: 

 
Finder: Detects 4K-Wall 

 
Launch the network finder software and 
4K-Wall and its IP address should appear 
in the display. 


Enter the IP address into a web browser 
of your choice. You should see the 
4KWALL Home/ Welcome page as 
shown in Figure 16-2.  


Click on the LOG IN button in the top tool bar. 
Enter the User ID and Password in the Login page. 
The User ID and Password are case sensitive. 
User ID = Admin, Password = Pass 
 
You can change the User ID and Password by clicking the USER ADMINISTRATION button. 

CONTROL VIA ETHERNET (TCP/IP)


Summary of Contents for 4K-Wall

Page 1: ...grated 2x2 Video Wall Controller and 4x4 Port HDMI Real Time Switch Matrix with On Screen Display Control No Software Required 1 800 284 2131 www smartavi com HDMI DVI Video Wall Controller and 4x4 4K...

Page 2: ...___________________________________________ 3 TECHNICAL SPECIFICATIONS_____________________________________________________________ 4 INSTALLATION______________________________________________________...

Page 3: ...Better still there s no software re quired as all content management options are effortlessly controlled via the 4K Wall video wall con troller unit itself There s no need for additional drivers Just...

Page 4: ...to 122 F 0 to 50 C Working Humidity Up to 85 RH no condensation Storage Temperature 4 to 149 F 20 to 65 C Storage Humidity Up to 90 RH no condensation USB MEDIA PLAYER USB player requires the IR Remot...

Page 5: ...t for additional control 7 Turn on the 4K WALL 8 Wait for the unit to initialize This should take less than 1 minute LEARN EDID Once 4K WALL 2x2 boots up it will automatically default to HDMI Audio fo...

Page 6: ...uad Mode User can divide each screen into four sections with all four in puts playing on each screen Users can place each screen in different loca tions further enhancing the 4K WALL s matrix function...

Page 7: ...OSD WITH THE FRONT PANEL Figure 7 1 To change modes with the OSD navigate using the following buttons on the front panel shown in 7 1 Front Panel Navigation 1 Down 2 UP 3 Left 4 Right FULL Enter OK P...

Page 8: ...deo wall should now display the selected input Full Mode Routing individual inputs to individual output displays FULL MODE Users can take advantage of full matrix functionality by routing any of the f...

Page 9: ...y Press the MENU button and navigate to highlight QUAD Press FULL to select into QUAD and use 1 Down or 2 UP button to highlight and select the de sired input number Press FULL The selected input numb...

Page 10: ...to highlight PiP Press FULL to select into PiP and use 1 Down or 2 UP button to highlight and select the desired input number to be set as the largest display Press FULL The other inputs will be disp...

Page 11: ...2 Please note that local EDID will only learn the EDID of Output 1 Please note that Factory Reset will restore any adjusted values back to default Figure 7 6 Bezel Compensation Bezel Compensation only...

Page 12: ...default Figure 7 8 Screen Adjust Screen Adjust allows the user to adjust the brightness of each individual output if necessary Flip Unflip allows the user to flip the top row of monitors 1 2 to be or...

Page 13: ...13 ON SCREEN DISPLAY OSD CONTINUED OSD Factory Reset Factory Reset will restore any adjust values back to default Please note 4K WALL will always default back to HDMI Audio for the EDID Figure 7 10...

Page 14: ...ay OSD gives users great flexibility and ease of use when looking to manage their video wall It can be operated with the IR Remote Control IR REMOTE CONTROL The 4K WALL will only respond to the remote...

Page 15: ...e that can detect the IP address for the 4K Wall This software is conveniently avail able on our website please visit https smartavi com helpful links Download and install Finder Detects 4K Wall Launc...

Page 16: ...are using a USB to COM port adapter and need to identify the COM port used do the follow ing Click on the start button Click on the Control Panel Click on Device Manager Click on the arrow next to Por...

Page 17: ...to view System Information i Port src res EDID HPD audio 1 HDMI 1920x1080 HDMI Audio ON 3 2 HDMI 1920x1080 HDMI Audio ON 3 3 HDMI 1920x1080 HDMI Audio ON 3 4 HDMI 1920x1080 HDMI Audio ON 3 Current Ou...

Page 18: ...on of available modes All typed characters must be upper case 1 Video Wall Mode Stretch one Source over 4 screens in a 2x2 array V x CR ex V 1 CR this command will stretch input 1 over 4 screens 2 Ful...

Page 19: ...on settings 115200 N 8 1 no flow control To start the bootloader send the following command BOOTLOADER Once 4K Wall receives the bootloader com mand and returns the Starting bootloader acknowledge lau...

Page 20: ...t AVI Any replacement product could be new or like new provided that it has functionality at least equal to that of the product being replaced Smart AVI limited warranty is valid in any country where...

Page 21: ...l not be liable for errors contained herein or for incidental or consequential damages in connection with the furnishing performance or use of this material No part of this document may be photocopied...

Reviews: