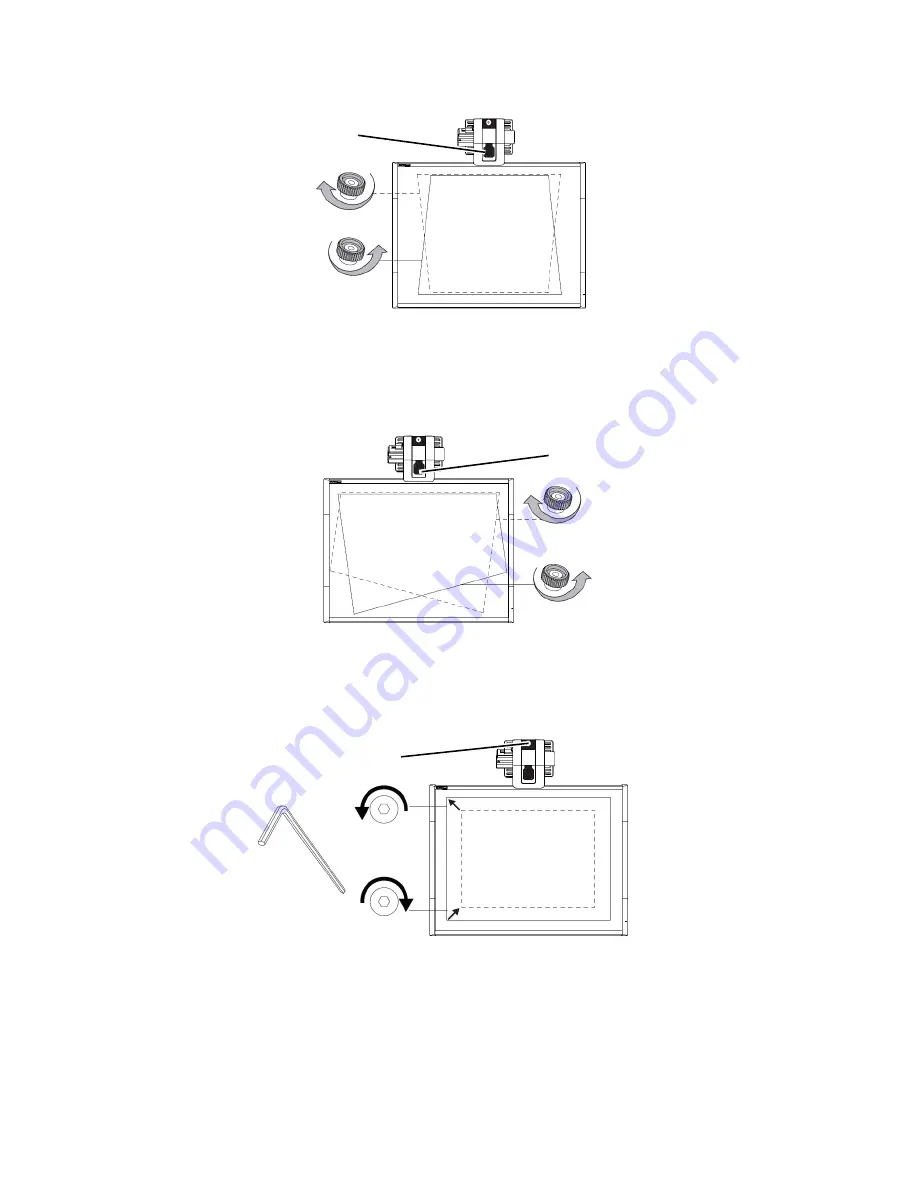
4. Rotate thumbscrew 1 until the left and right sides of the image are parallel.
NOTE:
The image moves up and down when you adjust the thumbscrew. Use in combination with the hex
adjustment screw at the base of the boom (see step 3).
5. Rotate thumbscrew 2 to adjust the horizontal keystone, until the top and the bottom of the image are parallel,
and the image appears rectangular.
NOTE:
This thumbscrew also rotates and moves the image to the left or right. Use in combination with the
thumbscrew on the top of the projector (see step 2) to align the image.
6. Use the included hex key to adjust hex screw 3 to change the size of the image.
NOTE:
Adjusting this screw may affect the other adjustments.
7. Repeat steps 1 through 6, using smaller increments. Adjust the image so that the top corners of the projected
image fit into the top corners of the interactive whiteboard’s screen.
8. When you are finished adjusting the image size, adjust the focus if necessary.
9. Secure the pen tray brackets to the wall.
You’ve completed the image alignment.
Thumbscrew
1
Thumbscrew
2
Hex
Screw 3


