


CHAPTER 2
INSTALLING THE DISPLAY
19
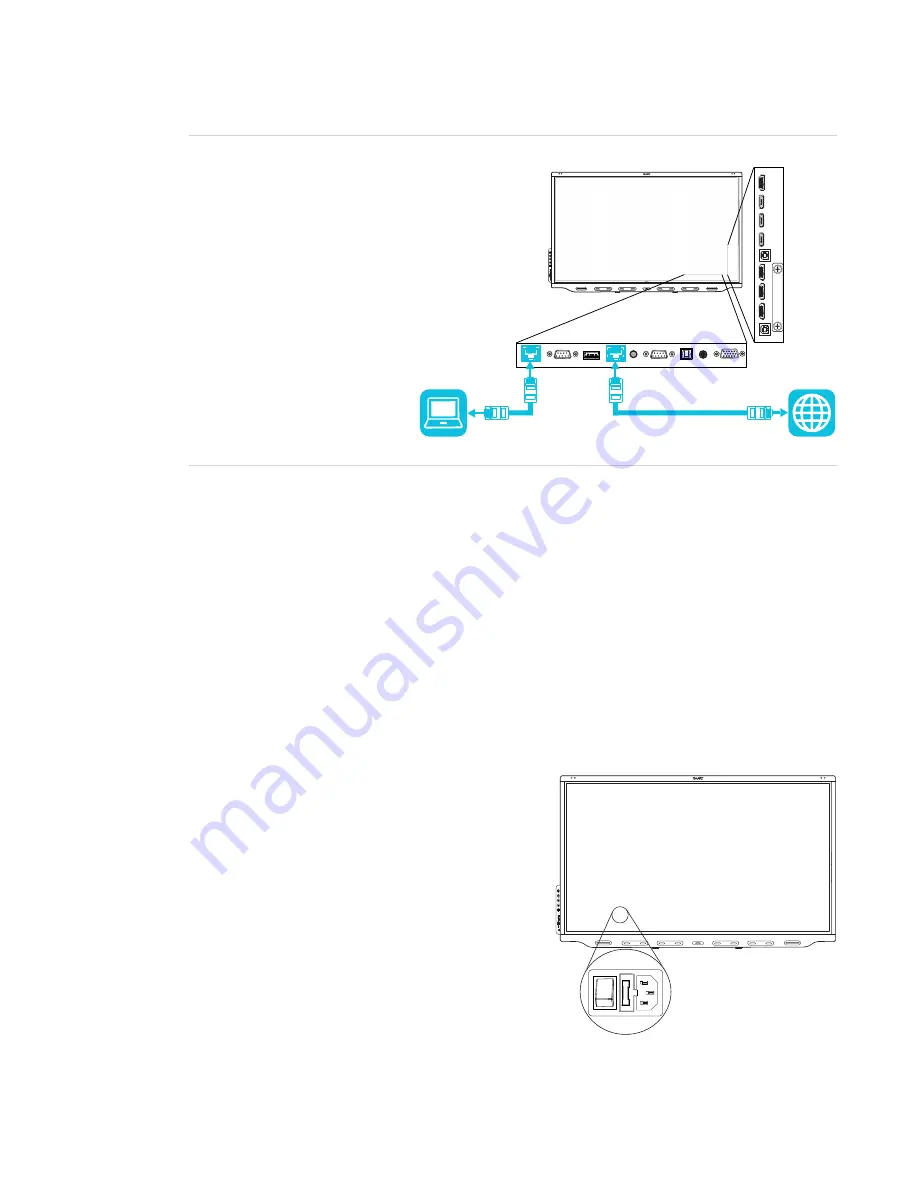
TIP
If you’re using the display’s
LAN
RJ45 jack to connect to a
network, you can connect the
other RJ45 jack to a computer
to provide network access for
the computer. This is particularly
useful if there is only one wired
network connection in the room.
(Network access is available
when the display is on or in
Standby mode but not when it’s
in Power Save mode.)
You’ll also need to work with your organization’s network administrators to configure the network
for the display, see
Connecting a SMART display with the iQ experience to a network
Connecting power and turning on the display for
the first time
The final step in installing and configuring the display is to connect power and turn it on. When you
first turn on the display, a setup wizard appears. Follow the steps in the wizard to complete the
setup of the display.
To connect the display to power
Connect the supplied power cable from the AC
power inlet on the back of the display to a power
outlet.


