


Setting up the Projector
31
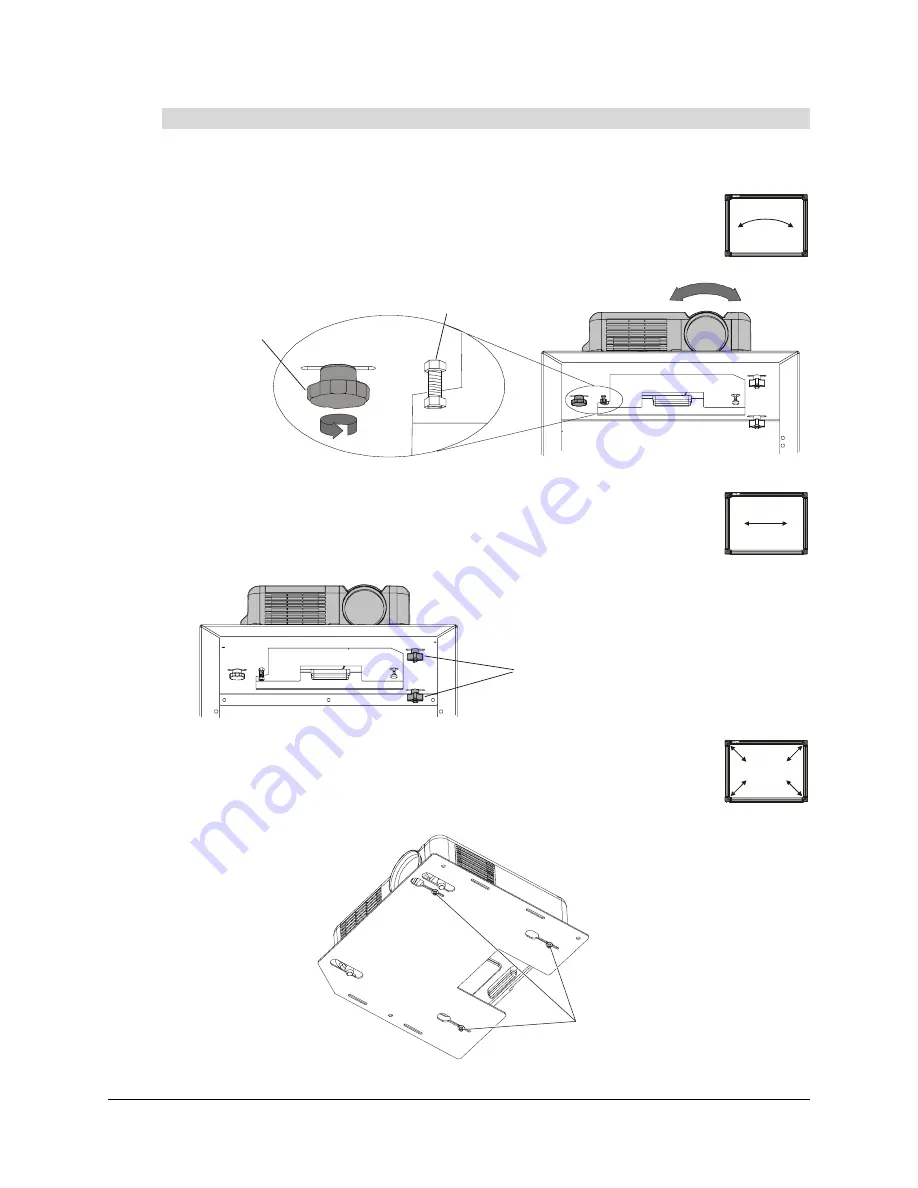
1. Ensure the transit locking screw underneath the projector plate is loose. If you need to loosen
it, use a wrench from the accessory kit.
2. Adjust the image roll. To do this, tighten or loosen the large round knob beside
the locking screw until the image sits properly in the frame.
3. Adjust the image laterally. To do this, loosen the two large, black T-knobs
located below the projector plate, slide the projector plate laterally, and then
tighten the two T-knobs.
4. Adjust the image size. To do this, loosen the three screws that secure the
projector to the projector plate using the M3 hex key that came with the
projector, and then slide the projector backward or forward inside the slots.
To adjust the projected image on the 2865 or the 2965
Turn to roll image
Transit Locking Screw
Loosen to move plate side-to-side
Loosen with M3 hex key
Summary of Contents for In-WallRear Projection Interactive Whiteboard
Page 1: ...In WallRear Projection SMART Board TM Installation Guide Interactive Whiteboard...
Page 14: ...8 Preparing to Install Your Interactive Whiteboard...
Page 42: ...36 Preparing Your Interactive Whiteboard for Use...
Page 48: ...42 Using and Maintaining the Interactive Whiteboard...
Page 62: ...56 Appendix B Restoring the Projector Settings...
Page 64: ...58 Waste Electrical and Electronic Equipment Regulations...


