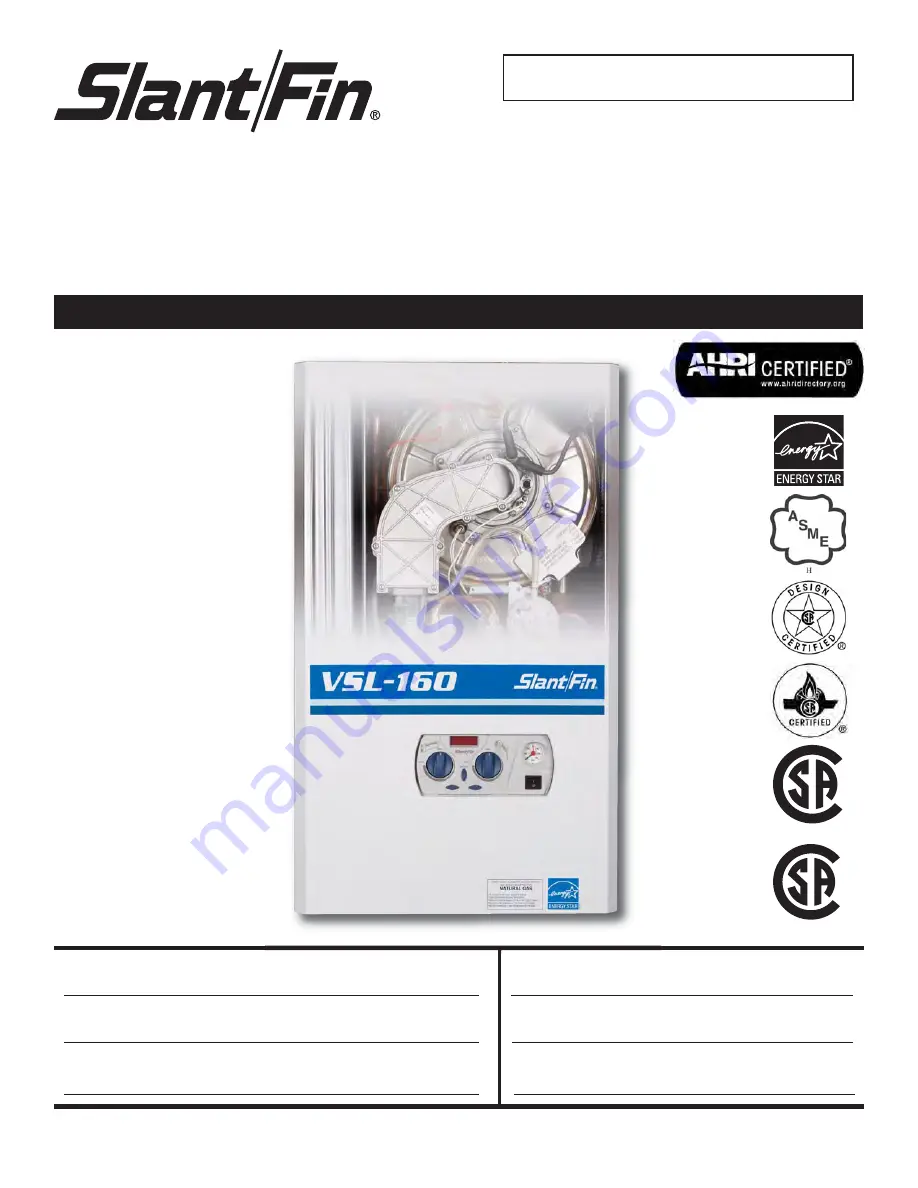
background image

Part # 819506000-R00  Printed in U.S.A. 513                                                                                                                                               PUBLICATION VSL-40 rev.B

Heating Contractor

Address

Phone Number

Boiler Model Number

Boiler Serial Number

Installation Date

INSTALLATION INSTRUCTIONS

DIRECT-VENT SEALED COMBUSTION CONDENSING BOILER
HOT WATER MODEL VSL-160B & VSL-160C (COMBI BOILER)

GAS-FIRED BOILER FOR NATURAL AND L.P. PROPANE GASES

VSL Boiler

®

C

US

®

LLC

This manual must be left with owner and should be

hung on or adjacent to the boiler for reference.

Summary of Contents for VSL-160B

Page 1: ...iler Serial Number Installation Date INSTALLATION INSTRUCTIONS DIRECT VENT SEALED COMBUSTION CONDENSING BOILER HOT WATER MODEL VSL 160B VSL 160C COMBI BOILER GAS FIRED BOILER FOR NATURAL AND L P PROPA...

Page 2: ...age personal injury or death Ne pas entreposer ni utiliser d essence ou ni d autres vapeurs ou liquides inflammables proximit de cette appareil ou de tout autre appareil QUE FAIRE SI VOUS SENTEZ UNE O...

Page 3: ...3 SAFETY INSTRUCTIONS...

Page 4: ...is requirement may compromise the safety of the unit and void its warranty When servicing boiler to avoid electric shock disconnect electrical supply before performing maintenance SAFETY INSTRUCTIONS...

Page 5: ...nspecter l appareil par un tecnicien qualifi et remplacez toute partie du syst me de contr le et toute commande qui ont t plong s dans l eau Ensure the boiler and its controls are protected from dripp...

Page 6: ...r heater 28 9 1 Connecting the boiler to an indirect water heater 28 9 2 Opening the instrument panel 29 10 INSTALLATION Vent and combustion air 30 10 1 Removing of a boiler from a common venting syst...

Page 7: ...ctions 74 13 13 Circulator pump and three way valve protection 74 13 14 Boiler s Freeze protection 74 13 15 Display in energy saving mode 75 13 16 Users menu 75 13 17 Installer s menu 76 13 18 Diagnos...

Page 8: ...ed however that during said thirty 30 day period a battery operated carbon monoxide detector with an alarm shall be installed 2 APPROVED CARBON MONOXIDE DETECTORS Each carbon monoxide detector as requ...

Page 9: ...NOTICE indicates special instructions on installation operation or maintenance that are important but not related to personal injury or property damage Important indication symbol 2 2 Description of m...

Page 10: ...nsor not present on 160 B model 8 Heating pressure switch low water cut off 9 Heating supply connection 10 DHW connection not present on 160 B model 11 Gas inlet connection 12 Cold water connection no...

Page 11: ...water temp sensor not present on 160 B model 37 Cable clamp 38 ASME Safety relief valve 39 U8 return temperature sensor 40 By pass pipe not present on 160 B model 41 Condensation discharge pipe 42 Sec...

Page 12: ...s valve 17 safety relief valve 21 condensate discharge pipe 22 heating supply pipe 23 domestic hot water outlet 24 gas inlet 25 cold water inlet 26 heating return pipe 45 U7 flue gas temperature senso...

Page 13: ...h a one pipe vent system and getting combustion air from room The quality of the system water is very important Poor water quality can damage heating systems due to scale formation and corrosion This...

Page 14: ...its dangers to the operator of the boiler Failure to comply with this provisions could result in severe personal injury death or substantial property damage WARNING LIQUEFIED PETROLEUM L P PROPANE GA...

Page 15: ...allation using room combustion air When room air is considered see Section 10 10 Vent and air may be vented vertically through the roof or out a side wall unless otherwise specified You may use any of...

Page 16: ...njury death or substantial property damage 3 mark the screw holes for the wall bracket A 4 remove the cardboard template 5 install the wall bracket A using the screws E provided 6 hang the boiler on t...

Page 17: ...g the production of domestic hot water CAUTION The manufacturer cannot be held responsible for any damage caused by incorrect use of additives in the heating system CAUTION This boiler is equipped wit...

Page 18: ...solutions which are specifically formulated for hydronic systems Ethylene glycol is toxic and can attack gaskets and seals used in hydronic systems CAUTION If glycol is used it must be used in accord...

Page 19: ...ed to control the operation of the DHW pump with Domestic Hot Water Prioritization programming CAUTION It is up to the installer to ensure the minimum system flow is not less than 5 GPM at any time 7...

Page 20: ...n the secondary looping see Figure 7 6 and electrically connect the pump follow Figure 8 2 160 B boiler is not fitted with an internal pump The installer needs to install an external heating pump as i...

Page 21: ...l an isolation valve upstream from the cold water inlet To correctly set the domestic water flow install an adjustable flow restrictor upstream the cold water inlet see Figure 7 6 item 17 160 C boiler...

Page 22: ...er make up Domestic hot water 1 Boiler 2 Air separator 3 Ball valve 4 Drain cocks 5 Filling valve 6 Expansion tank If needed 7 Filter 11 Relief valve drain 12 Gas shut off valve Install manual shut of...

Page 23: ...ating pump 11 Relief valve drain 12 Gas shut off valve Install manual shut off valve 5 ft 1 5m above floor 13 Ground joint union 14 Condensate drain see also Figure 7 8 15 Indirect water heater pump i...

Page 24: ...r CPVC pipe fittings and cement comply with national and or local codes for condensate neutralizer between pipe C of figure 7 2 and the waste disposal system be carried out with a pipe with an interna...

Page 25: ...105 C wire or equivalent Installation must comply with 1 National Electrical Code and any other national state provincial or local codes or regulations 2 In Canada CSA C22 1 Canadian Electrical Code...

Page 26: ...wire to terminal L1 10 connect the 120 volt neutral wire to terminal N NOTICE If the 120 volt power wires are inverted the boiler will block displaying error code E21 NOTICE If the boiler is not prop...

Page 27: ...not install the sensor above doors windows or ventilation outlets nor directly under balconies or gutter pipes Do not shield the outdoor temperature sensor Do not install the sensor on walls without o...

Page 28: ...oiler is in the heating mode If you are not sure light the boiler ON wait the display show F and then light off the boiler Now you can disconnect the plug from the diverter valve 9 use a 18 AWG two wi...

Page 29: ...rect water heater is satisfied the boiler will automatically return to central heating Priority selection is a functionality that toggles between CH and DHW demand when they are both active at the sam...

Page 30: ...ized to approach the minimum size as determined using the appropriate Annex G of the National Fuel Gas Code ANSI Z223 1 NFPA 54 and or CAN CSA B149 1 Natural Gas and Propane Installation Code Au momen...

Page 31: ...ir piping methods from Figure 10 1 to Figure 10 6 Do not attempt to install this boiler using any other means WARNING DO NOT mix components from different systems The vent system could fail causing le...

Page 32: ...ure 10 4 Vertical concentric Direct venting Figure 10 5 Side wall concentric Direct venting Figure 10 2 Vertical two pipes Direct Venting Figure 10 6 Side wall one pipe venting combustion air from roo...

Page 33: ...provided and with all requirements of all applicable codes Failure to provide a properly installed vent and air system will cause severe personal injury or death WARNING Using vent materials other th...

Page 34: ...1 8 1 9 1 8 n i F t n a l S e n e l y p o r p y l o P n e e r c s d r i B 0 0 0 5 8 1 9 1 8 n i F t n a l S e n e l y p o r p y l o P r e t p a d a r e l i o b c i r t n e c n o C 0 0 0 5 0 0 9 1 8 n...

Page 35: ...seams of the air inlet pipe using either Aluminum Foil Duct Tape meeting UL Standard 723 or 181A P or a high quality UL Listed silicone sealant b Do not install seams of vent pipe on the bottom of hor...

Page 36: ...the boiler to vent or air termination Do not exceed the lengths given in Section 10 4 2 Cut pipe to the required lengths and deburr the inside and outside of the pipe ends 3 Bevel outside of each pipe...

Page 37: ...he pipe and half clamp to the adapter E Tight the clamps with a tork of 1 5 2 lbf ft 2 3 Nm Vent connection see Figure 10 8 Item B This connection is used to provide a passageway for conveying combust...

Page 38: ...fire personal injury or death WARNING Improper installation of Stainless steel systems may result in injury or death WARNING Use only water based lubricants on joints Never use hydrocarbons based lub...

Page 39: ...levels of carbon monoxide or a fire which can result in severe personal injury or death 2 Insert clamp D onto side B of boiler adapter A 3 Insert adapter E into side B of boiler adapter A 4 Use clamp...

Page 40: ...eath WARNING Use only water based lubricants on joints Never use hydrocarbons based lubricants because they would destroy gaskets Failure to follow this warning could result in excessive levels of car...

Page 41: ...end of Band Clamp L into hole M of boiler adapter A 3 Insert vent pipe N into boiler adapter A 4 Tight the two Band Clamps O to mechanically secure vent pipe N to boiler adapter A Tight band clamps wi...

Page 42: ...aptor 80 80 PP P N 81 9171 000 3ft PP M F extension P N 81 9772 000 60 ft PP flexible extension P N 81 9173 000 Spacer for PP flexible extension P N 81 9003 000 90 PP M F in line elbow P N 81 9174 000...

Page 43: ...Improper venting can result in excessive levels of carbon monoxide or a fire which can result in severe personal injury or death In particular 1 slip fit the extension 1 and 2 see Figure 10 15 togethe...

Page 44: ...on request for installing the Coaxial system P N 81 9183 000 In line 90 PP coaxial M F elbow P N 81 9176 000 In line 45 PP coaxial M F elbow P N 81 9170 000 3ft 1m PP coaxial extension P N 81 9005 000...

Page 45: ...ements and with the National Fuel Gas Code ANSI Z223 1 for U S installations or CSA B149 1 for Canadian installations For installation in Canada vent pipe system must be certified to ULC S636 see Tabl...

Page 46: ...guard vent to prevent condensate damage to exterior finishes 4 The vent piping must terminate in an elbow pointed outward as shown in Figure 10 12 or 10 13 WARNING Do not exceed the maximum lengths o...

Page 47: ...exceed the limits given in the Section 10 4 2 You must consider the surroundings when terminating the vent and air a Position the vent termination where vapors will not damage nearby shrubs plants or...

Page 48: ...e any public walkway At least 3 feet above any forced air intake within 10 feet No closer than 12 inches below or horizontally from any door or window or any other gravity air inlet b Air inlet must t...

Page 49: ...de of the building more than what is shown in Figures 10 17 and 10 18 Condensate could freeze and block vent pipe 10 11 5 Multiple vent air terminations 1 When terminating multiple boilers terminate e...

Page 50: ...flue products will form a noticeable plume as they condense in cold air Avoid areas where the plume could obstruct window views c Prevailing winds could cause freezing of condensate and water ice buil...

Page 51: ...ent pipe Failure to comply could result in severe personal injury death or substantial property damage Figure 10 22 Concentric sidewall multiple boilers terminations 10 INSTALLATION Vent and combustio...

Page 52: ...ir inlet pipe and vent pipe can be located in any desired position on the roof but must always be no further than 2 feet apart and with the vent termination at least 1 foot above the air intake 5 Loca...

Page 53: ...s provide clearances required by CSA B149 1 Installation Code 3 The air inlet is part of a direct vent connection It is not classified as a forced air intake with regard to spacing from adjacent boile...

Page 54: ...DO NOT use field supplied couplings to extend pipes Airflow restriction will occur and may cause intermittent operation 6 Operate the appliance one 1 heat cycle to ensure combustion air and vent pipes...

Page 55: ...direct vent appliances are vented near each other each appliance must be individually vented see Figure 10 27 WARNING NEVER common vent or breach vent this appliance to avoid possibility of severe pe...

Page 56: ...ric vertical venting Example n 2 Combustion air intake Flue exhaust Seal Combustion air inlet with screen Seal Seal Flue outlet Sealed cap Existing Flue exhaust Seal Combustion air intake Existing Com...

Page 57: ...vent and air intake lengths for this venting arrangement are to be determined from Section 10 4 Use only approved venting materials listed in Tables 10 1 and 10 2 10 INSTALLATION Vent and combustion a...

Page 58: ...during any pressure testing of that system at a test pressure in excess of 1 2 PSIG 3 5 kPa b The appliance must be isolated from the gas supply piping system by closing a manual shutoff valve during...

Page 59: ...e requiring no field adjustment Attempting to alter or measure the gas valve outlet pressure could result in damage to the valve causing potential severe personal injury death or substantial property...

Page 60: ...from NATURAL GAS to LP GAS 8 push button to save the new value 9 turn off power to the boiler 10 Move switch 7 see Figure 9 2 from ON position to OFF position 11 Replace the orifice item C of Figure 1...

Page 61: ...ult in severe personal injury death or substantial property damage 15 Attach to the front of the boiler the appropriate conversion label found in the conversion kit see Figure 11 3 or Figure 11 4 stat...

Page 62: ...eating system WARNING Never use non approved additives or toxic boiler treatment chemicals in the heating system as they can cause serious health problems or possibly death Any additives introduced in...

Page 63: ...r 160 C model only Once the heating system has been filled and purged the domestic hot water heat exchanger must be filled as follows 1 connect a rubber tube to the air purging cock A shown in Figure...

Page 64: ...re personal injury or death 12 5 Start up of the boiler 1 Open the manual gas shut off valve Figure 11 1 2 Switch the on off power switch item 12 in Figure 13 1 to on 3 Upon start up an is shown for 3...

Page 65: ...at demand by turning knob 7 shown in Figure 13 1 to its maximum setting Also ensure that the room thermostat is calling for heat 8 press the and keys at the same time for more than 10 seconds the disp...

Page 66: ...tions must be made as shown in Figure 12 5 to get the correct pressure reading 10 replace panel H of Figure 14 1 and latch it closed If panel H is not properly in place the manometer reading will not...

Page 67: ...yed if a domestic hot water demand has been generated The boiler will now run for 10 minutes at high fire input 6 wait 2 to 3 minutes for the CO2 to stabilize 7 insert the probe of a calibrated combus...

Page 68: ...move through the heat exchanger without being adequately heated It is therefore advisable to carry out the following adjustments 1 switch the on off power switch item 12 in figure 13 1 to on 2 adjust...

Page 69: ...rops restore the correct value This operation may have to be repeated several times during the first month of operations to remove any air bubbles present 13 2 Overview The boiler is pre set with stan...

Page 70: ...mmer mode To disable the heating functions for a prolonged period leaving only the domestic hot water function switch OFF the heating temperature until the wording OFF appears by turning knob 7 of Fig...

Page 71: ...n the Installers Menu set the parameter to 01 In this mode the heating supply water temperature calculated temperature in Figures 13 2 and 13 3 will be adjusted automatically based on the input from t...

Page 72: ...le fulcrum of the curve The suggested starting values are 92 F 33 C for low temperature systems 122 F 50 C for high temperature systems 13 10 4 Outdoor reset zone adjustments The default values previo...

Page 73: ...that are too high may translate into room temperature instability Values that are too low may make the action of the room thermostat ineffective Climatic adjustment with room compensation can be used...

Page 74: ...ill light to prevent the boiler from freezing If the boiler will not be used for long time it should be drained per Sections 14 10 and 14 11 13 USE e Time delay in restarting the burner in its normal...

Page 75: ...s active per section 13 9 Adjustment of the parallel shift of the curve as shown in Figure 13 3 when outdoor reset is active per section 13 9 Display of the calculated heating temperature when outdoor...

Page 76: ...l automatically exits the Installers menu Any parameter change not saved using the button will be lost The next table lists each Installers menu parameter what it affects and its adjustment range PARA...

Page 77: ...ind of boiler Must be maintained at 20 value Must be maintained at 40 value Can be changed between 1 and 54 Default value is 18 180 sec Can be modified only in conjunction with factory technicians Can...

Page 78: ...n Blocking error Contact a professionally qualified technician Blocking errors automatically reset if the condition causing the block disappears Auto purging procedure that last 3 minutes in progress...

Page 79: ...enerator c if the combustion air pressure is incorrect inspect the vent system and eliminate any obstructions d if the voltage to the gas valve is not 120Vac the power control board must be replaced e...

Page 80: ...eck a that no obstructions are in the flue discharge air intake line b check the flue pressure switch setting point setting is 4 5 in W C c check that the electrical resistance of the flue gas sensor...

Page 81: ...d carry current Check that the electrical resistance of the sensor corresponds with the graph in section 14 13 check that the electrical connection cables between the sensor and the power control boar...

Page 82: ...ower control board have continuity and carry current Check if the boiler is properly grounded Move ON switches 7 an set again the correct tY value see section 17 If the sensor resistance does not corr...

Page 83: ...x month Check boiler piping gas and water for leaks Follow section 14 1 17 End of season months Shut boiler down unless boiler used for domestic hot water Follow section 14 1 18 14 MAINTENANCE Table 1...

Page 84: ...of rust other corrosions or separation of the vent and air intake piping 2 Check outside terminations Screens and louvers should be free of any debris and must be cleaned as required 14 1 4 Check sys...

Page 85: ...y or the boiler combustion air and vent termination must be relocated to another area 14 1 13 Check pressure gauge 1 Make sure the pressure reading on the boiler pressure gauge does not exceed 25 psi...

Page 86: ...follow the steps below while refering to Figure 14 1 1 remove screws A 2 raise latch C 3 remove the front cover 4 press the two plastic springs item L down 5 lower the electrical box 6 lift latch G 7...

Page 87: ...nents 12 reassemble the components by proceeding in reverse order 13 open the manual gas shutoff valve 14 restore electrical power to the boiler 15 check that there are no gas leaks WARNING Never use...

Page 88: ...in 2 mm and 0 10 in 2 5 mm the distance of the ignition electrodes to the burner surface must be between 0 20 in 5 0 mm and 0 22 in 5 5 mm the distance of the flame detection electrode to the burner...

Page 89: ...nents 6 carefully cover the electrical panel B with a waterproof material to prevent water from entering the electrical system 7 grip spring clamp G with a pair of pliers and slide it downwards 8 pull...

Page 90: ...the heating system isolation valves and heating system fill valve 9 follow the steps in Section 12 1 3 to bleed the air from the heating system NOTE If display shows L05 reverse polarity phase and ne...

Page 91: ...Section 14 10 and 14 11 to isolate and drain the water from the boiler 2 follow the steps in Section 14 2 to gain access the internal components 3 disconnect fittings A 4 remove screws C 5 rotate D f...

Page 92: ...12 in Figure 3 1 14 12 Overrides To carry out specific checks covered in the manual it is possible to override the control logic of the boiler See the following sections 14 12 1 Auto purging To reset...

Page 93: ...U3 U5 U6 U7 and U8 The location of each sensor can be found in Figure 3 1 and Section 14 15 and 14 16 14 14 Outdoor temperature sensor optional An outdoor temperature sensor can be connected to the b...

Page 94: ...ion electrode EPO External pump REQUIRED FOR MODEL 160 B EV3V External three way valve optional F1 Fuse 2Amps FPS Flue pressure switch GS Spark generator IG Main electrical switch J1 Six poles connect...

Page 95: ...95 14 MAINTENANCE...

Page 96: ...ion electrode EPO External pump REQUIRED FOR 160 B model EV3V External three way valve optional F1 Fuse 2Amps FPS Flue pressure switch GS Spark generator IG Main electrical switch J1 Six poles connect...

Page 97: ...97 14 MAINTENANCE...

Page 98: ...pressure of domestic hot water circuit PSI 150 Minimum pressure of domestic hot water circuit PSI 1 Capacity of expansion tank 160 C model only gal 2 64 Supply voltage 120Vac 60Hz Absorbed electric po...

Page 99: ...99 16 SPARE PARTS...

Page 100: ...100 16 SPARE PARTS...

Page 101: ...101 16 SPARE PARTS...

Page 102: ...81 9026 000 BRACKET SIPHON L84 H130 P32 18 81 9027 000 O RING 134 EPDM 3 53 X 25 8 19 81 9028 000 SCREW SELFTAPPING 3 9 X 9 5 CROSS HEAD 20 81 9029 000 SIPHON 21 81 9030 000 SCREW SELFTAPPING 2 9 X 6...

Page 103: ...000 INTERFACE OPENTERM 107 81 9116 000 COVER ELECTRICAL BOX 108 81 9117 000 FAIRLEAD 7 EXIT 109 81 9118 000 COVER JUNCTION BOX 110 81 9119 000 COPPER PIPE D 22 SUPPLY SEALING CHAMBER 111 81 9120 000 3...

Page 104: ...ettings to 01 or 02 see section 13 16 Installer s menu see section 13 17 Overrides menu see section 14 12 Boiler in stand by Domestic hot water Central heating temp setting D H W temp setting Last blo...

Page 105: ...peed rpm 100 Setting output for heating Heating service mode Reaction to outdoor temp Angle fulcrum Heat temp reduction by open RT State of the knobs Energy saver display Disabled parameter Domestic s...

Page 106: ...guration Must be always at 00 The boiler s micro processor makes this menu of parameters available to the qualified technician for the setting of the appliance To enter this menu you must 1 turn the m...

Page 107: ...107 NOTE 62403559 R00 May 03 2012...

Page 108: ...SLANT FIN CORPORATION Greenvale N Y 11548 Phone 516 484 2600 FAX 516 484 5921 Canada Slant Fin LTD LTEE Mississauga Ontario www slantfin com Slant Fin Corp 2013...

Reviews: