background image

� 

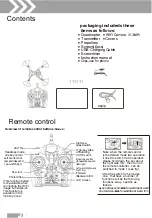
�  Battery Cover 

k=B 

I+ 

4 XAA(LR06) 

1.5V Batteries 

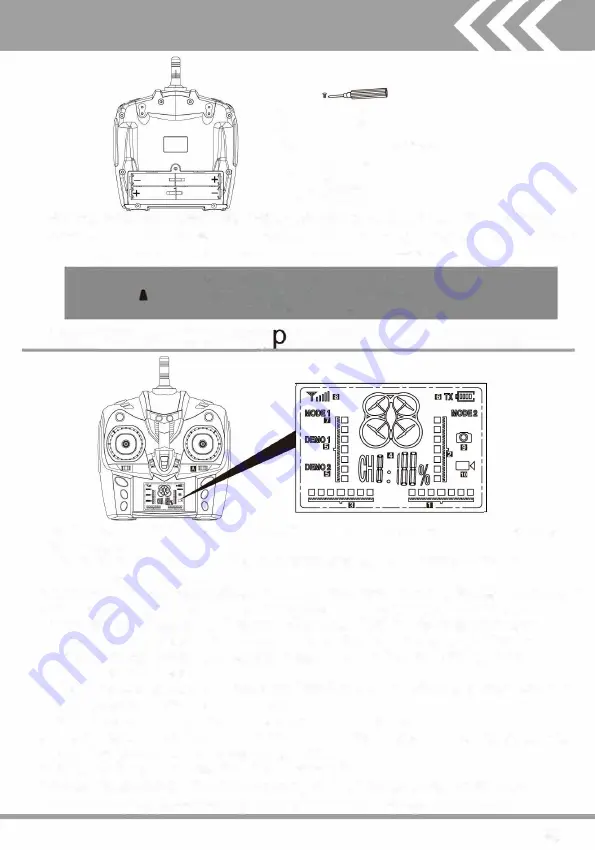
Inserting batteries: Remove the battery compartment on the back of the remote 

control and insert 4 AA alkaline batteries, paying attention to the polarity markings in 

the battery compartment {batteries must be purchased separately). 

1.lnstall batteries in correct polarity.

2.Do not mix old and new batteries. 

3.Do not mix different types of batteries.

Remote control  key  ad and  LCD  manual 

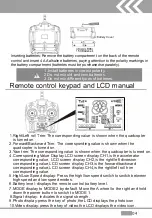
1.Right/Left roll Trim: The corresponding value is shown when the quadcopter

is turned on. 

2.Forward/Backward Trim: The corresponding value is shown when the

quadcopter is turned on. 

3.Yaw trim: The corresponding value is shown when the quadcopter is turned on.

4.Corresponding Value Display:LCD screen display CH1 ,is the accelerator

corresponding value, LCD screen display CH2,is the right/left diversion 

corresponding value,LCD screen display CH3,is the forward/backward 

corresponding value,LCD screen display CH4,is the right/left roll trim 

corresponding value. 

5.High/Low Speed display: Press the high/low speed switch to switch between

high speed and low speed modes. 

6.Battery level: displays the remote control battery level.

?.MODE display to MODE 2 by default. Move the A wheel to the right and hold 

down the power button to switch to MODE 1. 

8.Signal display: Indicates the signal strength.

9.Photo display:press the key of photo,the LCD displays the photo icon.

1 a.Video display:press the key of video,the LCD displays the video icon.

-

04 


Summary of Contents for DR-XL

Page 1: ...ompletely before operating this quadcopter DR XL 2 4 G controlling system 6 axis gyroscope Brand new headless altitude hold modes one key return function New One key take off landing function Unique f...

Page 2: ...tructure 5 7 lnstall landing skids propellor protecting frame 5 8 Preparation for flight 5 9 Change and charge battery of quadcopter 6 1O Mode 2 model control 6 7 11 lntroduction of quadcopter functio...

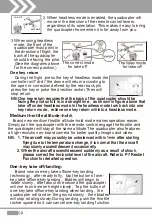
Page 3: ...when you fly it for the first time in order to prevent it from ascending too rapidly which could damage the quadcopter due to a collision 3 When you have finished using the quadcopter turn off the re...

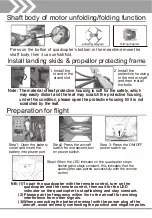
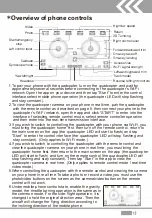
Page 4: ...ard backward lefUright gj s f JJ Leftward Rightward f s i _r_ flight trim r Forward PhotoNideo H Backward trim This function button is unavailable when connecting the WIFI image transmission This func...

Page 5: ...sponding value is shown when the quadcopter is turned on 4 Corresponding Value Display LCD screen display CH1 is the accelerator corresponding value LCD screen display CH2 is the right left diversion...

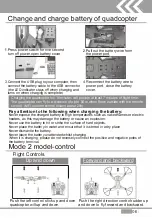
Page 6: ...tion for flight Step1 Open the battery cover and insert the battery into power port Step2 Press the aircraft switch for onesecond turn on power switch 1 I Step 3 Press the ON OFF power switch up Step4...

Page 7: ...control distant about 25m Pay attention to the following when charging the battery Never expose the charged battery to high temperatures such as naked flames or electric heaters as this may damage the...

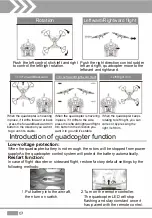
Page 8: ...n the direction you to go until it s stable want it to go until it s stable Left Right trim When the quadcopter keeps rotating to left right you can correct it by pressing the right I left trim Introd...

Page 9: ......

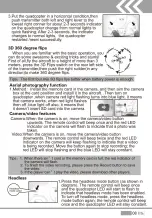
Page 10: ...mode Medium throttle altitude hold Brand new medium throttle altitude hold mode makes operation easier Simply pair the quadcopter with the remote control engage the throttle and the quadcopter will s...

Page 11: ......

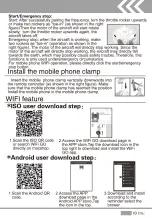
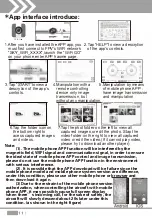
Page 12: ...the video folder on the right to view all captured video or edit the video lf it cannot play video please try to download another player 1 The mobile phone APP function will be interfered by the magn...

Page 13: ...Fi you must bring the quadcopter home first then turn off the remote control return to the main screen on the app the quadcopter LED will start to flash and tap Start to enter the control interface t...

Page 14: ...roduct using a clean cloth 2 Avoid exposing the product to direct sunlight or high temperatures 3 Do not place the product in water as this will damage the electrical components 4 Regularly inspect th...

Page 15: ...ISO QR code...

Page 16: ...Android QR code...

Reviews: