4
Setup Instructions
Stand
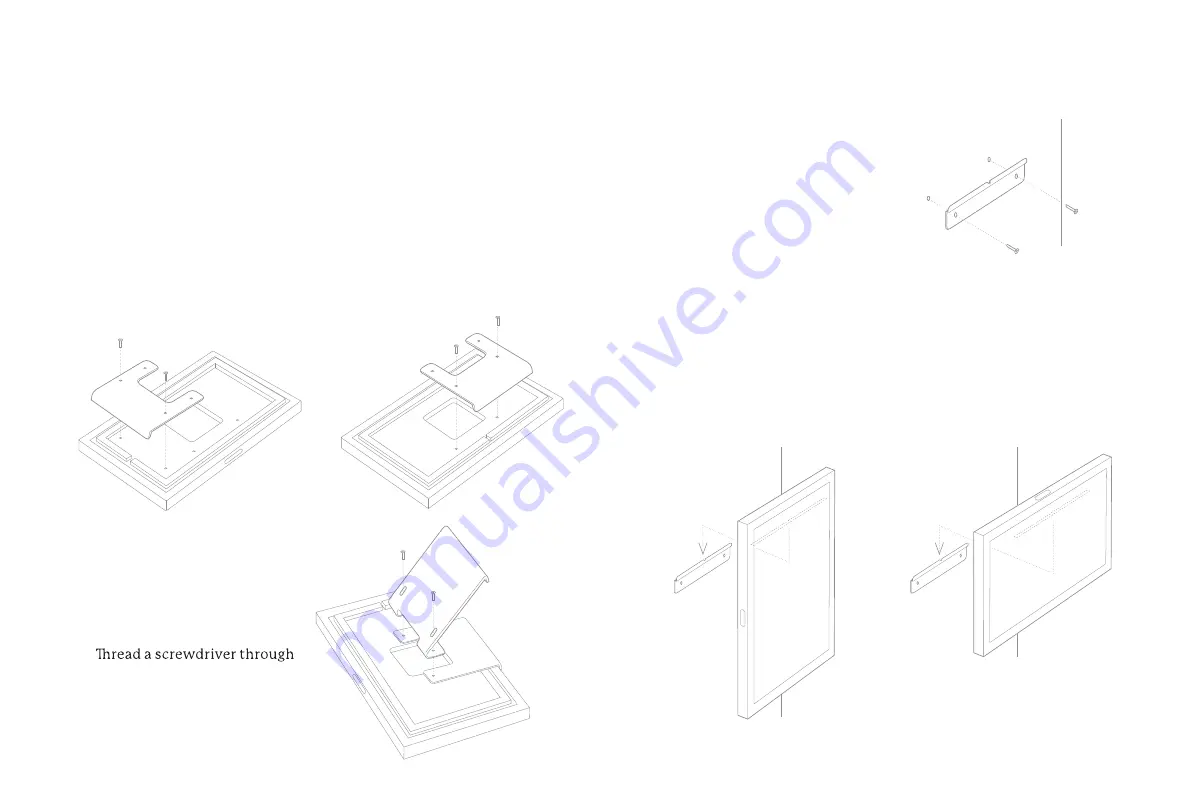
Lay the device face down on a flat surface, and
align the holes of base plate (A) with the holes on
the back of the device. Use screws (a) to secure.
Portrait Orientation:
Landscape Orientation:
Line the holes of the angled
stand (B) up with the smaller
holes in the base plate (A).
the stand holes to hand
tighten screws (b).
Display your Frame horizontally or vertically and photos will
automatically rotate to fit the Frame’s orientation. For video
instructions, visit
youtube.com/c/SkylightFamily
1.
2.
A
B
b
A
a
a
b
A
a
a
A
5
Portrait Orientation:
Landscape Orientation:
Attach the mount to the wall
using the provided anchors
and matching screws (c), with
the pleat facing towards you.
Align the pleat with the
grooves located at the back
of the device, near the top,
and hook the device on.
1.
2.
Wall Mount
c
c


