background image

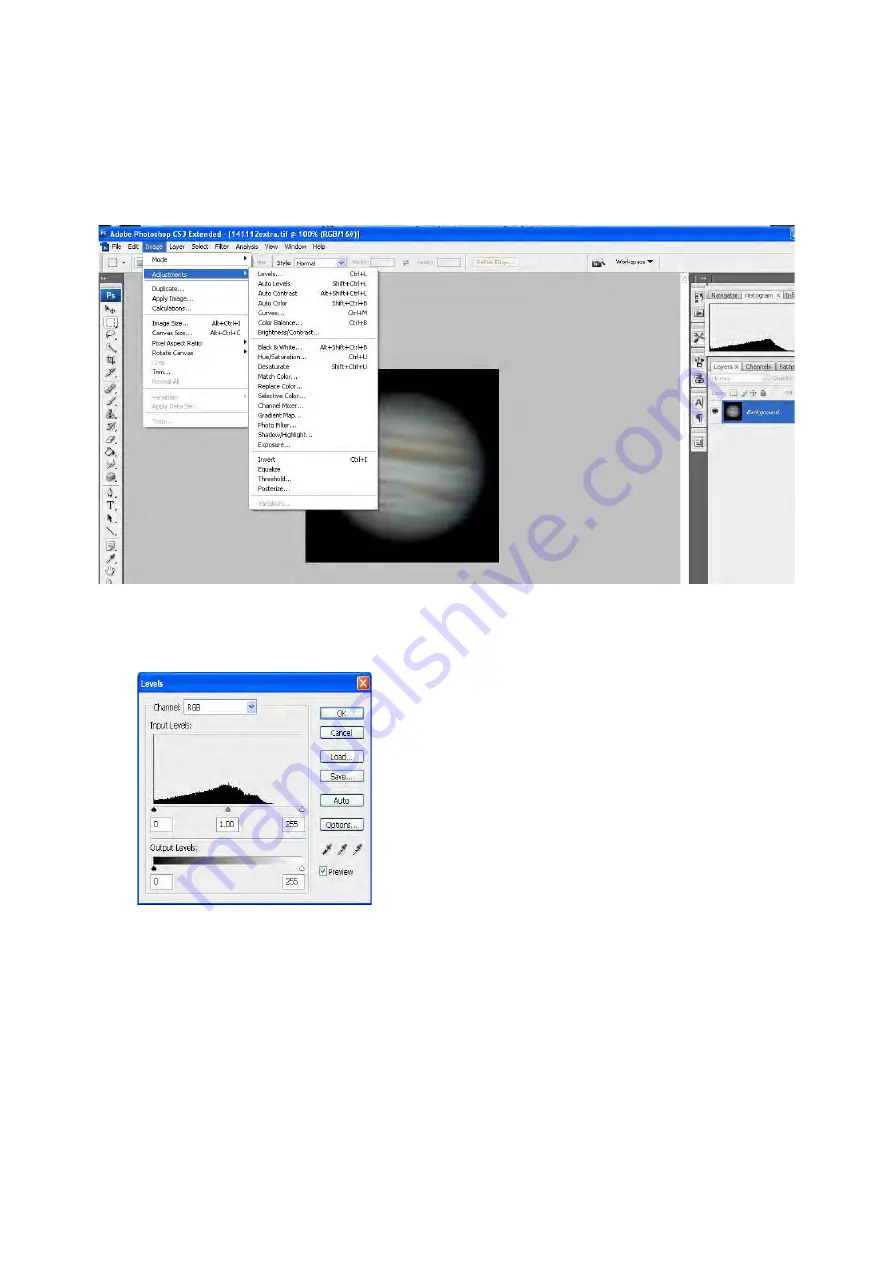
9. Gimp/Photoshop Editing

I'm going to leave this section a bit vague as I believe people will have different methods of doing 
the final editing. But I will give a quick run down on what I do in this section with 

Photoshop.

1. Open the program and select the saved image created in Registax
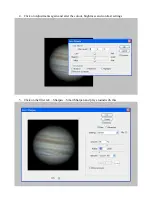
2. Click on the image tab, click Adjustments then levels

3. Slide the right hand arrow(white) on the input level graph to the beginning of the black 

section of the chart – click OK

Summary of Contents for Skyliner 200P

Page 1: ... this tutorial Basically help fellow Dobsonian users with the techniques I have perfected in my quest to end up with a worthy image Contents 1 Equipment 2 Software 3 Setting Up 4 Sharpcap Capturing 5 VirtualDub Editing 6 Castrator Editing 7 AutoStakkert Editing 8 RegiStax Editing 9 Gimp Photoshop Editing 10 End Result 1 Equipment Dobsonian Telescope with Finderscope This my Skywatcher Skyliner 200...

Page 2: ...pter with an IR filter screwed on This particular webcam has been discontinued and is fetching high prices on online auction sites However there are alternatives available for a reasonable price such as the Xbox and the Microsoft Cinema HD the latter being a bit more tricky to modify You can find tutorials online that explain how to modify these three webcams Laptop Not much to say about this as l...

Page 3: ...uring videos of your chosen planet you will need to go through a few checks Firstly make sure the finderscope is aligned with the main scope and secondly that the scope is collimated If you are unsure how to do these you can refer to your telescope user manual or there is plenty of instructions around online On your chosen night for capturing our solar system neighbours you will need to take the t...

Page 4: ...he laptop Now you can begin to capture 4 Sharpcap Capturing There are tutorials on how to use Sharpcap on Youtube so I will not be going into a great detail regarding settings for this program These guides can explain in a lot more detail then I can in this written tutorial I suggest checking these out before progressing further 1 Open Sharpcap and select the camera from the cameras menu 2 Select ...

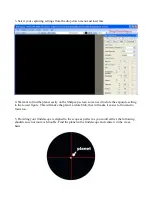
Page 5: ... to slide the exposure setting to the lowest figure This will make the planet a white blob that will make it easier to find and to focus too 5 Providing your finderscope is aligned to the scope as perfect as you could earlier the following should cause not too much trouble Find the planet in the finderscope and centre it in the cross hairs ...

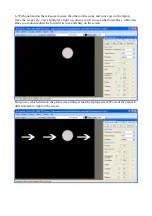
Page 6: ...e scope very very slightly left right up down etc till you see what resembles a white disc Once you found it adjust the focus till its nice and sharp on the screen Did you see which direction the planet was drifting across the laptop screen We want the planet to drift from left to right on the screen ...

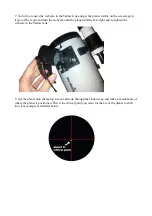
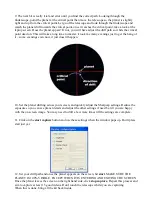
Page 7: ...he webcam until the planet drifts left to right and re tighten the webcam in the barlow lens 8 Get the planet onto the laptop screen and look through the finderscope and make a mental note of where the planet is positioned This is the critical point you want for the arc of the planet to drift into For example as detailed below ...

Page 8: ...w it just doesn t happen 10 Set the planet drifting across your screen and quickly adjust the Sharpcap settings Reduce the exposure so you can see planet details and adjust the other settings if need be till you are happy with the on screen image You may need to drift a few more times till the settings are complete 11 Click on the start capture button and use these settings when the window pops up...

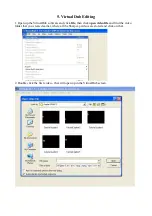
Page 9: ...ualDub software and click file then click open video file and find the video folder that you created earlier where all the Sharpcap videos are stored and click on that 2 Double click the first video that will open up in the VirtualDub screen ...

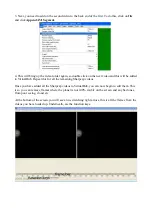
Page 10: ...ualDub Repeat this for all the remaining Sharpcap videos Once you have added all the Sharpcap videos to VirtualDub you can now begin to edit them This is so you can remove frames where the planet is not 100 visible on the screen and any bad ones from poor seeing cloud etc At the bottom of the screen you will see a line stretching right across this is all the frames from the videos you have loaded ...

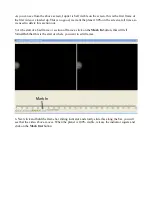
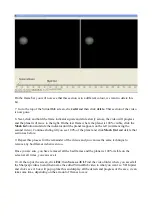
Page 11: ...to delete this section out 5 At the start of a bad frame or section of frames click on the Mark In button this will tell VirtualDub that this is the start of where you want to edit frames 6 Next click and hold the frame bar sliding indicator and slowly slide this along the bar you will see that the video above moves When the planet is 100 visible release the indicator square and click on the Mark ...

Page 12: ...deo Continue sliding till you see 100 of the planet and click Mark Out and delete that section as before 9 Repeat this process for the remainder of the videos and you can use the same technique to remove any bad frames in between too Once you are sure you have removed all the bad frames and the planet is 100 visible on the screen at all times you can save it 10 At the top of the screen click File ...

Page 13: ...Once it has saved we can move on to the next section ...

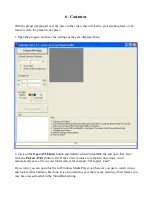
Page 14: ...find the edited VirtualDub file and open that Next click the Process AVI s button It will take a few minutes to complete once done it will automatically save a file in your folder called for example VD Jupiter_Castr If you want you can open this file in Windows Media Player or whatever you use to watch videos and look at what Castrator has done It is also useful to see if there is any missing or b...

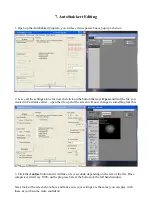
Page 15: ...eated in Castrator earlier open the file up and the screen will now change to something like this 3 Click the Analyse button and it will take a few seconds depending on the size of the file Once completed it will say 100 on the progress bars at the bottom of the left hand window Next look at the screen shot above and make sure your settings are the same you can play with these as you become more c...

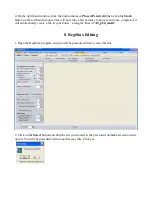
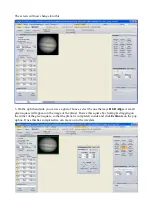
Page 16: ...ss and once completed it will automatically create a file in your folder along the lines of AS_p50_multi 8 RegiStax Editing 1 Open the RegiStax program and you will be presented with a screen like this 2 Click on the Select button and find the file you created in the previous AutoStakkert section and open it You will be presented with a box that says this Click yes ...

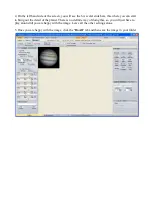
Page 17: ...ct the one that says RGB Align A small green square will appear on the image of the planet Resize this square by clicking dragging on the corner of the green square so that the planet is completely inside and click Estimate on the pop up box Once this has completed we can move on to the wavelets ...

Page 18: ...u can start to bring out the detail of the planet There is no definite way of doing this so you will just have to play around till you are happy with the image Leave all the other settings alone 5 Once you are happy with the image click the Do All tab and then save the image in your folder ...

Page 19: ...final editing But I will give a quick run down on what I do in this section with Photoshop 1 Open the program and select the saved image created in Registax 2 Click on the image tab click Adjustments then levels 3 Slide the right hand arrow white on the input level graph to the beginning of the black section of the chart click OK ...

Page 20: ...4 Click on Adjustments again and alter the colour brightness and contrast settings 5 Click on the filter tab Sharpen Smart Sharpen and play around with this ...

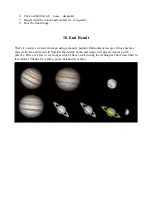
Page 21: ... it you have created an image using a manual push to Dobsonian telescope It does become easier with time and you will find that the quality of the end image will greatly improve with practice Here are a few of my images which I have created using the techniques I have described in this tutorial Thanks for reading good luck and clear skies ...

Reviews: