NET
I
TOP LEFT
BOTTOM LEFT
TOP RIGHT
BOTTOM RIGHT
A
B
LEFT LEG
RIGHT LEG
C
E
F
D
BUNGEES (17)
H
FOOT (3)
G
1
3
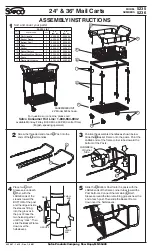
Slide the Top Left (A) through the black sleeve on Left
Leg (E). Repeat with Top Right (B) and Right Leg (F).
Connect parts (A) and (B) using the spring clip.
Slide Bottom Left (C) and Bottom Right (D) into the last
remaining Foot (G). Push in from both sides until (C)
connects with (D).
6
Lay out the Net (I), then connect the corners of the Net to
the frame using the Bungees (H). See the image above
for suggested connection points for the rest of the Net.
When complete there should be 5 Bungees on top, 5 on
each side and 2 on the bottom.
2
Slide Foot (G) onto Left Leg (E) and repeat with the
Right Leg (F). Then connect parts (E) and (F) using
the spring clip.
4
Slide the Bottom Right (D) into Top Right (B), DO NOT
secure with spring clip. Repeat on the left side, DO
NOT secure with spring clip. Now that both bottom
poles are resting in the top poles, secure with the
spring clips.
5
Put the unit into a standing position as shown in the
picture above. Unclip the yellow clips from the back
legs and secure them between the yellow tabs on the
front of the frame.
VISIT SKLZ.COM TO LEARN MORE
ASSEMBLY
PARTS
A
B
E
G
F
F
E
C
D
G
COMPLETED PRODUCT
CONNECT
DISCONNECT
COMPLETED VIEW
I
H
G
B
D


