DCN: 140-02302-01
Page 3
Heat Pump HVAC System
Thermostat Connection
G Fan
W1 Aux Heat
Y1 Compressor Stage 1
R 24VAC Return
C 24VAC Common
Y2 Compressor Stage 2
O Change Over Valve
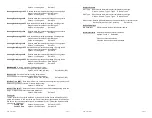
For Heat Pump systems, connect the 24R connection
to either the 24RC or 24RH
Y1
G
Y2
RS2
RS2
RSC
Heat Pump HVAC System Wiring
Thermostat Setup:
Heat Pump HVAC Systems
To set the HVAC system type, go to the
Thermostat Info
screen
and press
Setup
button.
1.
Type.
Set the HVAC System Type: set to
Heat Pump
2.
Fan Type
. Automatically set for heat pump systems. Ignore this setting.
3.
C/O type
. Change Over (reversing) Valve Type. Heat pumps change from heating to cooling by reversing operation.
You must configure the thermostat’s changeover valve setting to work correctly with your HVAC system.
Check your system information to be sure and note the color of original thermostat wire and the terminal it was connected to.
No matter what the old stat connection was (O or B), connect the wire to the thermostats W2/O terminal.
The setting of the C/O Type will set the correct system operation.
For change over with cool systems (Orange wire, O terminal): set
C/O type
to w/cool (most common and default setting)
For change over with heat systems (Brown wire, B terminal): set
C/O type
to w/heat
4.
2nd Stage Heat
. Enable second stage heating outputs
If you have a single stage heating system, leave this set to
N
If you have a 2 stage heating system, set to
Y
to enable.
5.
Aux Heat (HP).
If you have auxiliary heat strips, set this to
Y
to enable.
6.
2nd Stage Cool
. Enable second stage cooling outputs
If you have a single stage cooling system, leave this set to
N
.
If you have a two stage cooling system, set to
Y
to enable.
24RC
W1
24RH
W2/O
RS1
RS1
RSC
24C
Cooling 24V
Fan
Cooling stage 1
Cooling stage 2
Remote Sensor 2
Remote Sensor 2
Sensor shield
24VAC Com
24V Heating
Aux Heating
Change Over Valve
Remote Sensor 1
Remote Sensor 1
Sensor shield
Remote Sensor 2
Remote Sensor 1
Shielded cable
Shielded cable
Thermostat back
Note!
If you get heating
when you expected cooling,
change the C/O type to the
opposite setting.
DCN: 140-02302-01
Page 4
INSTALLATION SETUP
Before operating the system, the HVAC System Type must be setup in
the Installer Settings/System Settings/Mechanical Settings Menu!
Default Settings: The HVAC System Type is default set for a
Gas/Electric system with Gas Heat Fan type. If this matches the HVAC
system the thermostat is connected to, then no further setup is required.
If the HVAC system has Electric heat or is a Heat Pump system, then the
Mechanical Settings must be changed to match. Go to the Installer
Settings Menu to complete the HVAC setup.
Installer Settings Menu
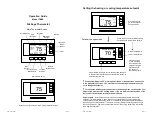
To change the HVAC setup, go to the
Installer Settings
Menu
. This is a hidden menu
and it can be accessed by pressing the main menu button and when the main Menu
Selection screen appears, press and hold the middle two buttons for 5 seconds.
Thermostat Main Menu Selection Screen
Installer Settings Menu screen
Press and hold two middle buttons to enter the Installer Settings Menu
Done
Select
Schedules
User Settings
Away Setpoints
Thermostat Info
Menu Selection
Done
Select
Display Lock N
Service Mode
System Settings
Max Heat SP 90
Installer Settings
+
_


