


WPS
Although home Wi-Fi networks have become more and more popular, users still
have trouble with the initial set up of network. This obstacle forces users to use
the open security and increases the risk of eavesdropping. Therefore, The Wi-Fi
Protected Setup (WPS) is designed to ease set up of security-enabled Wi-Fi
networks and subsequently network management.
The largest difference between WPS-enabled devices and legacy devices is that
users do not need the knowledge about SSID, channel and security settings, but
they could still surf in a security-enabled Wi-Fi network.
This device supports Push Button method and PIN method for WPS. The
following sub-paragraphs will describe the function of each item. The webpage
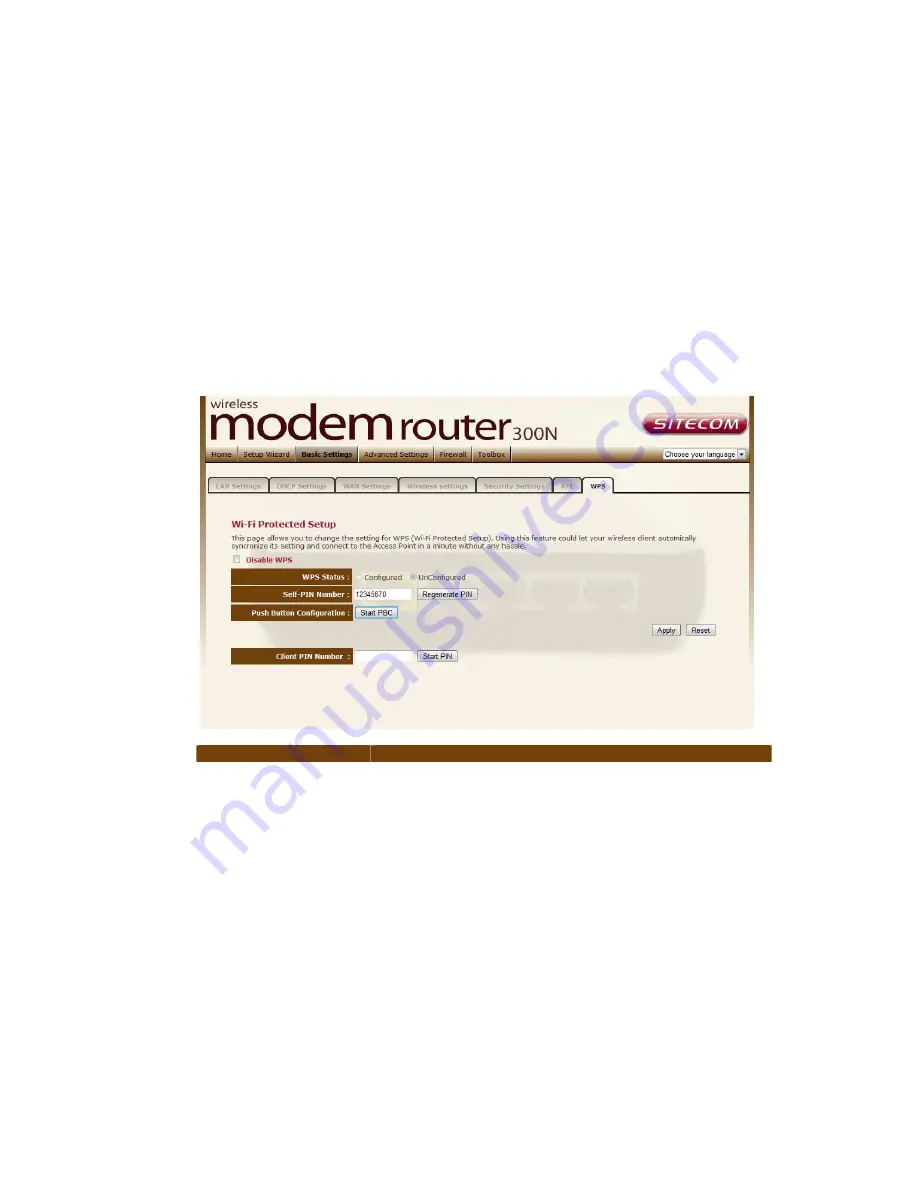
is as below.
Parameter
Description
Disable WPS
Check to disable the Wi-Fi protected Setup.
WPS Status
When AP’s settings are factory default (out of box), it
is set to open security and un-configured state. “WPS
Status” will display it as “UnConfigured”. If it already
shows “Configured”, some registrars such as Vista WCN
will not configure AP. Users will need to go to the
“Backup/Restore” page and click “Reset” to reload
factory default settings.
Self-PIN Number
“Self-PIN Number” is AP’s PIN. Whenever users want to
change AP’s PIN, they could click “Regenerate PIN” and
then click “ Apply Changes”. Moreover, if users want to
make their own PIN, they could enter four-digit PIN
without checksum and then click “ Apply Changes”.
However, this would not be recommended since the
registrar side needs to be supported with four-digit
PIN.


