2.
Purchase/Settings in Web Portal
<
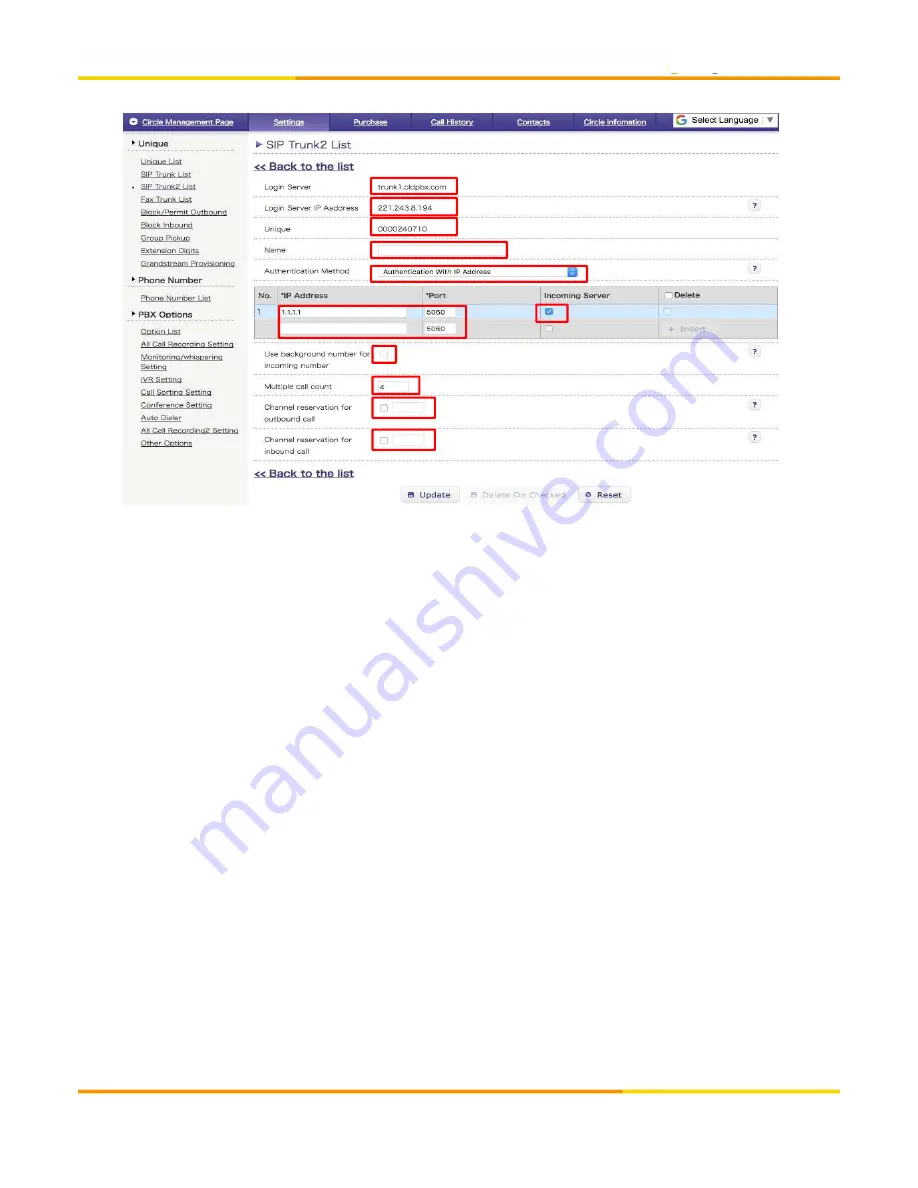
SIP Trunk 2 Detailed Settings
・
Authentication with IP Address
>
①
①
②
③
④
⑤
⑥
⑦
⑧
⑨
⑩
⑪
①
Login server name of SIP Trunk 2
②
Our SIP Server IP Address
Please configure it as [peer] in sip.conf on your Asterisk.
*Please refer
p.14
for details
*Please refer
p.14
for details
③
Unique is used as client user ID of your user PBX end.
④
Item “Name” is where you can name/rename your SIP Trunk account.
⑤
Select authentication method as “Authentication with IP Address”
⑥
Enter a public IP address / a port number of your IP-PBX *You can add multiple IP
addresses/ports from “+Insert” button.
⑦
Your IP-PBX will receive incoming call if ticked. *If unticked it will work only for
⑦
Your IP-PBX will receive incoming call if ticked. *If unticked it will work only for
outgoing calls.
⑧
In case you use Free Call or Navi-Dial number, please designate format of
incoming number configured on your SIP server.
Checked : Please configure 0ABJ number
Unchecked : Please configure Free Call or Navi-Dial number.
(* Changing check box status is not allowed.)
(* Changing check box status is not allowed.)
⑨ Set multiple call count. It’s 1 by default. Purchase “Additional 1 channel for
SIP Trunk 2” if you need more than 2 concurrent calls.
⑩ If this option is checked, you can specify channel reservation for multiple
outbound calls.
⑪ If this option is checked, you can specify channel reservation for multiple inbound
10
⑪ If this option is checked, you can specify channel reservation for multiple inbound
calls.
*Note ⑩ and ⑪
The total channel reservation (ou inbound) must not exceed the multiple call count.
Please refer p.12 for further details.


