background image

Warranty

ENGLISH – 11

LIMITED WARRANTY

IMPORTANT: SAVE THIS DOCUMENT AND KEEP IT IN A SAFE PLACE!

The SteamCraft Plus Steam Iron is warranted to be free from defects in material and workmanship.

The warranty for the SteamCraft Plus Steam Iron’s wiring and electronic parts is for a period of one (1) year from 

the date of purchase.

The warranty for all other parts of the SteamCraft Plus Steam Iron is for a period of ninety (90) days from the 

date of purchase.

If the electronic parts and/or the other parts in the SteamCraft Plus Steam Iron, after inspection by SINGER®, 

prove to be defective during the applicable warranty period(s), the electronic parts and/or the other parts will be 

repaired or replaced at SINGER®’s option, without charge, except for any expense associated with sending the 

SteamCraft Plus Steam Iron to SINGER®.

If SINGER® sends a replacement SteamCraft Plus Steam Iron, it will carry the remaining warranty of the original 

SteamCraft Plus Steam Iron.

This warranty may only be used by the original consumer owner of the SteamCraft Plus Steam Iron and may not 

be transferred or assigned.


Exclusions or Limitations

•  Service under this warranty may only be obtained within the 48 contiguous states, Alaska, Hawaii and 

Canada.

•  The SteamCraft Plus Steam Iron is warranted only for normal household (non-commercial) use. This warranty 

does not cover defect(s) caused by abuse, lack of maintenance or other neglect, failure to follow the care, 

cleaning or other instructions for the SteamCraft Plus Steam Iron, misuse, or events beyond our control.

•  ANY IMPLIED WARRANTY APPLICABLE TO THE STEAMCRAFT PLUS STEAM IRON, INCLUDING WITH-

OUT LIMITATION THE WARRANTIES OF MERCHANTABILITY AND/OR FITNESS FOR A PARTICULAR 

PURPOSE, IS LIMITED IN DURATION OF THIS WRITTEN WARRANTY. SINGER® SHALL NOT BE LIABLE 

FOR CONSEQUENTIAL ECONOMIC DAMAGES RESULTING FROM BREACH OF THIS WARRANTY OR 

ANY IMPLIED WARRANTY.

•  SINGER® does not authorize any person to create for it any obligation or liability in connection with the Steam-

Craft Plus Steam Iron and any of its parts beyond those set forth in this warranty.

•  SINGER® disclaims liability under this warranty for any damage or defect resulting from the use of other than 

SINGER® parts and SINGER® approved service in the repair and maintenance of the SteamCraft Plus Steam 

Iron.

•  This warranty gives you specific legal rights, and you may also have other rights which vary from state to state.

•  Some states do not allow limitations on how long an implied warranty lasts, so the above limitation may not 

apply to you.

•  Some states do not allow the exclusion or limitation of incidental or consequential damages, so the above 

limitation or exclusion may not apply to you.

Service under the Warranty may be obtained by returning the SteamCraft Plus Steam Iron with:

1.  This original warranty document; and

2. Proof of purchase (such as purchase receipt) to:  SVP Sewing Brands LLC 

                                                   ATTN: Service Department 

                                                   1714 Heil Quaker Boulevard 

                                                   LaVergne, TN 37068

If you have any questions regarding these warranties, please contact:

SVP Sewing Brands LLC 

ATTN: Consumer Affairs 

1714 Heil Quaker Boulevard • 

LaVergne, TN  37068

1-800-4-SINGER (1-800-474-6437) 

E-mail:  [email protected]

Or, visit the Consumer Support Area of our website at: www.Singer.com

Summary of Contents for 220426112.01

Page 1: ...SteamCraft Plus Steam Iron Instruction Manual Please read all instructions before use English...

Page 2: ...from outlet Never pull the cord to disconnect from outlet instead grasp plug and pull to discon nect 6 Always disconnect appliance from electrical outlet when lling with water emptying or when not in...

Page 3: ...22 This appliance can be used by children aged from 8 years and above and persons with reduced physical sensory or mental capabilities or lack of experience and knowledge if they have been given supe...

Page 4: ...n to ensure all residue is completely released 1 Soleplate 2 Spray Nozzle 3 Water Tank Door 4 Steam Knob 5 Spray Button 6 Burst of Steam Button 7 Temperature Select 8 Cord Guard 9 Water Tank 10 Temper...

Page 5: ...Tank with water to Max level 4 Close the Water Tank Door 5 Plug in Power Cord to electrical outlet and press the Temperature Select Button to switch on the appliance IMPORTANT Never add fabric condit...

Page 6: ...he fabric is made of begin ironing at Low Setting IRONING 1 Press the Temperature Select Button to turn on the appliance and select your desired temperture 2 Depending on which temperature setting you...

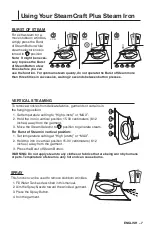
Page 7: ...sition 1 Set temperature setting to High LINEN or MAX 2 Hold the iron in vertical position 15 30 centimeters 6 12 inches away from the garment 3 Move the Steam Selector to position to generate steam F...

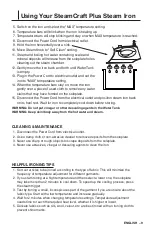
Page 8: ...lly when the iron is left untouched for 30 seconds horizontal position or 30 minutes vertical position To reactivate the iron simply press the Temperature Select Button The LED will return to the temp...

Page 9: ...ING Do not put vinegar or other descaling agents in the Water Tank WARNING Keep skin body away from the hot water and steam CLEANING MAINTENANCE 1 Disconnect the Power Cord from electrical outlet 2 Us...

Page 10: ...ctor is in Steam Off position Low water in the Water Tank First time use Low water in the Water Tank First time use Steam Iron s heat setting is too low to produce steam Steam Selector is in the ON po...

Page 11: ...nts beyond our control ANY IMPLIED WARRANTY APPLICABLE TO THE STEAMCRAFT PLUS STEAM IRON INCLUDING WITH OUT LIMITATION THE WARRANTIES OF MERCHANTABILITY AND OR FITNESS FOR A PARTICULAR PURPOSE IS LIMI...

Page 12: ...inger and the Cameo S Design are trademarks of The Singer Company Limited S a r l or its Affiliates 2020 The Singer Company Limited S a r l or its Affiliates All rights reserved Technical Specificatio...

Page 13: ...Lea todas las instrucciones antes de usar SteamCraft Plus Steam Iron Manual de Instrucciones Espa ol...

Page 14: ...rlo o desenchufarlo del toma corriente Nunca tire del cable para desconectarlo del tomacorriente en su lugar tome el enchufe y tire para desconectarlo 6 Siempre desconecte el aparato del tomacorriente...

Page 15: ...el ctrica u otra y no lo use si una de las aberturas est bloqueada 19 No utilice la m quina al aire libre 20 No use el accesorio cuando se usen productos en aerosol roc o o donde se administre ox gen...

Page 16: ...enrolle y enderece el cable de alimentaci n y retire la cubierta de la suela de cart n antes de usar NOTA Cuando utilice la funci n de vapor por primera vez pruebe con una toalla vieja ya que pueden q...

Page 17: ...rre la puerta del tanque de agua 5 Enchufe el cable de alimentaci n a la toma de corriente y gire el dial de control de temperatura hacia la derecha para encender el aparato IMPORTANTE Nunca agregue a...

Page 18: ...temperatura para encender el electrodom stico y seleccionar la temperatura deseada 2 Dependiendo de la configuraci n de temperatura que haya seleccionado las barras de temperatura correspondientes par...

Page 19: ...ablezca la configuraci n de temperatura en Alta o M X 2 Mantenga la plancha en posici n vertical a 15 30 cent metros 6 12 pulgadas de la prenda 3 Mueva el selector de vapor a la posici n para generar...

Page 20: ...NUNCA deje la plancha desatendida con el apagado autom tico en funcionamiento DRENAJE DEL TANQUE DE AGUA 1 Apague la plancha 2 Desenchufe el cable de alimentaci n de la toma de corriente 3 Abra la pue...

Page 21: ...obre el tal n Espere a que la plancha se enfr e por completo antes de guardarla ADVERTENCIA No ponga vinagre u otros agentes desincrustantes en el tanque de agua ADVERTENCIA Mantenga la piel cuerpo le...

Page 22: ...ivel bajo de agua en el tanque de agua Uso por primera vez Elajustedecalordelaplanchadevapor esdemasiadobajoparaproducirvapor Elselectordevaporest enlaposici n EN CENDIDO mientrasrellenaeltanquedeagua...

Page 23: ...l CUALQUIER GARANT A IMPL CITA APLICABLE A SteamCraft Plus Steam Iron INCLUYENDO SIN LIMITACI N LAS GARANT AS DE COMERCIABILIDAD Y O APTITUD PARA UN PROP SITO EN PARTICULAR EST LIM ITADA EN LA DURACI...

Page 24: ...dise o Cameo S son marcas comerciales de The SINGER Company Limited S a r l o sus afiliados 2020 The SINGER Company Limited S a r l o sus afiliados Todos los derechos reservados Especificaciones t cni...

Page 25: ...Veuillez lire toutes les instructions avant l utilisation Fer vapeur SteamCraft Plus Manuel d Instructions French...

Page 26: ...de l eau ou d autres liquides 5 L appareil doit toujours tre teint avant de le brancher ou de le d brancher Ne tirez jamais sur le cordon pour le d brancher de la prise saisissez plut t la prise et ti...

Page 27: ...xyg ne est administr 21 Nettoyez l appareil uniquement avec un chiffon sec ou l g rement humide 22 Cet appareil peut tre utilis par des enfants de plus de 8 ans ainsi que des personnes ayant des capac...

Page 28: ...llants de l appareil 2 D rouler et redresser le cordon d alimentation et retirer le couvercle de la semelle en carton avant utilisation REMARQUE Lorsque vous utilisez la fonction vapeur pour la premi...

Page 29: ...d eau avec de l eau au niveau maximum 4 Fermez le couvercle du r servoir d eau 5 Branchez le cordon d alimentation la prise lectrique et tournez la molette de r glage de la temp rature vers la droite...

Page 30: ...position basse REPASSAGE 1 Appuyez sur le bouton de s lection de la temp rature pour allumer l appareil et s lec tionnez la temp rature souhait e 2 Selon le r glage de temp rature que vous avez s lect...

Page 31: ...lez la temp rature sur Haut ou MAX 2 Tenez le fer repasser en position verticale une distance de 15 30 centim tres 6 12 pouces du v tement 3 D placez le s lecteur de vapeur en position pour g n rer de...

Page 32: ...icale Pour remettre le fer repasser en marche il suffit de le bouger ou de tourner la molette de r glage de temp rature vers la droite L affichage LED affichera nouveau le r glage de la temp rature qu...

Page 33: ...autres d tartrants dans le r servoir d eau AVERTISSEMENT loignez votre corps de l eau chaude et de la vapeur et faites attention ne pas effleurer votre peau NETTOYAGE ET ENTRETIEN 1 D branchez le cor...

Page 34: ...on Le r glage de la chaleur du fer repasser vapeur est trop bas pour produire de la vapeur Le s lecteur de vapeur est en position Activ pendant le remplissage du r servoir d eau Appuyez plusieurs fois...

Page 35: ...otre volont TOUTE GARANTIE IMPLICITE APPLICABLE AU FER VAPEUR SteamCraft Plus Y COMPRIS SANS S Y LIMITER LES GARANTIES DE QUALIT MARCHANDE ET OU D AD QUATION UN USAGE PARTICULIER EST LIMIT E DANS LA D...

Page 36: ...dessin Cameo S sont des marques de commerce de The SINGER Company Limited S a r l ou ses filiales 2020 The SINGER Company Limited S a r l ou ses filiales Tous droits r serv s Sp cifications technique...

Page 37: ...SteamCraft Plus Steam Iron Manual de Instru es Leia todas as instru es antes de usar Portugu s...

Page 38: ...onectar da tomada Nunca puxe o cabo para desconectar da tomada em vez disso segure o plugue e puxe para desconectar 6 Sempre desconecte o aparelho da tomada el trica ao encher com gua esvaziar ou quan...

Page 39: ...um pano seco ou levemente mido 22 Este aparelho pode ser usado por crian as a partir de 8 anos e por pessoas com capaci dade f sica sensorial ou mental reduzida ou falta de experi ncia e conhecimento...

Page 40: ...prote o do aparelho 2 Desenrole e endireite o cabo de alimenta o e remova a tampa da base do cart o antes de usar NOTA Ao usar a fun o de vapor pela primeira vez teste com uma toalha velha pois algun...

Page 41: ...ua at o n vel m ximo 4 Feche a porta do tanque de gua 5 Conecte o cabo de alimenta o tomada el trica e gire o seletor de controle de temperatura para a direita para ligar o aparelho IMPORTANTE Nunca a...

Page 42: ...r o aparelho e selecionar a temperatura desejada 2 Dependendo da configura o de temperatura selecionada as barras de temperatura correspondentes piscar o Quando o ferro estiver pronto para uso as barr...

Page 43: ...gura o de temperatura como Alta ou M X 2 Mantenha o ferro na posi o vertical a 15 30 cent metros 6 12 polegadas de dist ncia da roupa 3 Mova o seletor de vapor para a posi o para gerar vapor Para o ja...

Page 44: ...ro sem vigil ncia com o desligamento autom tico em opera o ESCOAR O TANQUE DE GUA 1 Desligue o ferro 2 Desconecte o cabo de alimenta o da tomada el trica 3 Abra a porta do tanque de gua e esvazie o ta...

Page 45: ...completamente antes de guardar PERIGO N o coloque vinagre ou outros agentes descalcificantes no tanque de gua PERIGO Mantenha a pele corpo longe da gua quente e do vapor LIMPEZA E MANUTEN O 1 Descone...

Page 46: ...e gua Uso pela primeira vez A configura o de calor do ferro a vapor muito baixa para produzir vapor O seletor de vapor est na posi o LIGADO enquanto recarrega o tanque de gua Pressionar o bot o Steam...

Page 47: ...MPL CITA APLIC VEL AO FERRO A VAPOR SteamCraft Plus INCLUINDO SEM LIMITA O AS GARANTIAS DE COMERCIALIZA O E OU ADEQUA O A UMA FINALIDADE ESPEC FICA EST LIMITADA NA DURA O DESTA GARANTIA ESCRITA O SING...

Page 48: ...Cameo S Design s o marcas com erciais da The SINGER Company Limited S a r l ou suas afiliadas 2020 The SINGER Company Limited S a r l ou suas afiliadas Todos os direitos reservados Especifica es t cn...

Reviews: