background image


25

5.9


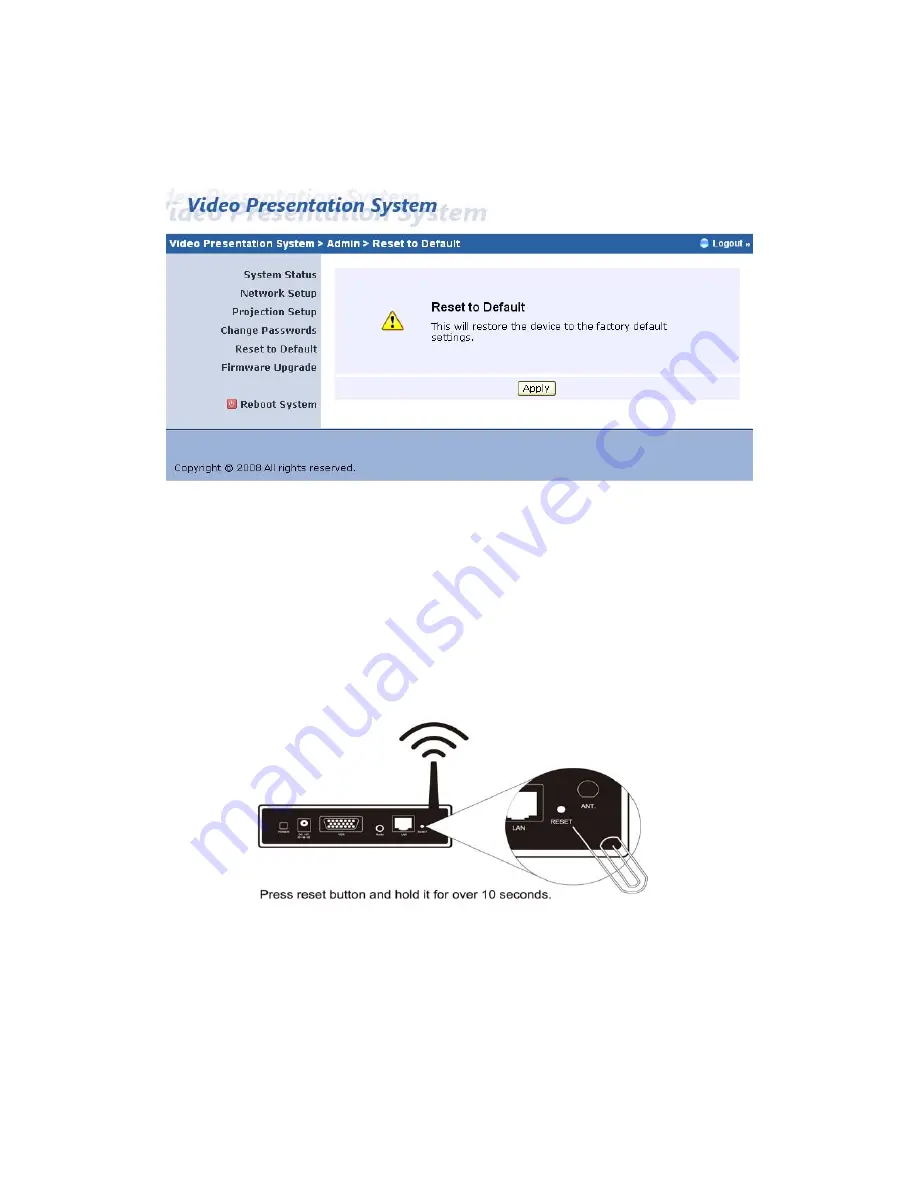
  Reset to Default 


Click 

[Reset to Default]

 button to restore factory default settings. 

<Apply>: 

Confirmation and action.   

 
*** Another way to restore Factory Default Settings, Follow below 
procedures. 

1.


Press 

[Reset] 

button and 

Hold.


2.


Turn on VPS box.  

3.


Wait for over 10 seconds and relief [

Reset

] button. 

4.


It will take effect to restore factory default settings.   


Summary of Contents for VPS-300D

Page 1: ...VPS 300D Video Presentation System Version 1 0 Date Nov 3rd 2009...

Page 2: ...System Information 15 4 9 VPS for PDA 15 4 10 Exit Program 16 5 Web Management 16 5 1 Home Page 16 5 2 Download Software 17 5 3 Conference Control 18 5 4 Login Web Admin 20 5 5 System Status 20 5 6 N...

Page 3: ...onnected projector 4 to 1 Split Screen Projection With this 4 to 1 split screen feature up to four PC screens can be projected to one projector in the same time Thus you can easily do side by side com...

Page 4: ...seconds 4 to 1 split screen projection Turn one projector into four increase meeting productivity right away PDA wireless projection PC less stylish presentation becomes possible Conference control Al...

Page 5: ...ansmission Power 2dBi external dipole antenna Receiving Sensitivity 65dBm 54Mbps 80dBm 11Mbps at 10 5 BER Wireless Link Coverage Up to 300 feet 100 meters depends on environment Supported PC NB Resolu...

Page 6: ...t menu on the screen as below it indicates the VPS box is ready now 3 Make sure your PC WLAN is enabled already and connect your PC with VPS box 4 Open your browser and it will redirect to VPS main pa...

Page 7: ...corner of projector screen 5 Download the client software Please select the Windows Vista XP 2000 or Windows Mobile 5 0 and execute the installation program After install the program VPS shortcut wil...

Page 8: ...8 6 Make sure your personal firewall allows VPS software to pass through 7 Enter the LOGIN CODE and You can see the login code on the projector screen 8 Click the Play button to start projection...

Page 9: ...successfully then follow below steps to start 1 Click VPS icon to execute the program 2 Program start to search for VPS box automatically 3 If VPS box founded then Login Code dialog box will be pop up...

Page 10: ...de shown on the projector screen 4 3 Buttons Description 1 After login successfully you will see main UI of VPS application 2 Click following buttons to manipulate VPS Application Project desktop scre...

Page 11: ...the program Exit the program 4 4 Start Stop Presentation Click to project desktop Full screen or split screen Click to stop presentation Click to pause presentation which will hide any activities of y...

Page 12: ...12 4 6 Searching Server Click Search Server to search for VPS box...

Page 13: ...13 4 7 Make VPS Token Click Make VPS Token to make a USB VPS Token please follow the steps with the wizard...

Page 14: ...14...

Page 15: ...information 4 9 VPS for PDA To project your PDA screen with VPS please follow the steps 1 Enable your WiFi and connect to VPS 2 Open the browser and enter Server IP address to download VPS client soft...

Page 16: ...ement 5 1 Home Page 6 Make sure your PC connect to VPS box successfully 7 Open your browser it will enter VPS home page automatically 8 If not enter your IP address on the browser you can see the IP o...

Page 17: ...execute the installation program 3 Follow Installation Wizard instructions to proceed till the installation process complete 4 If pop up Windows Security Alert because Windows firewall block this prog...

Page 18: ...web management again to download the driver 5 3 Conference Control 1 This function allows you to host a meeting smoothly without projector cable swapping and each participant can show their presentati...

Page 19: ...een which indicates all of users connected to VPS box 5 There are three columns Computer Name Play Control and IP Address 6 Play Control There are six buttons including Play Full Play Split 1 Play Spl...

Page 20: ...n Web Admin 1 Click Admin and then enter password to login web page 2 The password default value is admin 5 5 System Status Click System Status shows current system status Model Name Product model nam...

Page 21: ...C address wire MAC address Connection Status 1 Projecting status which is Waiting for projecting or Projecting 2 Total Users It shows how many users login into VPS box 5 6 Network Setup There are many...

Page 22: ...ax Length is 32 bytes Channel to set fixed channel or Auto The Auto means after power on VPS it will scan all of wireless channel and select clear one channel automatically WEP you can Disable WEP key...

Page 23: ...color depth It depends on your PC settings Screen Refresh Rate This is VGA output refresh rate provides 60 Hz and 75Hz to suit for different kinds of projectors Login Code You can select Disable Rand...

Page 24: ...s Click Change Password button to change password value Enter New Password enter new password you want to change for each category Confirm New Password double confirm new password Apply Confirmation a...

Page 25: ...efault settings Apply Confirmation and action Another way to restore Factory Default Settings Follow below procedures 1 Press Reset button and Hold 2 Turn on VPS box 3 Wait for over 10 seconds and rel...

Page 26: ...file name you want to upgrade 3 Click Upgrade to start 4 A warning message shown and count down counter on the screen 5 After a few minutes a complete message shown on the screen 6 Restart VPS box to...

Page 27: ...27 5 11 Reboot System Click Reboot System button to restart system Reboot reboot system automatically 5 12 Logout...

Page 28: ...1 VPS 300D 1PC 2 VPS 300D Antenna 1PC 3 USB Token 1PC 4 Adaptor DC 5V 2 5A 1PC 5 Mounting Bracket 1PC 6 Bracket Fix Screws 4PCS 7 Mounting Screws 2PCS 6 2 Packaging Specification Dimension 155mm W x...

Page 29: ...29 6 3 Wall Mounting Instruction Optional...

Reviews: