Simoco SDP600UW User Manual Download Page 10

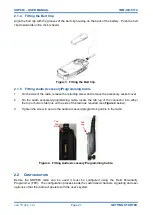
SDP660 – USER MANUAL 

TNM-U-E-0114 

Jun 15 (Iss. 1.4) 

Page 10 

RF ENERGY COMPLIANCE


COMPLIANCE WITH RF ENERGY EXPOSURE GUIDELINES 

(UNITED STATES AND CANADA) 

RF


E

NERGY 

E

XPOSURE 

A

WARENESS  AND 

C

ONTROL 

I

NFORMATION  AND 

O

PERATIONAL 

I

NSTRUCTIONS FOR 

FCC


O

CCUPATIONAL 

U

SE 

R

EQUIREMENTS


Before using your Simoco  portable two-way radio,  read this important RF energy awareness and 
control  information  and  operational  instructions  to  ensure  compliance  with  the  Federal 
Communication Commission’s (FCCs) RF exposure guidelines. 

NOTICE. 

This  radio  is  intended  for  use  in  Occupational/Controlled  conditions  in  a  portable 
application  where  users  have  full  knowledge  of  their  exposure  and  can  exercise  control 
over  their  exposure  to  meet  the  occupational  limits  in  FCC/ICNIRP  and  International 
Standards.  This radio device is NOT authorised for general population consumer use. 

This two-way radio uses electromagnetic energy in the Radio Frequency (RF) spectrum to provide 
communications between two or more users over a distance.  It uses RF energy or radio waves to 
send and receive calls.   RF energy is one form of electromagnetic energy.  Other forms include, 
but  are  not  limited  to,  electric  power,  sunlight  and  x-rays.    RF  energy,  however,  should  not  be 
confused  with  these  other  forms  of  electromagnetic  energy,  which,  when  used  improperly,  can 
cause biological damage.  Very high levels of x-rays, for example, can damage tissues and genetic 
material. 

Experts in science, engineering, medicine, health and industry work with organizations to develop 
standards for safe exposure to RF energy.  These standards provide recommended levels of RF 
exposure  for  both  workers  and  the  general  public.    These  recommended  RF  exposure  levels 
include substantial margins of protection.  All Simoco two-way radios are designed, manufactured 
and  tested  to  ensure  they  meet  government  established  RF  exposure  levels.    In  addition, 
manufacturers also recommend specific operating instructions to users of two-way radios.  These 
instructions  are  important  because  they  inform  users  about  RF  energy  exposure  and  provide 
simple procedures on how to control it.  Please refer to the following websites for more information 
on  what  RF  energy  exposure  is  and  how  to  control  your  exposure  to  assure  compliance  with 
established RF exposure limits. 

http://transition.fcc.gov/oet/rfsafety/rf-faqs.html


http://www.osha.gov/SLTC/radiofrequencyradiation/


Federal Communications Commission Regulations 

The  FCC  rules  require  manufacturers  to  comply  with  the  FCC  RF  energy  exposure  limits  for 
portable two-way  radios  before they  can  be marketed  in  the  United  States  (US).   When  two-way 
radios are used as a consequence of employment, the FCC requires users to be fully aware of and 
able to control their exposure to meet occupational requirements.  Simoco two-way radios have an 
exposure  awareness  label  attached  to  the  equipment  directing  users  to  specific  awareness 
information.    Do  not  remove  this  exposure  awareness  label  from  the  device.    Additionally,  your 
Simoco  user  manual  or  separate  safety  booklet  includes  information  and  operating  instructions 
required to control your RF exposure and to satisfy compliance regulations. 

Compliance with RF Exposure Standards 

Simoco  two-way  radios  are  designed  and  tested  to  comply  with  a  number  of  national  and 
international  standards  and  guidelines  (listed  below)  for  human  exposure  to  RF  electromagnetic 
energy.  This radio complies  with the IEEE (FCC) and  International Commission on Non-Ionizing 
Radiation  Protection  (ICNIRP)  exposure  limits  for  Occupational/Controlled  RF  exposure 
environments at operating duty factors of up to 50% talk 50% listen and is authorised by the FCC 

Summary of Contents for SDP600UW

Page 1: ...une 2015 Field House Uttoxeter Old Road Derby DE1 1NH Tel 44 0 1332 375500 FAX 44 0 1332 375501 http www simocogroup com 1270 Ferntree Gully Road Scoresby Victoria 3179 Australia Tel 61 0 3 9730 3999...

Page 2: ...ghts including patent rights copyrights and trade secrets of Digital Voice Systems Inc This voice coding Technology is licensed solely for use within this Communications Equipment The user of this Tec...

Page 3: ...hanges to Support page email addresses 1 2 25 July 2013 Special functions Man Down Lone worker and DMR All Calls Dial String added Section 9 Dial Strings added plus other minor amendments 1 3 14 Octob...

Page 4: ...18 2 GETTING STARTED 19 2 1 PREPARING THE RADIO FOR USE 19 2 1 1 Charging the Battery 19 2 1 1 1 Procedure 19 2 1 2 Fitting the Battery 20 2 1 3 Fitting the Antenna 20 2 1 4 Fitting the Belt Clip 21...

Page 5: ...ENU 37 7 2 ZONE MENU 38 7 3 SETTINGS MENU 38 7 4 OPTIONS MENU 39 7 5 CONTACTS MENU 39 7 6 INFORMATION MENU 40 7 7 MESSAGES MENU 41 7 7 1 Inbox 41 7 7 2 Outbox 42 7 7 3 Send Status 42 7 7 4 Send Templa...

Page 6: ...S Page Figure 1 Fitting the Battery 20 Figure 2 Fitting the Antenna 20 Figure 3 Fitting the Belt Clip 21 Figure 4 Fitting Audio Accessory Programming Cable 21 Figure 5 SDP660 Controls 22 Figure 6 Defa...

Page 7: ...gure 36 Key Beeps Menu 47 Figure 37 Speaker Volume Menu 48 Figure 38 Alert Volume Menu 48 Figure 39 Radio Status Menu RSSI Screen 49 Figure 40 Radio Status Menu Battery Level Screen 49 Figure 41 Radio...

Page 8: ...a hands free kit whilst driving a vehicle Do NOT operate your radio in an explosive atmosphere unless the radio s level of IECEx approval is approved for use in that atmosphere Obey the Turn Off Two w...

Page 9: ...rical Safety Regulations appropriate to the country of operation WARNING DANGEROUS VOLTAGES DANGEROUS VOLTAGES EXIST IN ALL THE BATTERY CHARGERS USED WITH THIS RADIO FOR THE APPROPRIATE SAFETY PRECAUT...

Page 10: ...s of protection All Simoco two way radios are designed manufactured and tested to ensure they meet government established RF exposure levels In addition manufacturers also recommend specific operating...

Page 11: ...r accessories may not ensure compliance with the FCC s RF exposure guidelines and may violate FCC regulations Do not use this device if the operational requirements described herein are not met Instru...

Page 12: ...Ear Approved Accessories This radio meets the FCC RF exposure guidelines when used with the Simoco accessories supplied or designated for the product Use of other accessories may not ensure compliance...

Page 13: ...Functions and Accessories Details of both the default and optional system configurations have been included in this User Manual therefore some material may not be relevant to every system Configuratio...

Page 14: ...US Customer Services Email customerservice simocogroup com TECHNICAL SUPPORT In order to streamline support requests and better serve our customers at Simoco we utilize a support ticket system Every s...

Page 15: ...co EMEA techsupport simocogroup com Simoco Australasia inquiry aus simocogroup com Simoco Americas techsupport simocogroup com Technical Support Helplines Simoco EMEA Tel UK 08717 411 040 Internationa...

Page 16: ...le Access FM Frequency Modulation FOACSU Full Off Air Call Set Up FPP Field Personality Programmer GPS Global Positioning System ICNIRP International Commission on Non Ionizing Radiation Protection ID...

Page 17: ...io Receive Any DMR signal regardless of Colour Code or TGID will be heard Normal Mute Mode of Radio Receive Only signals with matching Colour Code will be heard Push To Talk The action or signal that...

Page 18: ...2 CONFIGURATION Before the SDP660 radio can be used it must be configured using the Field Personality Programmer FPP The configuration process loads the customised channels signalling and user option...

Page 19: ...FER TO THE PERSONAL SAFETY PAGES Your radio is powered by a 2200 mAh Lithium Ion battery To avoid damage and comply with warranty terms the battery should be charged with a Simoco Standard Battery cha...

Page 20: ...io See arrow 1 in Figure 1 below Press down slightly on the battery release clip located at the top of the battery until a click is heard See arrow 2 Figure 1 Fitting the Battery To remove the battery...

Page 21: ...socket cover 2 On the audio accessory programming cable locate the tab lug of the connector into either the top or bottom tab hole on the side of the radio as required see Figure 4 below 3 Tighten th...

Page 22: ...ric keypad Function buttons and numeric buttons can also have a second programmable function provided by a longer button press Multi coloured LED for a clear indication of radio status Full colour dis...

Page 23: ...LCD Display 10 Function Key F1 Menu Prog function key Default Menu Select 11 Function Key F11 Prog function key Default Start Call Send Message 12 Function Key F12 Prog function key Default End Call C...

Page 24: ...tual information in three lines These three lines contain both Persistent and Non persistent text information as follows Text Line 1 Persistent Text e g Zone name Text Line 2 Persistent Text e g Chann...

Page 25: ...t indicator Displayed when radio is transmitting A filled speaker icon indicates that a signal is present and the radio is unmuted The outline speaker icon indicates that a signal is present and the r...

Page 26: ...tation Steady Green once orientation has been remembered Flash Red when the man down sensor has detected a lack of motion an impact to or an abnormal orientation of the Radio Icon 6 Misc Encryption If...

Page 27: ...the FPP i e no keys pressed The radio will emit warning beeps for 10 seconds prior to switching off Pressing any key will reset this timer 5 2 ENTERING A PASSWORD Within the FPP there is a Password fi...

Page 28: ...AND UNLOCKING THE KEYPAD When the keypad is not in use it can be locked to prevent accidental keypad operation This is known as the KeyLock facility Figure 10 Default Screen with Keys Locked If the ke...

Page 29: ...0 channels A zone can be selected by any of the following methods 1 By menu selection Access the Zone menu and use the keys to select the desired zone 2 By using the function keys In the FPP the funct...

Page 30: ...rder to hear any replies The radio cannot listen and talk to groups simultaneously If you wish to talk to other groups or individuals these can be selected on the contact menu or dialled before pressi...

Page 31: ...io will interleave a check of this channel between each normal Scan channel The radio may also check the Priority Channel every few seconds while stopped on a channel If a signal is found on the Prior...

Page 32: ...ations near the radio The power button is not operable in emergency alarm mode The radio can be programmed to either remain in emergency alarm mode or to exit emergency alarm mode when the number of p...

Page 33: ...dial 8 followed by the extension number then press or the PTT button While the call is waiting to be answered by the recipient the telephone icon and CALLING will be displayed Once the recipient has a...

Page 34: ...SDP660 USER MANUAL TNM U E 0114 Jun 15 Iss 1 4 Page 34 BASIC OPERATIONS Figure 14 FPP Earpiece Volume and Mic Gain settings...

Page 35: ...nnel Zone this is usually the first menu as it is often accessed Contact Radio Info Mute Adjust User Options Settings Backlight Brightness Contrast Key Beeps Speaker Volume Alert Volume Text Message G...

Page 36: ...or to increase decrease a value Figure 15 Menu Navigation example Select Zone Select Back Menu ENTRY POINT Default Screen Normal Channel Screen Channel Back Back Back Back Back Back Back Back Back Bac...

Page 37: ...ists until the required menu option is selected with the leading pointer and then press the Select Nav Select button Pressing the Back F4 button at any point will go back to the previous screen 7 1 CH...

Page 38: ...operation of some of the general functions of the radio The Settings menu options can be programmed into the Settings menu with the FPP The FPP User can choose to add any all or none of the menu opti...

Page 39: ...D talk group of radio units TGID dialled external network access gateway phone internet other radio networks dispatchers and PABX PSTN Up to 20 Contact Lists can be created and programmed into the Rad...

Page 40: ...etc The Information menu is typically located under to Settings menu Figure 22 Information Menu Using the and keys select a radio information item from the list Press the Select key to display the spe...

Page 41: ...keys to scroll through the Messages menu options Press the S key to access the required option Figure 24 Messages Menu 7 7 1 Inbox The Inbox is used to store the received messages Up to 20 messages ca...

Page 42: ...again will give Reply and Delete options To return to the Messages Menu press the Back key 7 7 3 Send Status The Send Status menu option can be used to send a short Status message to another party Up...

Page 43: ...Select key to display the Send screen which allows you to select a Contact from the Contacts menu See Para 6 7 6 Sending Status Template and Text Messages for further information 7 7 5 New Message The...

Page 44: ...elow for further information 7 7 6 Sending Status Template and Text Messages To send Status Template and Text Messages carry out the following 1 When the message has been selected created and is ready...

Page 45: ...message options are Reply This will open a text Message screen in order to reply to the selected message Delete This will delete the received message Back This will return to the message inbox The De...

Page 46: ...be heard 15 Only very strong or near perfect signals will be heard Use the and keys to adjust the mute threshold Press the Select key to save the selected mute setting and return to the previous menu...

Page 47: ...klighting where this is possible The Brightness menu is located under the Options menu Figure 35 Brightness Menu Use the and keys to select the required brightness level To accept and save the setting...

Page 48: ...vious screen press the Select key 7 13 ALERT VOLUME MENU The Alert Volume menu allows the user to set the offset of the Alert Volume in relation to the current Volume setting Thus the alert tones can...

Page 49: ...Bm if the radio has been correctly calibrated For example 90 dBm is a strong signal and 130 dBm is no signal The RSSI screen will also display the Bit Error Rate BER for slots one and two RSSI and BER...

Page 50: ...osition that it will normally be worn in order to train the radio with its normal orientation Consequently any significant deviation from this remembered orientation will be sensed The display should...

Page 51: ...ferent aspects of the radio s display Figure 44 Display Test Menu Use the and keys to select the required test Press the Select key initiate the test Press the Back key to end the test and return to t...

Page 52: ...hannel so the user can talk directly to other radios on the channel while the repeater is out of service or out of range When the key is pressed again or the Channel is changed the mobile s Tx channel...

Page 53: ...tatus using a programmed Man Down button see buttons The Man Down system sequence is The radio s man down system is enabled by pressing the allocated Man Down button The radio uses a 3D accelerometer...

Page 54: ...fter any user activity with the radio i e either PTT or Lone Worker buttons are pressed 8 14 DMR ALL CALL DIAL STRING This function is used as a short sequence of key presses for All Call dial string...

Page 55: ...Dial string modifiers are used to alter the attributes of a call They are prefixed to a dialled number Modifiers 1 5 6 8 and 9 may be combined 8 and 9 are mutually exclusive eg 81 nnn Table 8 Call Mod...

Page 56: ...arger PSU SA 230 V AC with 3 pin SA fitting PA PSU1A5 SDP Single Charger PSU Excludes Mains Cord PA ACCORD XX8 PAR 600CRG2 SDP Dual Charger Unit Excludes Power Supply PA PSU3A0 Charger for two portabl...

Page 57: ...SDP660 USER MANUAL TNM U E 0114 Jun 15 Iss 1 4 Page 57 ACCESSORIES Part No Description Notes SA 600IMD Intelligent Man Down License SA 600MST Multi Site Trunking License Available Q2 2013...

Page 58: ...r Off Complete 880 Hz 1 sec Alert tone generated after radio saves its data and is ready to power down PTT Grant 1000 Hz 30 ms Generated after PTT request granted and radio starts transmitting Call Al...

Page 59: ...SIMOCO GROUP Global Headquarters Field House Uttoxeter Old Road Derby DE1 1NH UK Tel 08717 411 050 Fax 08717 411 049 International Tel 44 0 1332 375 671 Fax 44 0 1332 375 672 www simocogroup com...

Reviews: