background image

注)PCのイオンバランスは±10Vですが、静電気測定器 FMX-003のイオンバランス測

定用プレートは、検知部の面積・静電容量がANSI/ESD STM3.1 ESD Association
Standard Test Methodと違う関係で、±20V程度を目安にして下さい。

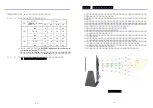
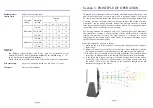
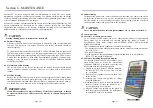
・静電気測定器を使用してイオンバランスをチェックする場合は、次の手順に従って下さ

い。

150㎜角以上の大きさの金属板を用意します。

①の金属板をできるだけ小さな高絶縁樹脂(フッ素樹脂等)またはガラス等で支持し

ブロワー前面30㎝の位置に、ブロワーの風が金属板に直角に当たるように設置します

その後方に静電気測定器を置きます。ブロワーの風が測定器の感知部に入らないこと
を確認して下さい。

ブロワーをOFFにし、金属板を接地して静電気測定器のゼロ調整を行い、その後金
属板の接地を外して、測定状態にします。

ブロワーをONにし、金属板の帯電電位を読み取って下さい。

金属板が−10V〜+10Vの帯電であれば、イオンバランスは正常です。

その範囲以上の帯電電位が読み取れれば、イオンバランスは正常ではありません。

ご注意

および

の測定には、正確に校正または調整された静電気測定器をご使用下さい

6.5

6.6

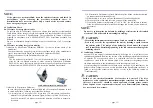
・イオン化された風に静電気測定器の感知部を直接さらすような方法でのイオンバランスの測

定は行わないで下さい。このような方法では、静電気測定器のメーターの読みは正確な値を
示しません。

「スパークテスト」は決して行わないで下さい。

・従来の除電装置でよく行なわれた、

本装置のバランス回路構成では「スパークテスト」は要領を得ないものとなっています。
また、放電針の短絡はバランス回路に悪影響を与えます。

6.7

調

エアロスタットPCのイオン出力は本質的にバランスが取れるように設計されていますの
で、使用途中あるいは定期的な調整を行う必要がありません。
もし、6.6のイオンバランスチェックの結果、イオンバランスが良好でないことが確認
された場合は、エアロスタットPCの除電電極を支持している絶縁材表面を圧搾空気等に
より絶縁部に付着した埃等のゴミを除去して下さい。この作業でもイオンバランスが崩れ
ている場合には、弊社または弊社代理店までご連絡下さい。保証要項に従い、弊社にて点
検修理させていただきます。

ご注意

エアロスタットPCの除電電極を支持している絶縁材表面が極端に汚れたり、吸湿材その他
の「導電性を付加する物質」が付着した場合、まれにイオンバランスが±10Vを外れる場
合があります。このような場合は、エアロスタットPCを分解洗浄すればイオンバランスは
正常に戻ります。分解洗浄(オーバーホール)は、保証期間内でも有償にて、弊社で行いま
すので、ご必要な場合は、弊社または弊社代理店までご連絡下さい。

6.8

故障箇所の点検
この点検は、本体カバーを開けて行います。このため高電圧を露出させることになり、大
変危険です。点検は専門の方にお任せ下さい。もしくは、弊社または弊社代理店までご連
絡下さい。保証要項に従い、弊社にて点検・修理させていただきます。

他にご不審な点、ご質問等がございましたら、弊社または弊社代理店までお問い合わせ下
さい。

12

第7章

異常時の処置

7.1

放電針からのスパーク
除電装置のシステムでは、目に見えるスパーク(火花放電)は正常使用時には一切起こり
ません。

もし、ブロワーの放電針からこのようなスパークが継続的に発生していれば、必ず、電極
部の清掃等のメンテナンスを行って下さい。清掃を行ってもスパークの発生が治まらない
場合は、電源スイッチをOFFにして、弊社もしくは弊社代理店に必ずご連絡下さい。

7.2

その他の異常
以下のような現象が発生した場合は、直ちに電源スイッチをOFFにして運転を停止し、
弊社または弊社代理店までご連絡下さい。

a)

ブロワー内部で火花が発生している。

b)

ブロワーが著しく変形している。

c)

異常な音やにおいがする。

d)

ファンが回らずエアーが吹き出てこない。

異常を発見した場合は、必ず点検・修理して下さい。または、修理・
点検依頼の詳細メモを添付の上、弊社宛その製品をご返送下さい。

13

Summary of Contents for Aerostat PC

Page 1: ...98070706 Simco Ion Ionizing Air Blower 1...

Page 2: ...Simco Ion Ionizing Air Blower 1 2 3 4 5 6 2 1 3...

Page 3: ...3 811 U S PAT 4 734 5 80 4 0 50 10 85 RH 180 W 247 H 112 D mm 2 9 kg AC 100 V 0 3 A 50 60 Hz 10 V 110 V 50 mm 600 mm 300 mm 30 PPI 0 01 ppm DASIBI 1003AH 150 mm m min dB A 1 0 50 2 0 57 600mm m sec 30...

Page 4: ...10 V m 150 mm 0 3 0 6 0 9 1 2 150 5 7 11 16 2 5 10 15 150 5 7 11 16 150 10 14 24 34 4 9 16 24 150 10 14 24 34 ANSI ESD STM3 1 ESD Associati on Standard Test Method 6 6 20 pF 1000V 100V H 6 7...

Page 5: ...50cm 30 cm 100 V 50 60 Hz 8 50 Hz 9...

Page 6: ...10 ANSI ESD STM3 1 ESD Association Standard Test Method R H Simco Ion FMX 003 150 FMX 003 ANSI ESD STM3 1 ESD Association Standard Test Method Simco Ion FMX 003 FMX 003 11...

Page 7: ...FMX 003 ANSI ESD STM3 1 ESD Association Standard Test Method 150 30 12 a b c d 13...

Page 8: ...14 15...

Page 9: ...16 17...

Page 10: ...2 4 TEL 078 303 4651 650 0046 TEL 078 303 4651 FAX 078 303 4655 650 0046 TEL 078 303 4651 FAX 078 303 4655 130 0026 TEL 03 3635 7261 FAX 03 3635 7189 980 0811 TEL 022 227 8451 FAX 022 227 8454 http w...

Page 11: ...ng the contents of package Please carefully remove the equipment from the carton and inspect Note any damage that might have occurred during shipment Empty the carton to ensure that small parts are no...

Page 12: ...dure In case sparking continues contact us or our sales representatives in your area The neutralizing electrodes in this product consist of sharp needles Please take precautions against injury Periodi...

Page 13: ...assure that the unit is working properly the high voltage AC is monitored by an ionization indicator lamp provided on the front panel Features of Simco Ion Aerostat PC Ionizing Air Blower are as follo...

Page 14: ...olated from the ground and is placed around the ionizing needles This arrangement makes the working of Auto Ion Balance system possible The ionizing elements are energized with a low current high volt...

Page 15: ...ON Activate Aerostat PC by turning the FAN SPEED knob clockwise out of the OFF 5 1 position The fan starts and the IONIZATION INDICATOR will illuminate to indicate the presence of ionized air Charge n...

Page 16: ...w to dry Install filter on air inlet and secure by snapping the filter retainer in place IMPORTANT Clean filter regularly for better efficiency If the filter is damaged it should be replaced In this c...

Page 17: ...ection of airflow is normal to its surface page 12 2 A Electrostatic Fieldmeter is placed behind the plate Make certain that ionized air cannot reach the measuring device 3 With the blower off carry o...

Page 18: ...ry terminals of the transformer should be isolated and a high impedance 500 M High voltage meter should be connected across it Plug the unit in and turn it on The meter should read a minimum of 5 kVAC...

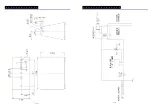
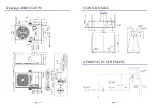
Page 19: ...Drawings AEROSTAT PC page 16 STAND DETAILS AEROSTAT PC SCHEMATIC page 17...

Page 20: ...installed altered has received damage through abuse carelessness accident connected to improper line voltage or has been serviced by anyone other than an authorized factory representative The warrant...

Reviews: