background image

30  GB

15.5 Cleaning, checking and 

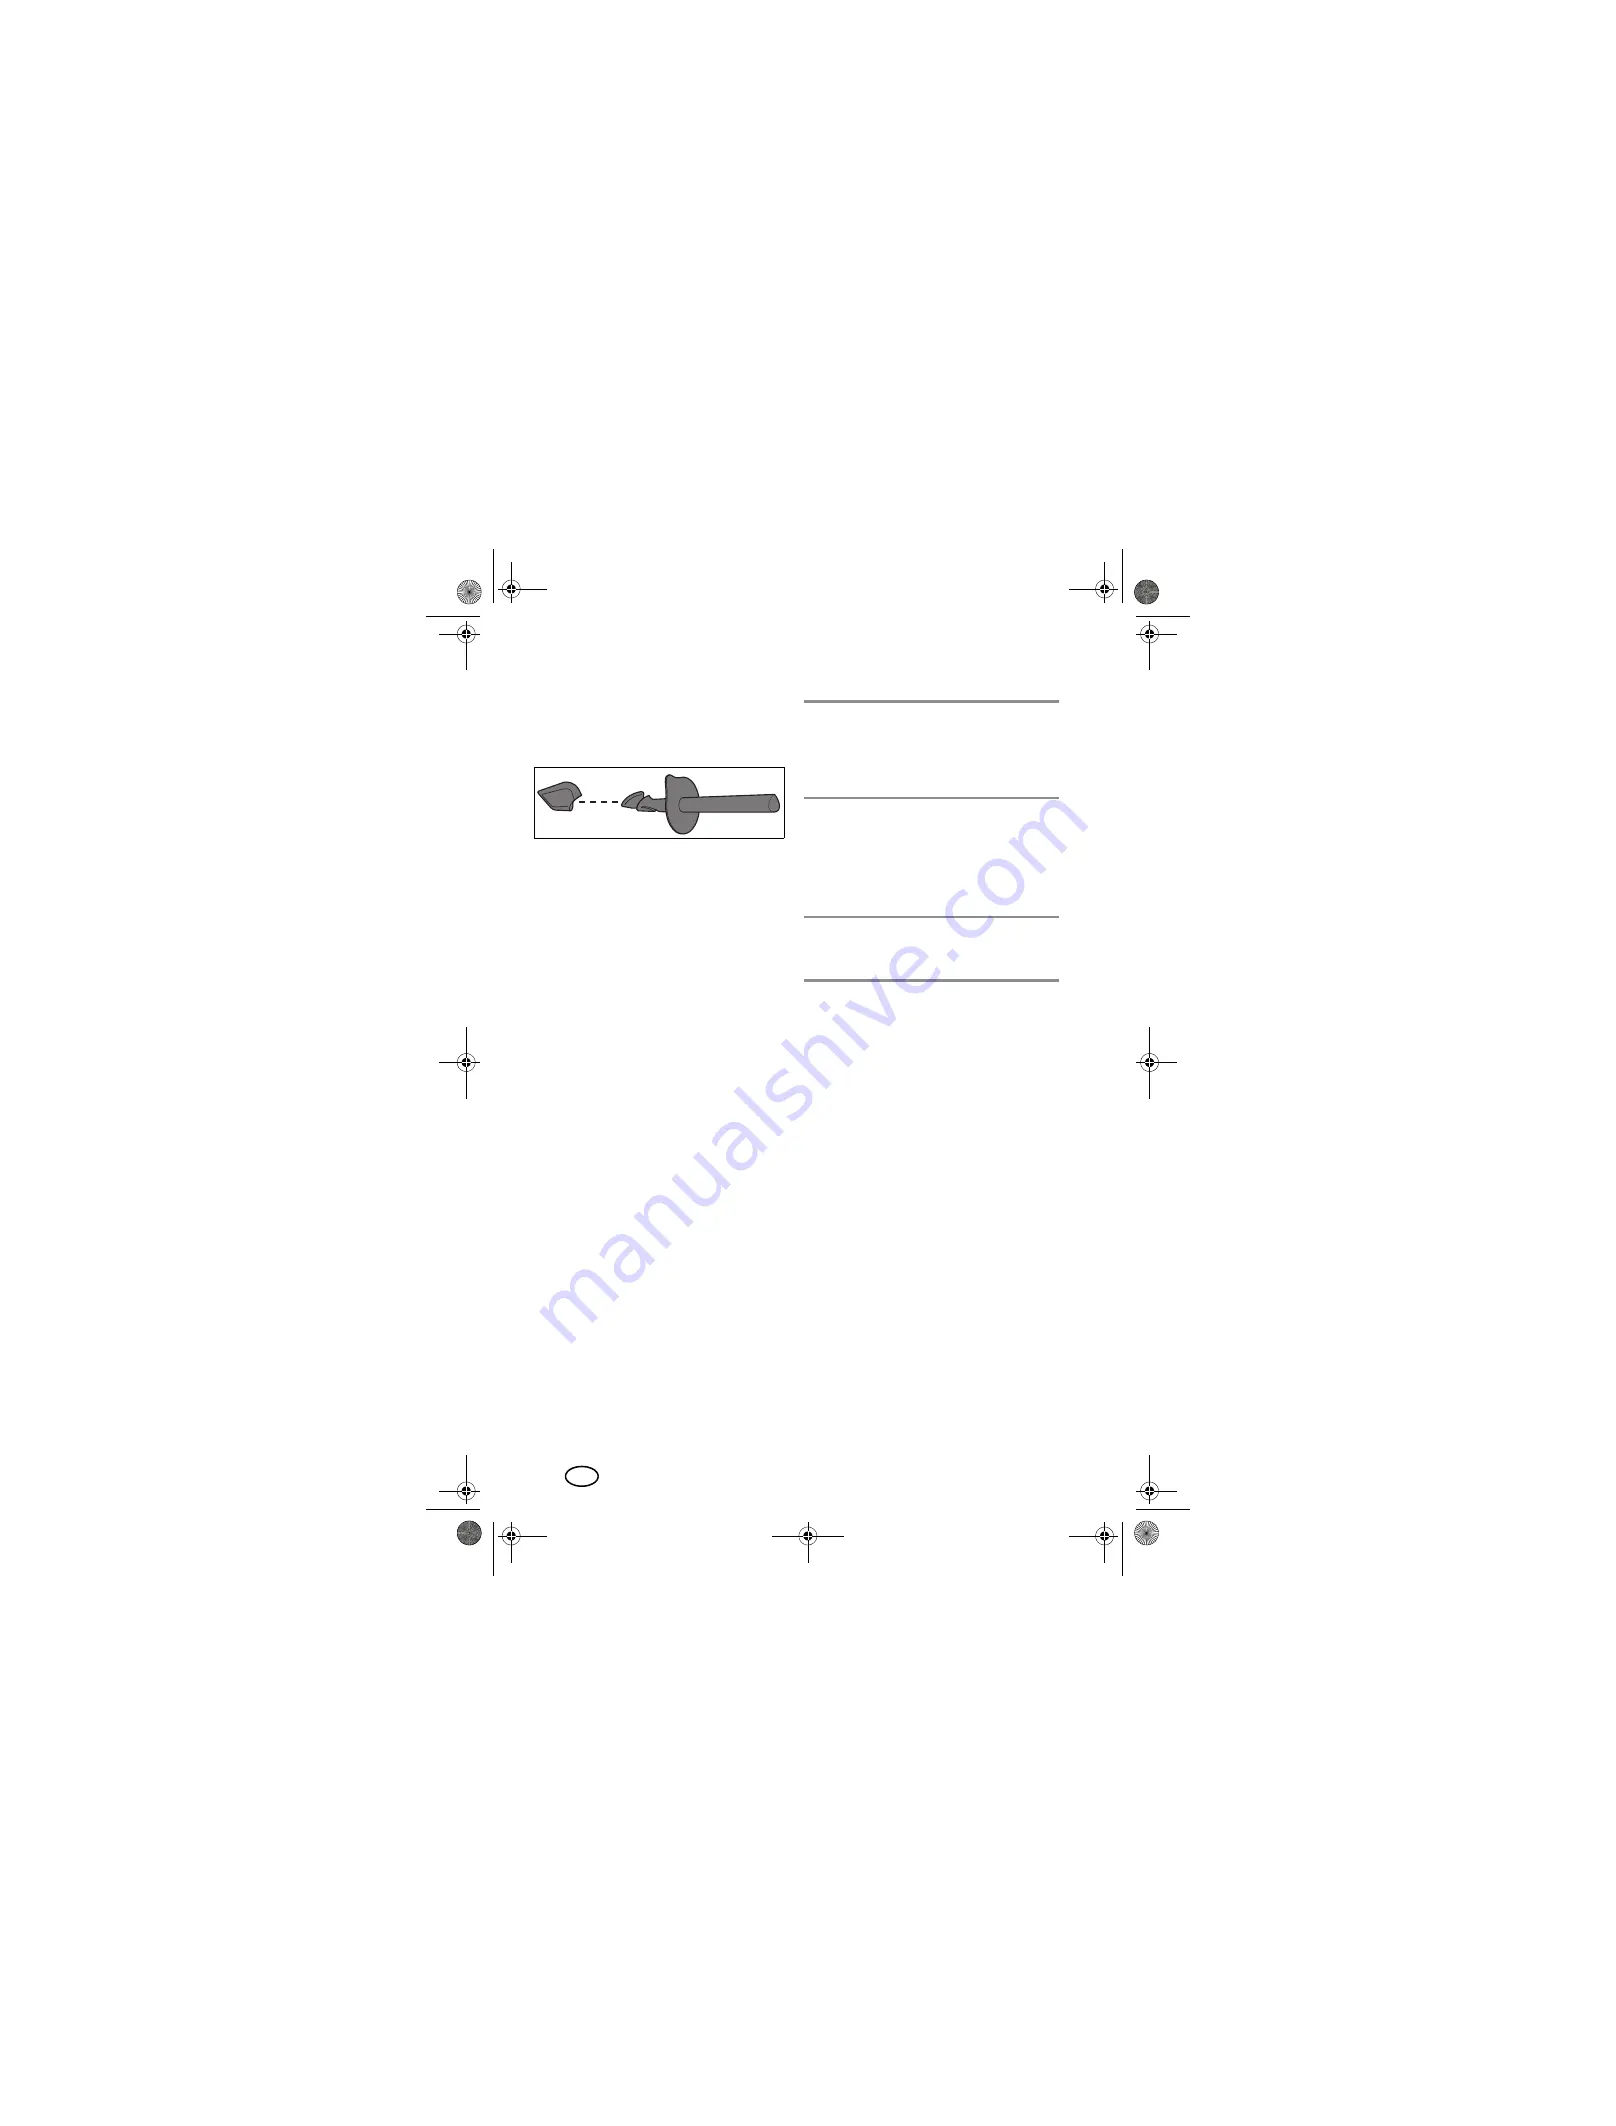
replacing the spatula

The spatula


32

 is provided with a detacha-

ble silicone scraper.


For cleaning, remove the silicone scraper, 
and check it for damage. Pay attention to 
changes (e.g. porous material or tears).
-

Both parts can be cleaned in the dish-
washer.

-

A new silicone scraper can be reor-
dered (see “How to order accessories” 
on page 36).

15.6 Descaling

When steaming with hard water, limescale 
may build up on the parts used, especially 
in the blender jug


5

Normal cleaning

In most cases, the limescale deposits are re-
moved by cleaning in the dishwasher or by 
hand.

Slight limescale deposits

1. Remove slight limescale deposits, which 

cannot be removed with normal clean-
ing by hand or in the dishwasher, with 
a cloth on which you put some house-
hold vinegar.

2. Rinse with clear water.

Major limescale deposits

CAUTION: 

~

Do not use commercially available des-
caling agent, not even glacial acetic 
acid or vinegar essence. Use the follow-
ing gentle method.

1. Prepare a mixture of 50 % white house-

hold vinegar and 50 % boiling water.

2. Fill this mixture into the blender jug


5

 or 

put other furred-up parts into a contain-
er with this mixture.

3. Allow the mixture to react for 30 minutes.

NOTE:

 more extended reaction periods do 

not improve the limescale deposits but may 
damage the parts permanently.

4. Rinse with clear water.
5. Allow the parts to dry completely before 

using them again. 

15.7 Storage

Store the device protected against dust 
and dirt and out of the reach of chil-
dren.

__317553_MC_plus_GR_CY.book  Seite 30  Freitag, 12. April 2019  10:00 10

Summary of Contents for MONSIEUR CUISINE EDITION PLUS

Page 1: ...R CUISINE ÉDITION PLUS SKMK 1200 D4 05 2019 ID SKMK 1200 D4_19_V1 2 MONSIEUR CUISINE ÉDITION PLUS Bedienungsanleitung DE GB GR CY DE MONSIEUR CUISINE ÉDITION PLUS δηγία χρήσης GR CY IAN 317553_1901 IAN 317553_1901 GR CY MONSIEUR CUISINE ÉDITION PLUS Operating instructions GB CY _317553_MC_plus_GR_CY_U1U4 fm Seite 1 Mittwoch 15 Mai 2019 9 46 09 ...

Page 2: ...English 2 Ελληνικά 40 Deutsch 80 __317553_MC_plus_GR_CY book Seite 2 Freitag 12 April 2019 10 00 10 ...

Page 3: ...Overview Επισκόπηση Übersicht 12 13 35 9 4 32 29 2 34 1 30 3 6 31 14 33 5 11 28 18 7 8 23 24 25 27 17 26 19 20 21 22 16 15 A 36 10 10 __317553_MC_plus_GR_CY book Seite 3 Freitag 12 April 2019 10 00 10 ...

Page 4: ...stopping the device 18 10 Using the blender jug 19 10 1 Removing the blender jug 19 10 2 Markings inside the blender jug 19 10 3 Using and removing the blade assembly 19 10 4 Insert blender jug 20 10 5 Insert and remove the mixer attachment 21 10 6 Put on the lid of the blender jug 21 10 7 Use the lid for the filler opening 22 10 8 Cooking and steaming with the cooking pot 22 10 9 Using the spatul...

Page 5: ...ng in the dishwasher 28 15 3 Cleaning the accessories 29 15 4 Cleaning checking and replacing seals 29 15 5 Cleaning checking and replacing the spatula 30 15 6 Descaling 30 15 7 Storage 30 15 8 Replacing the blade socket 31 16 Malfunctions Cause Remedy 32 16 1 Malfunctions during operation 32 16 2 Error messages on the display 34 17 Disposal 35 18 Technical specifications 35 19 How to order access...

Page 6: ...T STOP Starting and stopping the device 20 TURBO Pulse button 21 Changing the direction of rotation 22 Browning program 23 Steaming program 24 Dough kneading program 25 Starting the scale activate tare function 26 Timer 27 Display 28 Seal for blade assembly ensure the correct position 29 Blade assembly with flower shaped hub 30 Cooking pot 31 Mixer attachment 32 Spatula 33 Seal for the lid of the ...

Page 7: ...ot been positioned or closed correctly D Selected speed 1 4 is suited for the mixer attachment E Temperature of the food in the blender jug F Display of the weight in grams up to 5 000 g G Display of the speed 1 10 H Set to anti clockwise active I Symbol for the speed J set temperature 37 C 130 C B __317553_MC_plus_GR_CY book Seite 5 Freitag 12 April 2019 10 00 10 ...

Page 8: ... used to seal the blender jug 5 If necessary cut food first in pieces with an edge length of approx 3 4 cm Mixer attachment 31 For fluid food To whip cream at least 200 ml To whip egg white at least 2 eggs To emulsify e g mayonnaise must only be used with speed settings 1 to 4 Must not be used with func tion TURBO Cooking pot 30 To cook and stew Fill the blender jug 5 with at least 500 ml of water...

Page 9: ...us Symbol on your device 4 Intended purpose Monsieur Cuisine is used to mix whisk beat stir chop mash emulsify steam stew knead brown cook and weigh food These user instructions describe the basic functions such as mixing chopping and steaming For information on the prepara tion of special dishes refer to the recipe book included in the delivery The device is designed for private domestic use The ...

Page 10: ... sensory or intellectual abilities or people without adequate experience and or understanding if they are supervised or instructed on how to use this device safely and if they are aware of the resulting risks The appliance must not be immersed in water The surfaces of the device become very hot during opera tion During operation only grip the following parts of the device using potholders or oven ...

Page 11: ...ower cable of this device should become damaged it must be replaced by the manufacturer the manufacturer s customer ser vice department or a similarly qualified specialist in order to avoid any hazards Prior to replacement of parts or attachments which move when in operation the device must be switched off and disconnected from the mains Make sure that no liquid overflows onto the plug connections...

Page 12: ...nect the mains plug to a prop erly installed and easily accessible grounded wall socket whose voltage corresponds to the specifications on the rating plate The wall socket must contin ue to be easily accessible after the de vice is plugged in Ensure that the power cable cannot be damaged by sharp edges or hot points Do not wrap the power cable around the device Even after it has been switched off ...

Page 13: ...evice escaping abruptly when the lid is opened If you want to open the lids for the steamer baskets lift the lid first at the rear so that the escaping surge of steam is guided away from you WARNING Risk of material damage Place the device exclusively on a level dry non slip and waterproof surface so that it can neither fall nor slip off Never place the device on a hot sur face e g hot plate The m...

Page 14: ...ting up During production a thin film of oil is ap plied to protect many components Prior to the first use operate the device only with water so that any residues can evaporate NOTE when in operation for the first time some odour may be generated by the de vice This is harmless Please ensure ade quate ventilation 1 Remove all packing material 2 Check to ensure that all parts are pres ent and undam...

Page 15: ...e 16 to 0 grams and then add another object to be weighed 1 The device is switched on but no other cycle is in operation 2 Press the button 25 The button lights up The display 27 shows 0000 g 3 Place the object to be weighed on the scale 16 This may also be for in stance an empty or filled bowl On the display 27 the weight will be shown in grams up to 5 kilograms 4 Press 25 to set the weight indic...

Page 16: ...ed the longer the lock stays active since the blade assem bly 29 and the food keep turning longer 9 2 Power supply First connect the power cable 7 to the mains power socket 8 of the base unit 13 and then plug the mains plug 7 into a suit able wall socket The wall socket must con tinue to be easily accessible after the device is plugged in 9 3 Switching the device on and off Set the main switch 6 o...

Page 17: ...24 23 22 lights up and START STOP 19 flashes The programme is selected but not yet started Press START STOP 19 to start the function Program button 24 23 22 lights up and START STOP 19 lights up The programme is selected and started In order to abort the pro gramme early press START STOP 19 Program button 23 flashes and START STOP 19 lights up The programme is selected and started However the heat...

Page 18: ...out and an audio signal sounds The device can be opened NOTE if the speed setting is higher than 6 and you set a time exceeding 15 minutes the time will automatically be decreased to 15 minutes when starting 9 7 Setting the temperature Turn the temperature controller 17 to set the cooking temperature The adjustable temperature ranges from 37 C to 130 C 37 45 50 55 60 65 70 75 80 85 90 95 100 105 1...

Page 19: ...e speed to 0 the device will stop To con tinue working select a speed and press the button START STOP 19 If a temperature has been selected only the speed settings 1 3 are available Soft start In order to avoid that during sudden acceler ation of hot food liquid is ejected from the blender jug 5 or the device starts wobbling a soft start is provided for all settings except for the turbo function S...

Page 20: ... will show the symbol on the right Press and keep button TURBO 20 pressed for as long as you need the function NOTES The turbo function will only work if the blade assembly 29 is not turn ing if the food temperature in the blender jug 5 is less than 60 C The speed is promptly increased to set ting 10 maximum 9 11 Overflow In the holder of the blender jug 9 there is an overflow hole 11 Should liqui...

Page 21: ...admissi ble filling volume CAUTION When mixing liquids at speed 10 or with button TURBO 20 the blender jug 5 must not contain more than 1 litre since otherwise liquid may be ejected For speed settings of less than 10 the blender jug 5 may only be filled up to a maximum of 2 2 litres NOTE For some applications the blender jug 5 should not contain an insufficient amount of liquid so that the device ...

Page 22: ... content may escape 6 In order to lock the blade as sembly 29 move the unlock ing lever 37 on the underside of the blender jug 5 so that it points to the closed lock symbol NOTE chop large pieces into smaller ones with an edge length of approx 3 4 cm Otherwise larger pieces might get stuck in the blades 10 4 Insert blender jug 1 Place the blender jug 5 into the socket 9 2 Press the blender jug 5 d...

Page 23: ...blender jug 34 can only be placed on if the blender jug 5 was inserted correctly 1 Put the lid for the blender jug 34 slightly twisted onto the blender jug 5 The symbol of the opened lock points to the arrow of the locking system 12 2 Press and turn the lid 34 clockwise with both hands until the closed lock symbol points to the arrow of the locking sys tem 12 Only when the lid 34 is correctly clos...

Page 24: ...when the food is added If the entire food is covered by water it will be cooked If the food is not completely covered by water it will be steamed 2 Fill food into the cooking pot 30 NOTE Always make sure that the filling lev el does not exceed the marking MAX 3 Place the cooking pot 30 into the blend er jug 5 4 Close the blender jug 5 with the lid 34 and the measuring beaker 35 5 Use the main swit...

Page 25: ...cooking pot 30 without having to touch it directly Simply hook on the metal bracket of the cooking pot 30 and pull it out upwards 11 Steaming DANGER Risk of injury through scalding When opening the lid 1 or 34 during operation hot steam may escape NOTE these user instructions describe the basic functions such as mixing chopping and steaming For information on the prepa ration of special dishes ref...

Page 26: ...t on the seal 4 6 Fill food into the steamer baskets 3 and if required 2 NOTE even if you only need the shallow steamer basket 2 always both steamer bas kets 3 and 2 must be inserted so that no steam can escape to the side 7 Place the filled steamer basket 2 on steamer basket 3 8 Close the steamer baskets with the lid for the steamer baskets 1 11 3 Starting the steaming process 1 Use the main swit...

Page 27: ...team 2 Remove the lid 1 completely 3 Check the condition of the food to be cooked with a longer stick or a fork Once the food to be cooked is done press button START STOP 19 and then the main switch 6 to switch off the device If the food to be cooked is not done yet replace the lid 1 and let the de vice continue the operation 11 5 Steaming with the cook ing pot NOTE you can also use the program wi...

Page 28: ...oth er please make sure that Meat and fish should always be cooked in the bottom steamer basket 3 so that dripping juice will not come into contact with other food The food with the most weight to be cooked should possibly be cooked in the bottom steamer basket 3 13 Kneading The appliance can be used to process up to max 500 g of flour The programme is only operated with the blade assembly 29 13 1...

Page 29: ...some fat e g oil into den blender jug 5 2 Fill food into the blender jug 5 3 Close the blender jug 5 with the lid 34 4 Use the main switch 6 to switch on the device 5 Press the button 22 The button 22 lights up and the programme values are shown on the display 27 6 Press the flashing button START STOP 19 The programme is started The time set is counted down on the display 27 The button 22 lights u...

Page 30: ... g curry may discolour plastic This is not a defect with the device and harmless to health 15 1 Cleaning the base unit 1 Clean the outside of the base unit 13 with a damp cloth You can also use some detergent 2 Use clear water and wipe with a clean cloth 3 Do not use the base unit 13 until it is completely dry again 15 2 Cleaning in the dish washer The following parts are dishwasher safe Blender j...

Page 31: ...ith new ones You can reor der new seals see How to order acces sories on page 36 CAUTION Prior to the next use damaged seals 28 33 and 4 must be inserted again or replaced with new ones An operation without seals 28 33 and 4 in place is not permitted Blade assembly 29 1 Remove the blade assembly 29 from the blender jug 5 see Using and re moving the blade assembly on page 19 2 Pull seal 28 off the ...

Page 32: ...th normal clean ing by hand or in the dishwasher with a cloth on which you put some house hold vinegar 2 Rinse with clear water Major limescale deposits CAUTION Do not use commercially available des caling agent not even glacial acetic acid or vinegar essence Use the follow ing gentle method 1 Prepare a mixture of 50 white house hold vinegar and 50 boiling water 2 Fill this mixture into the blende...

Page 33: ...spare part see How to order accessories on page 36 Removing the old blade socket 1 Press your thumb down on the silicone cover 36 and simultaneously reach un der the rim of the old blade socket 10 Pull the old blade socket 10 out up wards You may need to wobble it a bit be fore the blade socket 10 becomes loose enough to be removed Inserting the new blade socket 2 Place the blade socket 10 onto th...

Page 34: ...u have processed too large a quantity of dough Replace the blade socket 10 with a new one see Replacing the blade socket on page 31 and comply with the specified maxi mum quantities in future Liquid underneath the device The blade assembly 29 has not been inserted correctly so that the blender jug 5 is leak ing Insert blade assembly 29 correctly see Using and removing the blade assembly on page 19...

Page 35: ...s A speed setting 7 10 was se lected At these speed set tings the device will function for a maximum of 15 minutes without a pause Select speed setting 0 6 see Set ting the speed on page 17 When switching on the set time is automat ically set to 15 00 The lid 34 the deep steamer basket 3 can not be opened The electronic lock is activated see Automatic lock on page 14 Stop the device and wait until...

Page 36: ...lose steamer basket 3 correctly see Preparation of the steamer inserts on page 24 The turbo function cannot be used since the food temper ature inside the blender jug 5 exceeds 60 C Set the speed using the speed control ler 18 see Setting the speed on page 17 HHH Temperature in the blender jug 5 is too high There is not enough food or liquid in the blender jug 5 Switch the device off and let the b...

Page 37: ...e sure you comply with the environmental reg ulations applicable in your country 18 Technical specifications Symbols used Subject to technical modifications Model SKMK 1200 D4 Mains voltage 230 V 50 60 Hz Protection class I Power rating 1 200 watt Blender 800 watt Cooking 1 000 watt Maximum filling volume of the blender jug 5 2 2 litres Maximum weighing capacity of the scale 16 5 kg Certified Safe...

Page 38: ...y defect occurs the product will be repaired or re placed by us at our discretion free of charge to you or the purchase price will be refunded This warranty implies that within the period of three years the defective de vice and the purchase receipt are presented including a brief written description of the defect and the time it occurred If the defect is covered by our warranty the repaired or a ...

Page 39: ...all cease Handling in case of a warranty claim In order to ensure prompt processing of your matter please observe the following notes Please keep the article number IAN 317553_1901 and the purchase receipt as a purchase verification for all in quiries The article number can be found on the rating plate an engraving the title page of your instructions in the bottom left or as a label on the rear or...

Page 40: ...Service Malta Tel 80062230 E Mail hoyer lidl com mt Service Cyprus Tel 8009 4409 E Mail hoyer lidl com cy IAN 317553_1901 Supplier Please note that the following address is no service address First contact the afore mentioned Service Centre HOYER Handel GmbH Tasköprüstraße 3 DE 22761 Hamburg GERMANY GB IE MT CY __317553_MC_plus_GR_CY book Seite 38 Freitag 12 April 2019 10 00 10 ...

Page 41: ...39 GB __317553_MC_plus_GR_CY book Seite 39 Freitag 12 April 2019 10 00 10 ...

Page 42: ...ση δοχείου ανάμειξης 58 10 2 Σημάνσεις στο δοχείο ανάμειξης 58 10 3 Τοποθέτηση και απομάκρυνση ένθετου μαχαιριού 58 10 4 Τοποθέτηση δοχείου ανάμειξης 59 10 5 Τοποθέτηση και απομάκρυνση επιθέματος ανάδευσης 60 10 6 Τοποθέτηση καπακιού δοχείου ανάμειξης 60 10 7 Χρήση καπακιού για την οπή πλήρωσης 61 10 8 Μαγείρεμα και τσιγάρισμα με το ένθετο μαγειρέματος 61 10 9 Χρήση της σπάτουλας 62 11 Μαγείρεμα σ...

Page 43: ...παρελκομένων 68 15 4 Καθαρισμός έλεγχος και αντικατάσταση των στεγανοποιήσεων 69 15 5 Καθαρισμός έλεγχος και αντικατάσταση σπάτουλας 70 15 6 Αφαλάτωση 70 15 7 Φύλαξη 70 15 8 Αντικατάσταση υποδοχής μαχαιριών 71 16 Βλάβες Αιτία ιόρθωση 72 16 1 Βλάβες κατά τη λειτουργία 72 16 2 Αναφορές σφαλμάτων στην οθόνη ένδειξης 75 17 Απόρριψη 76 18 Τεχνικά δεδομένα 76 19 Παραγγελία παρελκομένων 77 20 Ιστοσελίδα ...

Page 44: ...18 Ρυθμιστής ταχύτητας 19 START STOP Εκκίνηση και παύση της συσκευής 20 TURBO Πλήκτρο Turbo 21 Αλλαγή κατεύθυνσης στρέψης 22 Πρόγραμμα σοταρίσματος 23 Πρόγραμμα μαγειρέματος στον ατμό 24 Πρόγραμμα ανάδευσης ζύμης 25 Εκκίνηση ζυγαριάς ενεργοποίηση λειτουργίας απόβαρου 26 Ρυθμιστής χρόνου 27 Οθόνη ένδειξης6 28 Στεγανοποίηση του ένθετου μαχαιριού προσέξτε τη σωστή θέση 29 Ένθετο μαχαιριού με πλήμνη σ...

Page 45: ...σία είναι πολύ υψηλή C Το δοχείο ανάμειξης δεν έχει τοποθετηθεί ή δεν έχει κλείσει σωστά D Η επιλεγμένη ταχύτητα 1 4 είναι κατάλληλη για το επίθεμα ανάδευ σης E Θερμοκρασία των τροφίμων στο δοχείο ανάμειξης F Ένδειξη του βάρους σε γραμμάρια έως 5 000 g G Ένδειξη της ταχύτητας 1 10 H Αριστερόστροφη κίνηση ρυθμισμένη ενεργή I Σύμβολο για την ταχύτητα J ρυθμισμένη θερμοκρασία 37 C 130 C B __317553_MC...

Page 46: ...οχείου ανάμειξης 5 Αν χρειάζεται ψιλοκόβετε προηγουμένως τα τροφιμα σε κομμάτια με πλευρικό μή κος 3 4 cm Επίθεμα ανάδευ σης 31 για λεπτόρρευστα τρόφιμα Χτύπημα κρέμας γάλακτος τουλάχιστον 200 ml Χτύπημα ασπραδιού του λάχιστον 2 τεμάχια Γαλακτωματοποίηση π χ μα γιονέζα επιτρέπεται να χρησιμοποιεί ται μόνο με τις βαθμίδες τα χύτητας 1 έως 4 δεν επιτρέπεται να χρησιμο ποιείται με τη λειτουργία TURBO...

Page 47: ... το χτύπημα το ανακάτεμα τον τεμαχισμό την πολτοποίη ση τη γαλακτωματοποίηση το μαγείρεμα στον ατμό το τσιγάρισμα το ζύμωμα το σο τάρισμα το μαγείρεμα και το ζύγισμα τροφί μων και ειδών διατροφής Στις παρούσες οδηγίες χρήσης περιγράφο νται οι βασικές λειτουργίες όπως ανάμειξη τεμαχισμός και μαγείρεμα στον ατμό Πλη ροφορίες για την παρασκευή ειδικών συ νταγών μπορείτε να βρείτε στο απεσταλμένο βιβλ...

Page 48: ...ή και το καλώδιο ηλεκτρικής σύνδεσης μακριά από παιδιά Ο καθαρισμός και η συντήρηση δεν πρέπει να διεξάγονται από παιδιά Η συσκευή δεν επιτρέπεται να χρησιμοποιείται από τα παιδιά ως παιχνίδι Η συσκευή αυτή μπορεί να χρησιμοποιηθεί από άτομα με μειωμέ νες σωματικές αισθητήριες ή διανοητικές ικανότητες ή από άτομα χωρίς εμπειρία ή και γνώση εάν επιβλέπονται ή καθοδηγούνται για την ασφαλή χρήση της ...

Page 49: ...αλέσουν εγκαύματα Το ένθετο μαχαιριού και το επίθεμα ανάδευσης συνεχίζουν να πε ριστρέφονται για λίγο μετά την απενεργοποίηση Για αυτό η αυτό ματη ασφάλιση προστατεύει από το άνοιγμα του καπακιού πριν από την ακινητοποίηση Ιδίως τα υγρά φαγητά μπορεί να κινού νται ακόμη και μετά την ακινητοποίηση του μαχαιριού Περιμένετε πριν από το άνοιγμα του καπακιού μέχρι να σταματήσουν να κι νούνται τα φαγητά...

Page 50: ...λευσης Οι ηλεκτρικές συσκευές μπορεί να αποτελέσουν πηγή κινδύνων για κατοι κίδια ζώα και ζώα εκμετάλλευσης Επί σης τα ζώα μπορεί να προκαλέσουν ζημιά στη συσκευή Για το λόγο αυτό πρέπει γενικά να παραμένουν μακριά από ηλεκτρικές συσκευές ΚΙΝ ΥΝΟΣ ηλεκτροπληξίας λόγω υγρασίας Απαγορεύεται η λειτουργία της συσκευ ής κοντά σε μπανιέρα ντους ή γεμάτο νιπτήρα κ λπ Απαγορεύεται η βύθιση της κυρίως συ σ...

Page 51: ...το φις δικτύου από την πρίζα σε περίπτωση που εμφανιστεί βλά βη όταν δεν χρησιμοποιείτε το Monsieur Cuisine προτού συναρμολογήσετε ή αποσυ ναρμολογήσετε το Monsieur Cuisine προτού καθαρίσετε το Monsieur Cuisine και σε περίπτωση καταιγίδας Μη χρησιμοποιείτε τη συσκευή όταν υπάρχουν εμφανείς ζημιές στη συ σκευή ή στο καλώδιο ηλεκτρικής σύν δεσης Προς αποφυγή κινδύνων μην πραγμα τοποιείτε αλλαγές στο...

Page 52: ...εν επιτρέπεται να χρησιμοποιείται κατά τη χρήση του επι θέματος ανάδευσης Χρησιμοποιείτε το δοχείο ανάμειξης αποκλειστικά με τοποθετημένο καπά κι διότι αλλιώς μπορεί να εκτοξευθεί υγρό Μην μετακινείτε τη συσκευή όσο υπάρ χουν τρόφιμα ή ζύμη μέσα στη συ σκευή Μη γεμίζετε υπερβολικά το δοχείο ανά μειξης διότι αλλιώς μπορεί να εκτοξευ θεί το περιεχόμενο Υγρό που ξεχειλίζει ρέει στη βάση Για το λόγο α...

Page 53: ...τη χρήση μόνο με νερό έτσι ώστε να μπορέσουν να εξα τμιστούν τυχόν υπολείμματα ΥΠΟ ΕΙΞΗ κατά τις πρώτες χρήσεις λόγω θέρμανσης του κινητήρα μπορεί να δημιουργηθούν ελαφρές οσμές Αυτό είναι ακίνδυνο Φροντίζετε για επαρκή αερισμό 1 Αφαιρέστε όλα τα υλικά συσκευασίας 2 Ελέγξτε αν περιέχονται όλα τα εξαρτή ματα και αν δεν έχουν υποστεί βλάβη 3 Καθαρίστε τη συσκευή πριν από την πρώτη χρήση βλέπε Καθαρι...

Page 54: ...τα οποία βρίσκονται επάνω στη ζυγαριά 16 και κατόπιν να προσθέσετε νέο είδος ζύγισης 1 Η συσκευή είναι ενεργοποιημένη ωστό σο δεν διεξάγεται κύκλος λειτουργίας 2 Πιέστε το πλήκτρο 25 Το πλή κτρο αρχίζει να ανάβει Η οθόνη ένδει ξης 27 προβάλλει το 0000 g 3 Τοποθετήστε το είδος ζύγισης επάνω στη ζυγαριά 16 Αυτό μπορεί να είναι για παράδειγμα και ένα άδειο ή γεμάτο μπολ Στην οθόνη ένδειξης 27 προβάλ ...

Page 55: ...ισσότερο παραμένει ενεργή η ασφάλιση επειδή το μαχαίρι 29 και τα φαγητά περιστρέφονται για μεγαλύτερο χρονικό διάστημα 9 2 Τροφοδοσία ρεύματος Συνδέστε το καλώδιο ηλεκτρικής σύνδε σης 7 πρώτα με την υποδοχή δικτύου 8 στη συσκευή 13 και κατόπιν εισάγετε το φις δικτύου 7 σε μια κατάλληλη πρίζα Η πρίζα πρέπει να συνεχίσει να είναι συνε χώς προσβάσιμη και μετά τη σύνδεση 9 3 Ενεργοποίηση και απενερ γο...

Page 56: ...κτρο προγράμματος 24 23 22 ανάβει και το START STOP 19 αναβο σβήνει Το πρόγραμμα έχει επιλεγεί αλλά δεν έχει ακόμα εκκινη θεί Πατήστε START STOP 19 για να εκκινήσετε τη λει τουργία Το πλήκτρο προγράμματος 24 23 22 ανάβει και το START STOP 19 αναβο σβήνει Το πρόγραμμα έχει επιλεγεί και έχει εκκινηθεί Για να διακόψετε το πρό γραμμα πρόωρα πατήστε το START STOP 19 Το πλήκτρο προγράμματος 23 αναβοσβήν...

Page 57: ...να ανοίξετε τη συσκευή ΥΠO ΕΙΞΗ εάν έχει ρυθμιστεί ένα επίπε δο ταχύτητας μεγαλύτερο από 6 και ρυθμί σετε χρόνο μεγαλύτερο από 15 λεπτά ο χρόνος μειώνεται κατά την εκκίνηση αυτό ματα στα 15 λεπτά 9 7 Ρύθμιση θερμοκρασίας Στο ρυθμιστή θερμοκρασίας 17 ρυθμίζε τε με περιστροφή τη θερμοκρασία μαγειρέ ματος Η ρυθμιζόμενη θερμοκρασία βρίσκεται μεταξύ 37 C και 130 C 37 45 50 55 60 65 70 75 80 85 90 95 10...

Page 58: ... τη διάρκεια της λειτουργίας αλλάξετε την ταχύτητα σε 0 η συσκευή σταματάει Για να συνεχίσετε επιλέξτε μια ταχύτητα και πατήστε το πλήκτρο START STOP 19 Όταν έχει επιλεγεί μια θερμοκρασία δι ατίθενται μόνο οι βαθμίδες ταχύτητας 1 3 Softstart Για όλες τις ρυθμίσεις εκτός της λειτουργίας Turbo υπάρχει μια ήπια εκκίνηση ώστε να εμποδιστεί εκτόξευση υγρού από καυτό υλικό μαγειρέματος από το δοχείο ανά...

Page 59: ...ένα σήμα και στην οθόνη 27 εμφανίζεται το σύμβολο δεξιά Πατήστε και κρατήστε πατημένο το πλήκτρο TURBO 20 όσο χρειάζεστε τη λειτουργία ΥΠΟ ΕΙΞΕΙΣ Η λειτουργία Turbo λειτουργεί μόνο όταν δεν περιστρέφεται το ένθετο μα χαιριού 29 όταν η θερμοκρασία των τροφίμων στο δοχείο ανάμειξης 5 βρίσκεται κάτω από τους 60 C Η ταχύτητα αυξάνεται απότομα στη βαθμίδα 10 Μέγιστο 9 11 Στόμιο εκροής Στην υποδοχή για ...

Page 60: ...τά την ανάμειξη υγρών στη βαθμίδα 10 ή με το πλήκτρο TURBO 20 επιτρέ πεται να υπάρχει στο δοχείο ανάμει ξης 5 μόνο 1 λίτρο διότι αλλιώς μπορεί να εκτοξευθεί υγρό Σε μικρότερες βαθ μίδες ταχύτητας από το 10 το δοχείο ανάμειξης 5 επιτρέπεται να γεμίζει το πολύ μέχρι 2 2 λίτρα ΥΠΟ ΕΙΞΗ Σε ορισμένες εργασίες δεν πρέπει να υπάρχει πολύ λίγο υγρό στο δο χείο ανάμειξης 5 έτσι ώστε η συσκευή να μπορεί να ...

Page 61: ... Για να ασφαλίσετε το ένθετο μαχαιριού 29 πατήστε το σύρ τη απασφάλισης 37 στην κάτω πλευρά του δοχείου ανάμει ξης 5 έτσι ώστε να δείχνει προς το σύμβολο για την κλειστή κλειδαριά ΥΠΟ ΕΙΞΗ τεμαχίστε μεγάλα κομμάτια σε μικρότερα με ένα μήκος πλευρών περίπου 3 4 cm Αλλιώς τα μεγαλύτερα κομμάτια μπορεί να μαγκώσουν στα μαχαίρια 10 4 Τοποθέτηση δοχείου ανά μειξης 1 Τοποθετήστε το δοχείο ανάμειξης 5 στ...

Page 62: ...η καπακιού δο χείου ανάμειξης Το καπάκι για το δοχείο ανάμειξης 34 μπο ρεί να τοποθετηθεί μόνο όταν το δοχείο ανάμειξης 5 έχει τοποθετηθεί σωστά 1 Τοποθετήστε το καπάκι για το δοχείο ανάμειξης 34 κάπως στριμμένο πάνω στο δοχείο ανάμειξης 5 Το σύμβολο της ανοιχτής κλειδαριάς δείχνει στο βέλος της ασφάλισης 12 2 Πατήστε και περιστρέψτε το καπάκι 34 και με τα δύο χέρια δεξιόστροφα έως ότου το σύμβολο...

Page 63: ...ιμα με νερό μαγειρεύονται Όταν δεν καλύπτονται εντελώς όλα τα τρόφιμα με νερό τσιγαρίζονται 2 Βάλτε τα τρόφιμα στο ένθετο μαγειρέ ματος 30 ΥΠΟ ΕΙΞΗ Προσέξτε ώστε η στάθμη πλήρωσης να μην υπερβαίνει τη σήμανση MAX 3 Τοποθετήστε το ένθετο μαγειρέμα τος 30 στο δοχείο ανάμειξης 5 4 Σφραγίστε το δοχείο ανάμειξης 5 με το καπάκι 34 και τη μεζούρα 35 5 Ενεργοποιήστε τη συσκευή από τον κε ντρικό διακόπτη 6...

Page 64: ...ίς να πρέπει να το αγγίξετε απευθείας Απλά γαντζώστε το με ταλλικό τόξο του ένθετου μαγειρέματος 30 και τραβήξτε το προς τα επάνω και έξω 11 Μαγείρεμα στον ατμό ΚΙΝ ΥΝΟΣ τραυματισμού από ζεμάτισμα Κατά το άνοιγμα του καπακιού 1 ή 34 κατά τη διάρκεια της λειτουργίας μπο ρεί να εξέλθει καυτός ατμός ΥΠΟ ΕΙΞΗ στις παρούσες οδηγίες χρή σης περιγράφονται οι βασικές λειτουργίες όπως ανάμειξη τεμαχισμός κ...

Page 65: ...τρόφιμα στα επιθέματα ατμού 3 και εφόσον απαιτείται 2 ΥΠΟ ΕΙΞΗ ακόμα και εάν χρειάζεστε μόνο το επίπεδο επίθεμα ατμού 2 πρέπει πάντα να χρησιμοποιούνται και τα δύο επι θέματα ατμού 3 και 2 έτσι ώστε πλευρικά να μην εξέρχεται ατμός 7 Τοποθετήστε το γεμάτο επίθεμα ατμού 2 επάνω στο επίθεμα ατμού 3 8 Ασφαλίστε τα επιθέματα ατμού με το καπάκι για τα επιθέματα ατμού 1 11 3 Εκκίνηση μαγειρέματος στον ατ...

Page 66: ...νται πολλή ώρα διότι τα λαχανικά γίνονται πολύ μαλακά και το κρέας και το ψάρι μπορεί να στεγνώσουν και να σκληρύνουν ΚΙΝ ΥΝΟΣ τραυματισμού από ζεμάτισμα Κατά το άνοιγμα του καπακιού 1 κατά τη διάρκεια της λειτουργίας μπορεί να εξέλθει καυτός ατμός Για να ελέγχετε ενδιάμεσα την κατάσταση του υλικού μαγειρέματος ακολουθήστε την εξής διαδικασία 1 Ανοίξτε προσεκτικά το καπάκι για επιθέ ματα ατμού 1 Π...

Page 67: ...ώς αυξηθεί υπερβο λικά η θερμοκρασία η συσκευή απενεργο ποιείται αυτόματα Σε αυτή την περίπτωση τραβήξτε το φις δι κτύου 7 και αφήστε τη συσκευή να κρυώσει Κατόπιν μπορείτε πάλι να θέσετε σε λει τουργία τη συσκευή με νερό 12 Συμβουλές για το μαγείρεμα στον ατμό Το μαγείρεμα στον ατμό είναι μια από τις πιο υγιεινές δυνατότητες μαγειρέματος τροφί μων Όχι μόνο διατηρούνται οι θρεπτικές ου σίες και το...

Page 68: ... Το πλήκτρο 24 ανάβει Το πρόγραμμα ελέγ χει αυτόματα την δεξιόστροφη αριστε ρόστροφη κίνηση 6 Μετά το πέρας του ρυθμισμένου χρό νου τα πλήκτρα START STOP 19 και 24 σβήνουν και στην οθόνη 27 προβάλλονται όλες οι τιμές με 0 εκτός της θερμοκρασίας 7 Μετά από μερικά δευτερόλεπτα σβήνει η LED 15 και ακούγεται ένα ηχητικό σήμα Μπορείτε να ανοίξετε τη συ σκευή 8 Πιέστε τον κεντρικό διακόπτη 6 για να απεν...

Page 69: ...ή ρηση της συσκευής ΚΙΝ ΥΝΟΣ ηλεκτροπληξίας Πριν από κάθε καθαρισμό βγάζετε το φις δικτύου 7 από την πρίζα δικτύου Ποτέ μη βυθίζετε την κυρίως συ σκευή 13 στο νερό ΚΙΝ ΥΝΟΣ τραυματισμού από κοπή Λάβετε υπόψη σας ότι οι λεπίδες του ένθετου μαχαιριού 29 είναι πολύ κοφτε ρές Ποτέ μην αγγίζετε τις λεπίδες με γυμνά χέρια προς αποφυγή δημιουργί ας πληγών από κοπή Πριν την απομάκρυνση του ένθετου μαχαιρι...

Page 70: ... Κυρίως συσκευή 13 Καλώδιο ηλεκτρικής σύνδεσης 7 ΥΠΟ ΕΙΞΗ πριν τον καθαρισμό του δοχεί ου ανάμειξης 5 στο πλυντήριο πιάτων αφαιρέστε οπωσδήποτε το μαχαίρι 29 Απομακρύνετε πριν από κάθε καθαρισμό τη στεγανοποίηση 28 από το μαχαίρι 29 15 3 Καθαρισμός παρελκομένων 1 Ξεπλύνετε το δοχείο ανάμειξης 5 με ζε στό νερό και χύστε το νερό 2 Αφαιρέστε το μαχαίρι 29 βλέπε Τοπο θέτηση και απομάκρυνση ένθετου μα ...

Page 71: ...ρέπεται Ένθετο μαχαιριού 29 1 Αφαιρέστε το ένθετο μαχαιριού 29 από το δοχείο ανάμειξης 5 βλέπε Τοποθέ τηση και απομάκρυνση ένθετου μαχαι ριού σελίδα 58 2 Αφαιρέστε τη στεγανοποίηση 28 από το ένθετο μαχαιριού 29 3 Τοποθετήστε την καθαρή στεγανοποίη ση ή μια νέα 4 Πριν από την επόμενη χρήση τοποθε τήστε πάλι το ένθετο μαχαιριού 29 Βαθύ επίθεμα ατμού 3 1 Αφαιρέστε τη στεγανοποίηση 4 από την κάτω πλευ...

Page 72: ...απομακρύνονται με τον φυσιολογι κό καθαρισμό με το χέρι ή στο πλυντή ριο πιάτων μπορούν να απομακρυνθούν με ένα πανί στο οποίο προσθέτετε λίγο ξύδι 2 Ξεπλένετε με καθαρό νερό Μεγαλύτερες εναποθέσεις αλάτων ΠΡΟΣΟΧΗ Να μη χρησιμοποιείτε μέσα αφαλάτω σης του εμπορίου ούτε και ψυχρό οξικό οξύ ή συμπυκνωμένο ξύδι Χρησιμο ποιήστε την παρακάτω ήπια μέθοδο 1 Αναμείξτε 50 άσπρο ξύδι και 50 βραστό νερό 2 Βά...

Page 73: ...στέρων βλέπε Παραγ γελία παρελκομένων σελίδα 77 Αφαίρεση της παλιάς υποδοχής μα χαιριών 1 Πιέστε με τον αντίχειρα το κάλυμμα σι λικόνης 36 και πιάστε ταυτόχρονα την περιφέρεια της παλιάς υποδοχής μα χαιριών 10 από κάτω Αφαιρέστε την παλιά υποδοχή μαχαιριών 10 τραβώ ντας την προς τα επάνω Ίσως χρειαστεί να μετακινήσετε λίγο την υποδοχή μαχαιριών 10 πέρα δώθε για να μπορέσει να βγει Τοποθέτηση νέας ...

Page 74: ...ποθέτηση δοχείου ανάμειξης σελίδα 59 Το καπάκι 34 ή το βαθύ επί θεμα ατμού 3 δεν έχουν το ποθετηθεί σωστά στο δοχείο ανάμειξης 5 Τοποθετήστε σωστά το καπάκι 34 ή το βαθύ επίθεμα ατμού 3 εν υπάρχει τροφοδοσία ρεύματος Ελέγξτε το φις δικτύου 7 τον κε ντρικό διακόπτη 6 και ενδεχ την ασφάλεια Το ένθετο μαχαι ριού 29 δε στρέφεται Έχει φθαρεί η υποδοχή μα χαιριών 10 Αυτό μπορεί να συμβεί π χ αν επεξεργα...

Page 75: ...ίζει το πολύ μέ χρι 2 2 λίτρα Στο καπάκι 34 του δο χείου ανάμειξης 5 εξέρχεται υγρό Η στεγανοποίηση 33 δεν έχει τοποθετηθεί σωστά Τοποθετήστε σωστά τη στεγανο ποίηση 33 βλέπε Καθαρισμός έλεγχος και αντικατάσταση των στεγανοποιήσεων σελίδα 69 Η στεγανοποίηση 33 είναι ελαττωματική Τοποθετήστε νέα στεγανοποίη ση 33 βλέπε Καθαρισμός έλεγ χος και αντικατάσταση των στεγανοποιήσεων σελίδα 69 εν μπορεί να...

Page 76: ...μένη βλέπε Αυτόματη ασφάλιση σελίδα 53 Σταματήστε τη συσκευή και περιμέ νετε μέχρι να σβήσει η LED 15 πριν ανοίξετε το καπάκι 34 το βαθύ επίθεμα ατμού 3 Προσπαθήσατε να ανοίξετε το καπάκι 34 το βαθύ επίθε μα ατμού 3 όσο ήταν αναμ μένη η LED 15 Ενδέχεται να έχει μπλοκάρει η ηλεκτρονική ασφάλιση Περιστρέψτε το καπάκι 34 το βαθύ επίθεμα ατμού 3 με τα δύο χέρια δεξιόστροφα μέχρι να κλεί σει τελείως βλ...

Page 77: ...είστε σωστά το επίθεμα ατμού 3 βλέπε Προετοιμασία των επιθεμάτων ατμού σελίδα 63 Η λειτουργία Turbo δεν είναι δυνατή επειδή η θερμο κρασία των τροφίμων στο δοχείο ανάμειξης 5 είναι πάνω από 60 C Ρυθμίστε την ταχύτητα με τον ρυθμιστή ταχύτητας 18 βλέπε Ρύθμιση ταχύτη τας σελίδα 56 HHH Η θερμοκρασία στο δοχείο ανάμειξης 5 είναι πολύ υψηλή Υπάρχουν πολύ λίγα τρόφιμα ή υγρά στο δο χείο ανάμειξης 5 Απε...

Page 78: ... τη συσκευα σία πρέπει να λάβετε υπόψη σας τις αντί στοιχες περιβαλλοντικές διατάξεις της χώρας σας 18 ε νικά ε ομένα μ ολα που ρησιμοποιο νται ιατηρούμε το δικαίωμα τεχνικών αλλα γών Μοντέλο SKMK 1200 D4 Τάση δικτύου 230 V 50 60 Hz Κατηγορία προστασίας I Απόδοση 1 200 Watt Μίξερ 800 Watt Μαγείρεμα 1 000 Watt Μέγιστη ποσότητα πλήρωσης δοχείου ανάμειξης 5 2 2 λίτρα Μέγιστη δυνατότη τα επιβάρυνσης τ...

Page 79: ...ο αγοράς Αν εντός τριών ετών από την ημερομηνία αγοράς του προ όντος αυτού εμφανιστεί ελάττωμα που οφείλεται στο υλικό ή την κα τασκευή θα επισκευάσουμε ή θα αντικατα στήσουμε το προ όν δωρεάν ή θα επιστρέψουμε την τιμή αγοράς κατά την κρίση μας Προ πόθεση για την παροχή εγγύησης είναι πως εντός της προθεσμίας των τριών ετών το ελαττωματικό προ όν θα παρουσιαστεί συνοδευόμενο από την από δειξη αγο...

Page 80: ...πωσδήποτε χρήσεις και χειρισμούς για τα οποία οι οδηγίες χειρισμού προειδοποιούν πως πρέπει να αποφεύγονται Το προϊόν προορίζεται μόνο για ιδιωτική και όχι για επαγγελματική χρήση Σε περίπτω ση κακού και ακατάλληλου χειρισμού και χρήσης βίας καθώς και στην περίπτωση επέμβασης στη συσκευή η οποία δε διεξή χθη από το διαπιστευμένο κέντρο σέρβις μας η εγγύηση εκπίπτει ιαδικασία σε περίπτωση αξίωσης ε...

Page 81: ..._1901 μπορείτε να ανοίξετε τις οδηγίες χρήσης του προ όντος σας έντρο σέρ ις Σέρβις λλάδα Tel 801 5000 019 0 03 EUR Min E Mail hoyer lidl gr Σέρβις Κύπρος Tel 8009 4409 E Mail hoyer lidl com cy IAN 317553_1901 ρομη ευτής Παρακαλούμε λάβετε υπόψη σας πως η ακόλουθη διεύθυνση δε ε αι διεύ υ σ σ ρ ι πικοινωνήστε πρώτα με το κέ ντρο σέρβις που αναγράφεται παραπάνω HOYER Handel GmbH Tasköprüstraße 3 DE...

Page 82: ... starten und stoppen 97 10 Mixbehälter verwenden 98 10 1 Mixbehälter abnehmen 98 10 2 Markierungen im Mixbehälter 98 10 3 Messereinsatz einsetzen und entnehmen 98 10 4 Mixbehälter einsetzen 99 10 5 Rühraufsatz einsetzen und entnehmen 100 10 6 Deckel des Mixbehälters aufsetzen 100 10 7 Deckel für die Einfüllöffnung verwenden 101 10 8 Kochen und Dünsten mit dem Kocheinsatz 101 10 9 Spatel verwenden ...

Page 83: ... Reinigen in der Spülmaschine 107 15 3 Zubehör reinigen 108 15 4 Dichtungen reinigen prüfen und austauschen 108 15 5 Spatel reinigen prüfen und austauschen 109 15 6 Entkalken 109 15 7 Aufbewahren 109 15 8 Messeraufnahme auswechseln 110 16 Störungen Ursache Beseitigung 111 16 1 Störungen im Betrieb 111 16 2 Fehlermeldungen im Display 113 17 Entsorgung 114 18 Technische Daten 114 19 Zubehör bestelle...

Page 84: ...P Gerät starten und stoppen 20 TURBO Turbo Taste 21 Drehrichtung ändern 22 Programm zum Anbraten 23 Programm zum Dampfgaren 24 Programm zum Kneten von Teig 25 Waage starten Tara Funktion aktivieren 26 Zeitregler 27 Display 28 Dichtung des Messereinsatzes richtige Position beachten 29 Messereinsatz mit blumenförmiger Nabe 30 Kocheinsatz 31 Rühraufsatz 32 Spatel 33 Dichtung des Deckels für den Mixbe...

Page 85: ...tzt oder nicht richtig geschlossen D Gewählte Geschwindigkeit 1 4 ist für Rühraufsatz geeignet E Temperatur der Lebensmittel im Mixbehälter F Anzeige des Gewichts in Gramm bis 5 000 g G Anzeige der Geschwindigkeit 1 10 H Linkslauf eingestellt aktiv I Symbol für die Geschwindigkeit J eingestellte Temperatur 37 C 130 C B __317553_MC_plus_GR_CY book Seite 83 Freitag 12 April 2019 10 00 10 ...

Page 86: ...in um den Mixbehäl ter 5 abzudichten Lebensmittel ggf vorher in Stücke von ca 3 4 cm Kantenlänge zerkleinern Rühraufsatz 31 für dünnflüssige Lebensmittel Sahne schlagen mindestens 200 ml Eiweiß schlagen mindes tens 2 Stück Emulgieren z B Mayonnaise darf nur mit den Geschwin digkeitsstufen 1 bis 4 ver wendet werden darf nicht mit der Funktion TURBO verwendet werden Kocheinsatz 30 zum Kochen und Dün...

Page 87: ...ur Cuisine dient zum Mixen Quir len Aufschlagen Rühren Zerkleinern Pürieren Emulgieren Dampfgaren Dünsten Kneten Anbraten Kochen und Wiegen von Lebens und Nahrungsmitteln In dieser Bedienungsanleitung sind die grundlegenden Funktionen wie Mixen Zer kleinern und Dampfgaren beschrieben An gaben zum Zubereiten spezieller Gerichte finden Sie im mitgelieferten Rezeptbuch Das Gerät ist für den privaten ...

Page 88: ...rtung dürfen nicht durch Kinder durch geführt werden Kinder dürfen nicht mit dem Gerät spielen Dieses Gerät kann von Personen mit reduzierten physischen senso rischen oder mentalen Fähigkeiten oder Mangel an Erfahrung und oder Wissen benutzt werden wenn sie beaufsichtigt oder bezüg lich des sicheren Gebrauches des Gerätes unterwiesen wurden und die daraus resultierenden Gefahren verstanden haben D...

Page 89: ...Verriegelung davor den Deckel vor dem Stillstand zu öffnen Insbesondere flüssige Speisen können sich auch nach dem Stillstand des Messereinsatzes noch bewegen Warten Sie mit dem Öffnen des Deckels bis die Speisen nicht mehr in Bewegung sind Dieses Gerät ist nicht dafür bestimmt mit einer externen Zeitschalt uhr oder einem separaten Fernwirksystem betrieben zu werden Wenn die Anschlussleitung diese...

Page 90: ...tztiere ausgehen Des Weiteren können Tiere auch einen Schaden am Gerät verursachen Halten Sie deshalb Tiere grundsätzlich von Elektrogeräten fern GEFAHR von Stromschlag durch Feuchtigkeit Das Gerät darf niemals in der Nähe ei ner Badewanne einer Dusche eines gefüllten Waschbeckens o Ä betrieben werden Das Grundgerät die Anschlussleitung und der Netzstecker dürfen nicht in Wasser oder andere Flüssi...

Page 91: ... Monsieur Cuisine rei nigen und bei Gewitter Benutzen Sie das Gerät nicht wenn es sichtbare Beschädigungen am Gerät oder der Anschlussleitung aufweist Um Gefährdungen zu vermeiden neh men Sie keine Veränderungen am Arti kel vor GEFAHR von Verletzungen durch Schneiden Das Gerät darf unter keinen Umständen ohne Behälter betrieben werden Greifen Sie niemals in das rotierende Messer Halten Sie keine L...

Page 92: ...eschleudert werden könnte Stellen Sie das Gerät nicht um solange sich noch Speisen oder Teig im Gerät befinden Überfüllen Sie den Mixbehälter nicht da sonst der Inhalt herausgeschleudert werden kann Überlaufende Flüssigkeit fließt auf die Unterlage Stellen Sie das Gerät deshalb auf eine wasserfeste Un terlage Achten Sie darauf dass sich beim Dampfgaren nie zu viel oder zu wenig Wasser im Gerät bef...

Page 93: ...en ersten Benutzungen kann es durch die Erhitzung des Motors zu einer leichten Geruchsentwicklung kommen Dies ist unbedenklich Sorgen Sie für eine ausreichende Belüftung 1 Entfernen Sie sämtliches Verpackungs material 2 Überprüfen Sie ob alle Teile vorhanden und unbeschädigt sind 3 Reinigen Sie das Gerät vor der ersten Benutzung siehe Gerät rei nigen und warten auf Seite 107 4 Bringen Sie einmal 2...

Page 94: ... 0 Gramm stellen und dann neues Wiegegut dazugeben 1 Das Gerät ist eingeschaltet es läuft aber kein Arbeitsgang 2 Drücken Sie die Taste 25 Die Taste fängt an zu leuchten Das Display 27 zeigt 0000 g 3 Legen Sie das Wiegegut auf die Waa ge 16 Das kann zum Beispiel auch eine leere oder gefüllte Schüssel sein Im Display 27 wird das Gewicht bis 5 Kilogramm in Gramm angezeigt 4 Drücken Sie 25 um die Gew...

Page 95: ...Geschwindigkeit desto länger bleibt die Verriegelung aktiv weil der Messereinsatz 29 und die Speisen länger nachdrehen 9 2 Stromversorgung Verbinden Sie die Anschlussleitung 7 erst mit der Netzbuchse 8 am Gerät 13 und anschließend stecken Sie den Netz stecker 7 in eine geeignete Steckdose Die Steckdose muss auch nach dem An schließen jederzeit gut zugänglich sein 9 3 Gerät ein und aus schalten Ste...

Page 96: ... Programmtaste 24 23 22 leuch tet und START STOP 19 blinkt Das Programm ist gewählt aber noch nicht gestartet START STOP 19 drücken um die Funktion zu starten Programmtaste 24 23 22 leuch tet und START STOP 19 leuchtet Das Programm ist gewählt und gestartet Um das Programm vorzeitig abzubrechen START STOP 19 drücken Programmtaste 23 blinkt und START STOP 19 leuchtet Das Programm ist gewählt und ge...

Page 97: ...geöffnet werden HINWEIS Wenn eine Geschwindigkeits stufe größer als 6 eingestellt ist und Sie eine Zeit über 15 Minuten einstellen wird die Zeit beim Starten automatisch auf 15 Minu ten reduziert 9 7 Temperatur einstellen Am Temperaturregler 17 stellen Sie durch Drehen die Gartemperatur ein Die einstellbare Temperatur liegt zwischen 37 C und 130 C 37 45 50 55 60 65 70 75 80 85 90 95 100 105 110 11...

Page 98: ...igkeit gewählt werden Wenn Sie während des Betriebes die Geschwindigkeit auf 0 ändern hält das Gerät an Um weiterzuarbeiten wählen Sie eine Geschwindigkeit und drücken die Taste START STOP 19 Wenn eine Temperatur gewählt wurde stehen nur die Geschwindigkeitsstufen 1 3 zur Verfügung Softstart Um zu verhindern dass beim plötzlichen Be schleunigen Flüssigkeit von heißem Gargut aus dem Mixbehälter 5 g...

Page 99: ...t das Symbol rechts Drücken und halten Sie die Taste TURBO 20 gedrückt solange Sie die Funktion benötigen HINWEISE Die Turbo Funktion funktioniert nur wenn der Messereinsatz 29 sich nicht dreht wenn die Temperatur der Lebensmittel im Mixbehälter 5 unter 60 C liegt Die Geschwindigkeit wird schlagartig auf Stufe 10 Maximum erhöht 9 11 Überlauf In der Aufnahme für den Mixbehälter 9 be findet sich ein...

Page 100: ...Beim Mixen von Flüssigkeiten auf Stu fe 10 oder mit der Taste TURBO 20 darf sich maximal 1 Liter im Mixbehäl ter 5 befinden da sonst Flüssigkeit her ausgeschleudert werden kann Bei kleineren Geschwindigkeitsstufen als 10 darf der Mixbehälter 5 bis zum Maxi mum von 2 2 Litern gefüllt sein HINWEIS Bei einigen Arbeiten sollte sich nicht zu wenig Flüssigkeit im Mixbehälter 5 befinden damit das Gerät e...

Page 101: ...e 6 Um den Messereinsatz 29 zu verriegeln betätigen Sie den Entriegelungshebel 37 auf der Unterseite des Mixbehäl ters 5 sodass er auf das Symbol für das geschlossene Schloss zeigt HINWEIS Zerkleinern Sie große Stücke in kleinere mit einer Kantenlänge von etwa 3 4 cm Größere Stücke könnten sich sonst in den Messern verklemmen 10 4 Mixbehälter einsetzen 1 Setzen Sie den Mixbehälter 5 in die Aufnahm...

Page 102: ...r 34 lässt sich nur dann aufsetzen wenn der Mixbe hälter 5 korrekt eingesetzt wurde 1 Setzen Sie den Deckel für den Mixbe hälter 34 etwas verdreht auf den Mix behälter 5 Das Symbol des geöffneten Schlosses zeigt auf den Pfeil der Verriegelung 12 2 Drücken und drehen Sie den Deckel 34 mit beiden Händen im Uhrzeigersinn bis das Symbol des geschlossenen Schlosses auf den Pfeil der Verriege lung 12 ze...

Page 103: ...ebensmittel mit Wasser bedeckt sind werden sie ge kocht Wenn die Lebensmittel nicht vollstän dig mit Wasser bedeckt sind werden sie gedünstet 2 Geben Sie die Lebensmittel in den Koch einsatz 30 HINWEIS Achten Sie darauf dass der Füll stand die Markierung MAX nicht über schreitet 3 Setzen Sie den Kocheinsatz 30 in den Mixbehälter 5 4 Verschließen Sie den Mixbehälter 5 mit dem Deckel 34 und dem Mess...

Page 104: ... 30 entnehmen ohne ihn direkt berühren zu müssen Haken Sie einfach den Metallbügel des Kocheinsatzes 30 ein und ziehen ihn nach oben heraus 11 Dampfgaren GEFAHR von Verletzung durch Verbrühen Beim Öffnen des Deckels 1 bzw 34 während des Betriebes kann heißer Dampf austreten HINWEIS In dieser Bedienungsanleitung sind die grundlegenden Funktionen wie Mi xen Zerkleinern und Dampfgaren beschrie ben An...

Page 105: ... damit ein 6 Geben Sie die Lebensmittel in die Dampfeinsätze 3 und falls erforder lich 2 HINWEIS Auch wenn Sie nur den flachen Dampfeinsatz 2 benötigen müssen immer beide Dampfeinsätze 3 und 2 eingesetzt werden damit seitlich kein Dampf austritt 7 Setzen Sie den befüllten Dampf einsatz 2 auf den Dampfeinsatz 3 8 Verschließen Sie die Dampfeinsätze mit dem Deckel für Dampfeinsätze 1 11 3 Dampfgaren ...

Page 106: ...e vorsichtig den Deckel für Dampfeinsätze 1 Achten Sie beim Öffnen des Deckels 1 darauf dass Sie nicht von einem Schwall heißen Dampfes getroffen werden 2 Nehmen Sie den Deckel 1 ganz ab 3 Überprüfen Sie mit einem längeren Stab oder einer Gabel den Zustand des Gar gutes Wenn das Gargut fertig ist drücken Sie die Taste START STOP 19 und anschließend den Hauptschalter 6 um das Gerät auszuschalten We...

Page 107: ...arsam umgegangen werden 12 1 Dampfeinsätze ver wenden Sie können je nach Bedarf entweder nur den tiefen Dampfeinsatz 3 oder beide Dampfeinsätze 2 und 3 verwenden Der flache Dampfeinsatz 2 kann nicht ohne den tiefen Dampfeinsatz 3 verwendet wer den 12 2 Menüs zubereiten Wenn Sie ein ganzes Menü zubereiten und daher beide Dampfeinsätze übereinander verwenden beachten Sie bitte Fleisch und Fisch soll...

Page 108: ...ücken Sie den Hauptschalter 6 um das Gerät auszuschalten oder gehen Sie zum nächsten Rezeptschritt 14 Anbraten Mit dem Programm können Sie bis zu 200 g Fleisch Fisch Gemüse und Gewürze leicht anbraten z B um Röstaromen freizusetzen Große Stücke müssen zuvor grob zerkleinert werden 14 1 Allgemeine Programm informationen voreingestellte Zeit 7 Minuten verän derbar maximale Zeit 14 Minuten voreingest...

Page 109: ...befreien die Klin gen von Speiseresten sodass der Mes sereinsatz 29 sicher entnommen werden kann Verwenden Sie beim Spülen von Hand so klares Wasser dass Sie den Messer einsatz 29 gut sehen können um sich nicht an den sehr scharfen Messern zu verletzen VORSICHT Verwenden Sie keinesfalls scheuernde ätzende oder kratzende Reinigungsmit tel Dadurch könnte das Gerät beschä digt werden HINWEIS Bestimmt...

Page 110: ... auf Verände rungen z B poröses Material oder Einris se Die entfernten Dichtungen 28 33 und 4 können in der Spülmaschine ge reinigt werden Beschädigte Dichtungen 28 33 und 4 müssen durch neue ersetzt werden Neue Dichtungen können Sie nachbe stellen siehe Zubehör bestellen auf Seite 115 VORSICHT Entfernte Dichtungen 28 33 und 4 müssen vor dem nächsten Gebrauch wieder eingesetzt oder durch neue er s...

Page 111: ...gt Leichte Kalkablagerungen 1 Leichte Kalkablagerungen die nicht durch die normale Reinigung von Hand oder in der Spülmaschine beseitigt wer den können entfernen Sie mit einem Lappen auf den Sie etwas Haushaltses sig gegeben haben 2 Spülen Sie mit klarem Wasser nach Größere Kalkablagerungen VORSICHT Verwenden Sie keine handelsüblichen Entkalkungsmittel auch keinen Eisessig oder Essigessenz Verwend...

Page 112: ...en auf Seite 115 Alte Messeraufnahme entfernen 1 Drücken Sie mit dem Daumen auf die Si likon Abdeckung 36 und greifen Sie gleichzeitig unter den Rand der alten Messeraufnahme 10 Ziehen Sie die alte Messeraufnahme 10 nach oben he raus Eventuell müssen Sie ein bisschen ru ckeln damit sich die Messeraufnah me 10 herausziehen lässt Neue Messeraufnahme einsetzen 2 Setzen Sie die neue Messeraufnah me 10...

Page 113: ...en siehe Mixbehälter einsetzen auf Seite 99 Deckel 34 oder tiefer Dampfeinsatz 3 sind nicht korrekt auf den Mixbehälter 5 aufgesetzt Deckel 34 oder tiefen Dampfein satz 3 korrekt aufsetzen Keine Stromversorgung Netzstecker 7 Hauptschalter 6 und evtl Sicherung überprüfen Messereinsatz 29 dreht sich nicht Ist die Messeraufnahme 10 abgenutzt Dies kann z B dann passieren wenn Sie eine zu große Menge T...

Page 114: ...t einsetzen siehe Dichtungen reinigen prü fen und austauschen auf Seite 108 Dichtung 33 ist defekt Neue Dichtung 33 einsetzen sie he Dichtungen reinigen prüfen und austauschen auf Seite 108 Es lässt sich keine Tem peratur einstellen Es wurde eine Geschwindig keitsstufe 4 10 gewählt Geschwindigkeitsstufe 0 3 wäh len siehe Geschwindigkeit ein stellen auf Seite 96 Teile des Gerätes ver färbt Bestimmt...

Page 115: ...chine können Sie bis zu maximal 500 g Mehl verarbeiten Lassen Sie das Gerät vollständig ab kühlen Danach ist es wieder einsatz bereit Deckel 34 oder tiefer Dampfeinsatz 3 sind nicht kor rekt auf den Mixbehälter 5 aufgesetzt Deckel 34 korrekt schließen siehe De ckel des Mixbehälters aufsetzen auf Seite 100 Oder Dampfeinsatz 3 korrekt schließen siehe Vorbereitung der Dampfeinsätze auf Seite 103 Die ...

Page 116: ...en Recyclinghofes erhal ten Sie z B bei Ihrer Stadtreinigung oder in den Gelben Seiten Verpackung Wenn Sie die Verpackung entsorgen möch ten achten Sie auf die entsprechenden Um weltvorschriften in Ihrem Land 18 Technische Daten Verwendete Symbole Technische Änderungen vorbehalten Modell SKMK 1200 D4 Netzspannung 230 V 50 60 Hz Schutzklasse I Leistung 1 200 Watt Mixer 800 Watt Kochen 1 000 Watt Ma...

Page 117: ...ses Produkts ein Material oder Fabrikationsfehler auf wird das Produkt von uns nach unserer Wahl für Sie kostenlos repariert oder ersetzt Diese Garantieleistung setzt voraus dass innerhalb der Dreijahres frist das defekte Gerät und der Kaufbeleg Kassenbon vorgelegt und schriftlich kurz be schrieben wird worin der Mangel besteht und wann er aufgetreten ist Wenn der Defekt von unserer Garantie ge de...

Page 118: ...n wur den erlischt die Garantie Abwicklung im Garantiefall Um eine schnelle Bearbeitung Ihres Anlie gens zu gewährleisten folgen Sie bitte den folgenden Hinweisen Bitte halten Sie für alle Anfragen die Ar tikelnummer IAN 317553_1901 und den Kassenbon als Nachweis für den Kauf bereit Die Artikelnummer finden Sie auf dem Typenschild einer Gravur auf dem Ti telblatt Ihrer Anleitung unten links oder a...

Page 119: ...iz Tel 0842 665566 0 08 CHF Min Mobilfunk max 0 40 CHF Min E Mail hoyer lidl ch IAN 317553_1901 Lieferant Bitte beachten Sie dass die folgende An schrift keine Serviceanschrift ist Kontaktieren Sie zunächst das genannte Service Center HOYER Handel GmbH Tasköprüstraße 3 DE 22761 Hamburg DEUTSCHLAND DE AT CH __317553_MC_plus_GR_CY book Seite 117 Freitag 12 April 2019 10 00 10 ...

Reviews: