


Table of Contents
1. Introduction . . . . . . . . . . . . . . . . . . . . . . . . . . . . . . . . . . . . . . . . . . . . . . . . . . . . . . . . . . . . . . . . . . . . . . . . . . 3
2. The meeting room main display . . . . . . . . . . . . . . . . . . . . . . . . . . . . . . . . . . . . . . . . . . . . . . . . . . . . . . . . . 3
3. Sharing using the Button . . . . . . . . . . . . . . . . . . . . . . . . . . . . . . . . . . . . . . . . . . . . . . . . . . . . . . . . . . . . . . . 3
4. Sharing from Windows laptops using the soft Button Desktop App . . . . . . . . . . . . . . . . . . . . . . . . . . 4
7. Connecting to the base unit . . . . . . . . . . . . . . . . . . . . . . . . . . . . . . . . . . . . . . . . . . . . . . . . . . . . . . . . . . . . . 6
8. Switching between users . . . . . . . . . . . . . . . . . . . . . . . . . . . . . . . . . . . . . . . . . . . . . . . . . . . . . . . . . . . . . . . 7
9. Sharing from Windows laptops in extended desktop mode . . . . . . . . . . . . . . . . . . . . . . . . . . . . . . . . . 7
10. Pairing the Buttons with the Base unit . . . . . . . . . . . . . . . . . . . . . . . . . . . . . . . . . . . . . . . . . . . . . . . . . . 7
11. How to access the configurator . . . . . . . . . . . . . . . . . . . . . . . . . . . . . . . . . . . . . . . . . . . . . . . . . . . . . . . . 8
12. Enable / disable pin code . . . . . . . . . . . . . . . . . . . . . . . . . . . . . . . . . . . . . . . . . . . . . . . . . . . . . . . . . . . . . . 8
13. WiFi configuration . . . . . . . . . . . . . . . . . . . . . . . . . . . . . . . . . . . . . . . . . . . . . . . . . . . . . . . . . . . . . . . . . . . . 9
14. Network configuration . . . . . . . . . . . . . . . . . . . . . . . . . . . . . . . . . . . . . . . . . . . . . . . . . . . . . . . . . . . . . . . 10
15. Multicasting . . . . . . . . . . . . . . . . . . . . . . . . . . . . . . . . . . . . . . . . . . . . . . . . . . . . . . . . . . . . . . . . . . . . . . . . 11
16. Video Settings . . . . . . . . . . . . . . . . . . . . . . . . . . . . . . . . . . . . . . . . . . . . . . . . . . . . . . . . . . . . . . . . . . . . . . 11
17. Changing the administrator password . . . . . . . . . . . . . . . . . . . . . . . . . . . . . . . . . . . . . . . . . . . . . . . . . 12
18. Customize the startup and wallpaper images . . . . . . . . . . . . . . . . . . . . . . . . . . . . . . . . . . . . . . . . . . 12
3
User Guide - Silex ClickShow R101
1. Introduction
Thank you for choosing the Silex ClickShow R101 wireless presentation system. This
system is designed with the complex nature of today’s business in mind, allowing for a
flexibility that matches the product to the customer’s needs, not the other way around.
This users guide gives you information on how to use and configure the system.
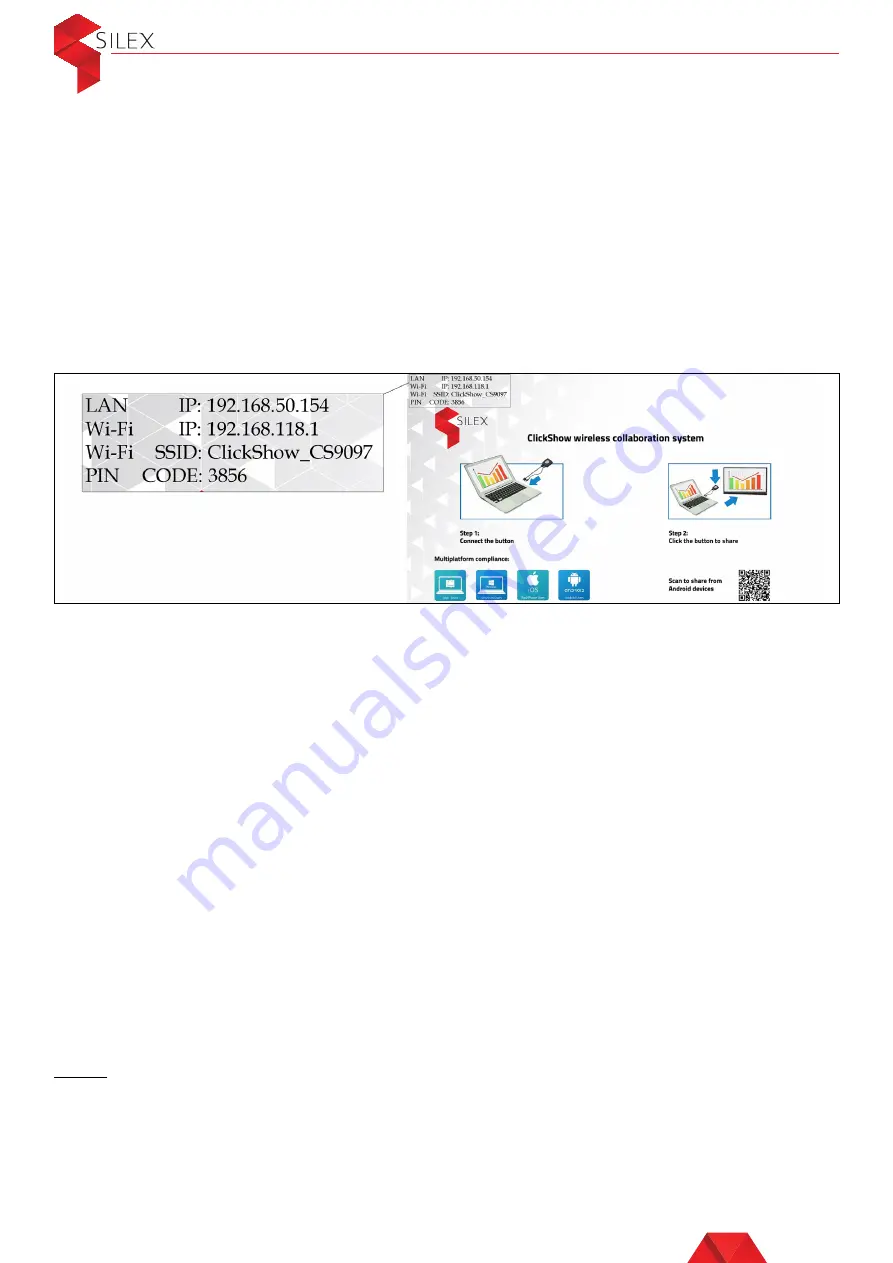
2. The meeting room main display
When the ClickShow Base unit is installed and running, the default wallpaper is
displayed on the meeting room main screen.
On the top left corner, some information is displayed from the default configuration: the
LAN IP address, the WiFi hotspot IP address, the Wi-Fi hotspot name (SSID) and the
PIN code (if this option is enabled).
If no network cable is plugged in the LAN port of the ClickShow base unit, then the first
line will display the device version number.
3. Sharing using the Button
Sharing content using the HDMI Button can be done from any device that has an HDMI
output, such as: Windows and MAC PCs and laptops, DVD players, media player box,
video conference terminals, etc…
• Plug the HDMI cable and the USB cable of the Button into the HDMI port and the
USB port of your device. The light indicator will blink in blue color
• When the Button indicator becomes static blue, it is ready to connect.
Click the Button. The light indicator turns static red and your content is shared on
the main display
To stop sharing, click the Button again.
Note:
The USB cable is used to power the HDMI button, to pair the Button if needed and for
touch back reverse control. If the device you are trying to connect the button to does
not have a USB port, then you can plug the USB cable to a USB power adaptor in a
wall power socket. The USB Power adaptor IS NOT included in the ClickShow box at
purchase.


