11
2.
Install the solar panel frames. Ground any metal frames to prevent static
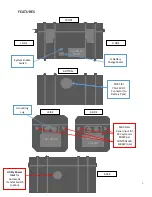
buildup. Also ground the RPS using the Grounding Lug on the right side of the
Case. A grounding rod can be used for this purpose.
3.
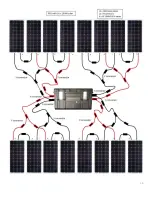
Connect the solar panels to the y connectors and then to the cables.
4.
Run the cables from the solar panel array to the RPS. Make sure to take
sufficient precautions to protect the cable from weather and pests.
5.
Connect the solar panels (up to 800 W per Controller).
6.
Enable the RPS by depressing the 'System Enable' Switch. If the battery
charge is within the safe charge limits the switch will light indicating
renewable power is available.
System Enable Switch
7.
Connect equipment/devices (2000 W max.) to the RPS.
8.
Monitor the % Battery Charge over time to determine if the amount of
power you are using is at a sustainable level. If power consumption remains
higher than the system can support, consider installing a second RPS or
replacing devices with more efficient types (e.g LED lights).
% Battery Charge Meter
Summary of Contents for RPS
Page 14: ...14 ...
Page 15: ...15 ...
Page 16: ...16 ...
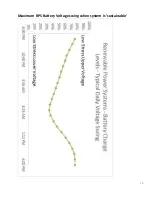
Page 18: ...18 Maximum RPS Battery Voltage swing when system is sustainable ...


