


10
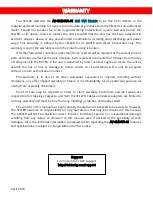
Setting
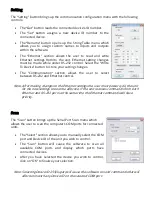
The “Setting” button brings up the communication configuration menu with the following
controls:
The “Get” button reads the connected device’s ID number.
The “Set” button assigns a new device ID number to the
connected device.
The “Rename” button opens up the String Table menu which
allows you to assign custom names to inputs and outputs
within the software.
The “Ethernet” section allows the user to read and write
Ethernet settings from/to the unit. Ethernet setting changes
must be made while under RS-232 control. Select the “Write
To Device” button to store your setting changes.
The “Communication” section allows the user to select
between RS-232 and Ethernet control.
Note: After making changes to the Ethernet settings the user must power cycle the unit
for the new settings to become effective. If the unit receives commands from both
Ethernet and RS-232 ports at the same time the Ethernet commands will have
priority.
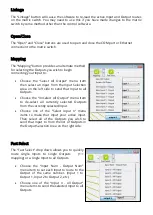
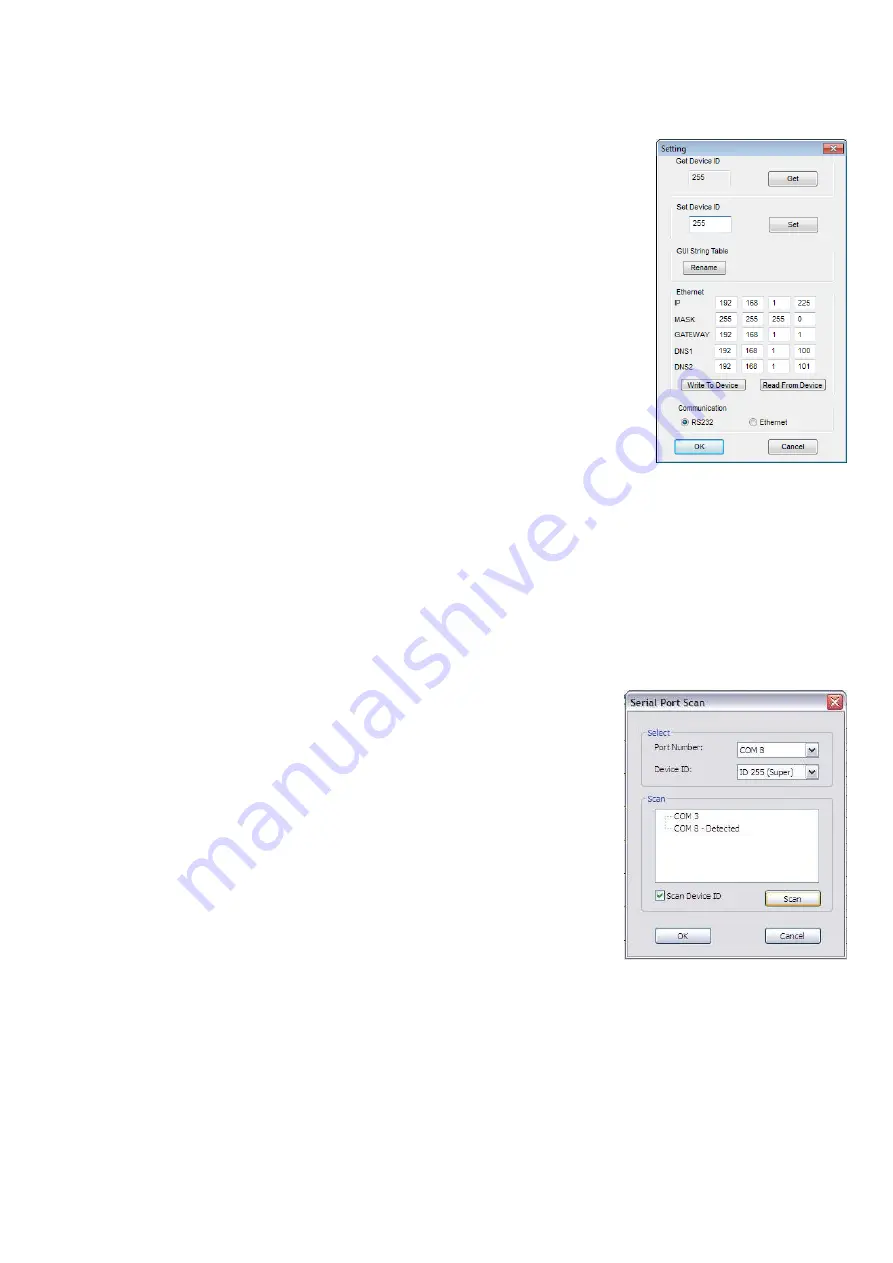
Scan
The “Scan” button brings up the Serial Port Scan menu which
allows the user to scan the computer’s COM ports for connected
units.
The “Select” section allows you to manually select the COM
port and Device ID of the unit you wish to control.
The “Scan” button will cause the software to scan all
available COM ports and display which ports have
connected devices.
After you have selected the device you wish to control,
click on “OK” to finalize your selection.
Note: Selecting Device ID 255(Super) will cause the software to send commands that will
affect units with any Device ID on the selected COM port.


