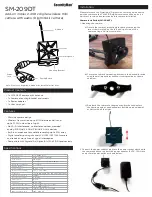
background image


21 

WIRELESS FLASH 

When using the “Wireless Flash” mode, you can take pictures with a more three-dimensional feeling with 
shadow, or you can produce natural images with shadow depending on the flash position without any 
extension cord connecting the camera body to the flash. In case of the EF-530 DG SUPER NA-iTTL, 
communication between the camera body and the flash will be achieved by the light of the flash. In the 
“Wireless Flash” mode, the camera will calculate the correct exposure automatically. 


This function is available with CLS compatible cameras only. 


It is possible to use the built-in flash of D70(D70s), D80 and D200 with wireless photography. 


In these instructions, we call a flash unit, which is attached to the camera body the “Master unit ”, and we call 
a flash unit at a remote position a “Slave unit”. 


When setting a slave unit at the desired position, you can use a mini-stand. This mini-stand has a screw hole for a tripod. 


Place the slave flash unit at the desired location. Do not place the slave unit within the picture area. 


Set the flash unit within the range of 0.5m/1.5ft~5m/16ft from the subject and set the camera body within the 
range of 1m/3ft~5m/16ft from the subject. 


Two or more sets of Slaves can be divided into groups and different flash conditions can be set for each group 
(1~3). The Master Flash should be set at 0. 


Channel and group number settings can be input on the master unit and slave units. Other settings can be 
input on the master flash unit only. 


Setting the slave unit   


1. Attach the flashgun to the camera body and switch “ON” the flash unit. Press 

the MODE button to select the TTL / 

 / 

  icon. 


◆ 

Setting cannot be done if camera’s exposure display turns off. In such a case, 
press the camera’s shutter button half-way to re-activate the setting. 


2. Press the SEL button to make the channel indicator blink and press the + or – button to set the channel 

number (from C1- C4). 

3. Press the SEL button to make the group number blink and press the + or – button to set the group 

number. Press the SEL button to confirm. 

4. Detach the slave unit from the camera body and place it in the desired position. 


◆ 

In the case of using D200’s(D80’s) built-in flash for wireless photography Group A cameras correspond to 

Group 1 flashguns and Group B corresponds to Group 2 flashguns. When using the built-in flash unit of 
the D70 for wireless photography, set the channel number to C3 and group number to 1. For the rest of 
the settings, refer to your camera’s instruction manual. Please also note that it cannot be used with 

D70(D70s) and D200 

camera’s command mode 

AA 

and

 M

1/128. 


Setting the Master Unit


Setting the channel number on the master flash unit 

1. Attach the flashgun to the camera body, and switch “ON” the flash unit. Press 

the

 MODE 

button to select the 

  icon. Confirm the   icon is shown 

in the display. 

2. Press  the

 SEL 

button to make the channel indicator blink on the display.   

3. Press  the

 + or – 

button to set the desired channel number. (Choose the 

same channel number as set on the slave flash unit.) 

4. Press  the

 SEL 

button several times until the display stops blinking. 


Setting the flash mode on the master flash unit 

5. Press  the

 + or – 

button and select 

  (Master) 

6. Press  the

 SEL 

button and confirm    icon is blinking.   

(If you do not want to fire master unit, press the + or – button and select 


icon. Press the SEL button to confirm this setting). 

7. Press  the

 SEL 

button again. 

8. Press  the

 MODE 

button and select TTL, M or MULTI and then press the SEL button to confirm. 

9. If TTL is selected, 

  icon will blink and you can set the exposure compensation. If no compensation is 

required press the

 SEL 

button to complete the setup. If compensation is required press the

 + or – 

button to 

set the required amount, then press the

 SEL 

button to set compensation. If M mode is selected, press the

 + 

or – 

button to set the flash output amount. If MULTI is selected, exposure will switch to Multi Flash Mode. 

Summary of Contents for EF-530 DG SUPER NA-ITTL

Page 1: ...s Keep at least 1m 3feet distance between face and the flash unit when taking a picture with flash Do not touch the synchro terminal of your camera when the flash is attached to a hot shoe High voltage circuitry could cause an electric shock Never use your camera in an environment where flammable burnable gas liquids or chemicals etc exist Otherwise it might cause fire or explosion Caution Do not ...

Page 2: ...e batteries we do not recommend using them Please replace batteries if it takes more than 30seconds to light the Ready Lamp To assure proper electrical contact clean the battery terminals before installing the batteries NiCad batteries do not have standardized contacts If you use NiCad batteries please confirm that the battery contacts touch the battery compartment properly To prevent battery expl...

Page 3: ...oe Locking Ring until it is tight When you attach or remove the flash grasp the bottom of the flash to prevent damage to the shoe foot and the camera s hot shoe If the camera s built in flash is set in up position please close it before you attach the flash unit To remove the flash rotate the shoe locking ring in the opposite direction of LOCK mark until it stops SETTING OF FLASH COVERAGE ANGLE Wh...

Page 4: ...lease select TTL BL Depending on the camera model i TTL or D TTL system will be used The d mark will be displayed on the LCD panel for both systems For the following cameras F 5 F 4 series F100 F90X F90 F80 N90S N90 N80 series F70D N70 F810S N8008S F801 N8008S and Pronea 600i TTL BL or TTL can be selected However cameras other than those listed above only TTL can be selected 4 Focus on the subject...

Page 5: ...Built in CPU A M TTL 2 F401S N4004S F401 N4004 Without Built in CPU M TTL 2 FA FE2 FG F3 FM3 With Built in CPU Without Built in CPU A M TTL 2 Confirm Distance 1 Flash s LCD panel will show the F number and working distance of flash automatically 2 Set the F number on the flash to be the same as camera and check the available working distance range on the LCD panel To set the F number on the Flash ...

Page 6: ... button or button to set the distance 5 Press the SEL button several times to stop blinking 6 Set the aperture value on the lens or camera 7 When the Ready Light of the flash is illuminated the unit is ready for use When using with cameras other than the above 1 Please follow the first 2 steps as above and press the SEL button several times to make the aperture display blink 2 Press the button or ...

Page 7: ...photograph a moving subject with slow synchronization usually the furrow of the subject will be exposed in front of the subject The ordinary flash light will fire when the first shutter curtain is fully opened thus the subject will be exposed from the time flash is fired to the time the shutter is closed This is front curtain synchronization When you use rear curtain synchronization the flash will...

Page 8: ...ve Read out the subject distance from the focus ring on the lens Either change the flash power level or the flash s F stop Please refer following on how to change the flash s F stop 1 Press the SEL button several times to make the F stop indicator blink 2 Press the or button and set the F stop 3 Press the SEL button and make the indicator of F stop stop blinking Please set the distance indicated o...

Page 9: ...d press the or button to set the channel number from C1 C4 3 Press the SEL button to make the group number blink and press the or button to set the group number Press the SEL button to confirm 4 Detach the slave unit from the camera body and place it in the desired position In the case of using D200 s D80 s built in flash for wireless photography Group A cameras correspond to Group 1 flashguns and...

Page 10: ...but in step 3 select and erase from display Slave Flash Normal Slave Flash Even if the EF 530 DG SUPER is not attached to the camera body you can fire the flash by using the camera s built in flash or another flash unit 1 Attach the flash unit to the camera s hot shoe 2 Set the camera s exposure mode to the desired mode If you use A or M mode also set the desired aperture value 3 Turn on the flash...

Page 11: ... closely as possible with the actual distance from the slave flash to the subject If the actual distance is out of range you need to change the aperture value 11 Press the SEL button several times to make the display stop blinking 12 Place the slave unit in the desired location Do not place the slave unit within the picture area Setting for Slave Controller unit 13 Attach the Slave Controller flas...

Reviews: