


13
and operate the throttle pushrod tube from the servo end. Make
sure the pushrod can fully open and close the carburetor without
binding.
❑
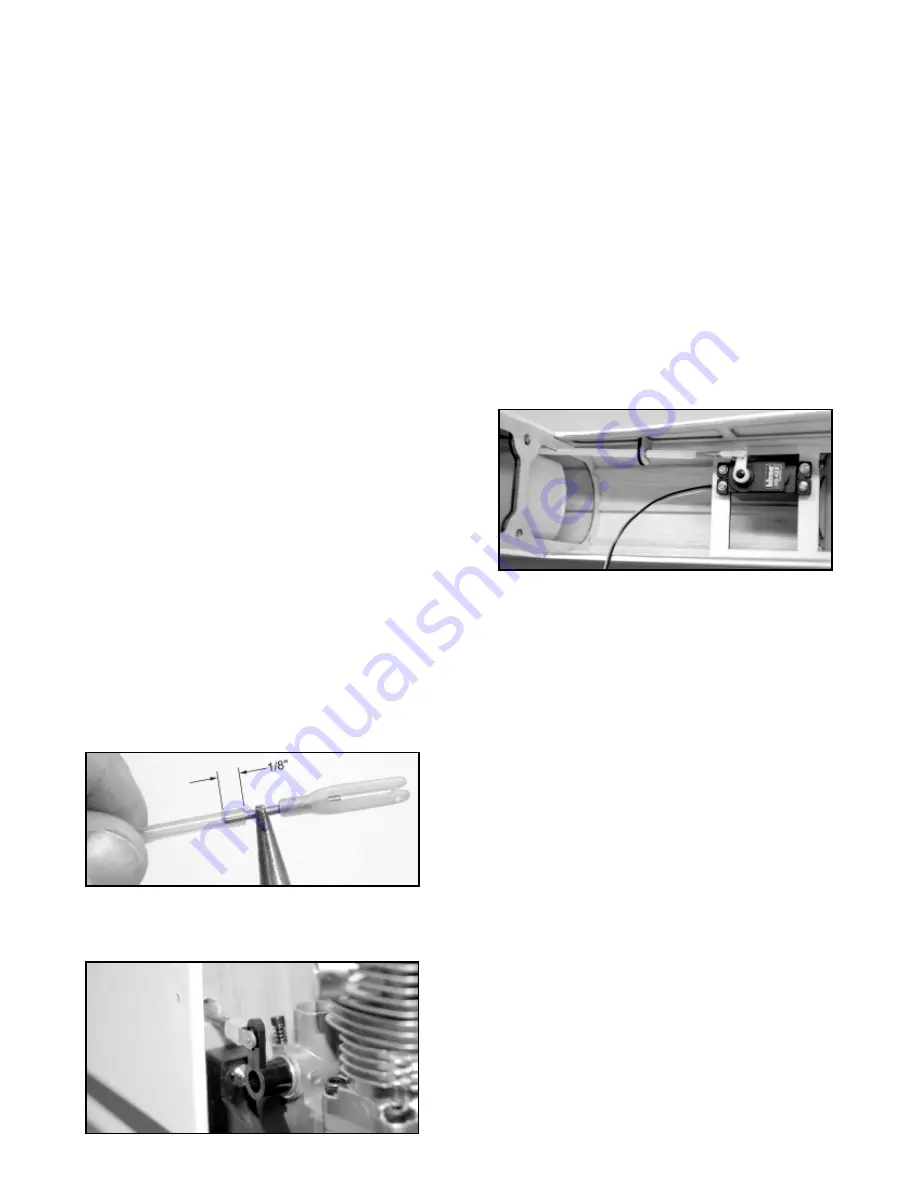
7) Finish the servo end of the throttle pushrod as follows:
a. Turn your radio on and make sure the throttle servo is
operating in the right direction for high and low throttle. Put the
throttle servo in high throttle position and turn off the radio.
b. Put the throttle pushrod in high throttle position.
c. Inside the fuselage, clip the Threaded Stud with Metal R/C
Link to the servo arm. Hold the threaded stud and the pushrod
tube alongside each other and mark the tube for cutting to length.
Remember to allow for the 1/8" that the threaded stud will be
screwed inside the end of the pushrod tube.
Once you’ve
determined the correct length, cut off the excess pushrod tube with
a sharp razor knife.
d. Unclip the R/C link from the servo arm and screw the
threaded stud 1/8" inside the end of the pushrod tube, as you did
the other end in step 5. Then reattach the R/C link to the servo
arm. Use a small piece of fuel tubing (not supplied) on the R/C link
to keep it from coming open.
❑
8) Turn your radio back on and check the operation of the
throttle. Adjust the overall length of the throttle pushrod by scewing
the R/C links in or out as needed to achieve full throttle control.
When finished, secure at least one of the R/C links to it's threaded
stud with CA glue, so that the pushrod tube cannot rotate in flight
and change adjustment.
RADIO INSTALLATION, PART IV: Radio System
With all the servos now installed, all that remains is the installation
of the receiver, battery pack and switch.
RX BATTERY PACK: The single heaviest unit of the radio system
is the battery pack. This means that you can, if needed, locate the
battery pack wherever it is needed in the airplane to help achieve
the correct balance point. Be sure to wrap the battery pack in foam
rubber to isolate it from vibration. Use more foam packing, rubber
bands or tie-wraps to secure it to the model structure so that it
can't move around in flight.
RECEIVER:
Wrap the receiver in foam and secure it in the
fuselage.
Route the receiver antenna outside the model and
secure it back near the tail of the airplane.
Notes about our installation: To achieve proper balance with the
YS-63 in our prototype, we needed to put both the battery pack
and the receiver in the area just in front of the servo tray. So we
wrapped the battery pack and the receiver together in a single
piece of foam rubber, with a seperate piece of foam rubber
between them, as shown in the next photo.
For the receiver antenna, we drilled a 1/16” dia. exit hole in the
right fuselage side at the receiver position. The antenna goes
through the hole and is string back to the tail of the airplane. We
and back into the fuselage. Notice that there is a slot cut in the first
fuselage former behind the firewall for the pushrod sleeve to go
through. This slot keeps the pushrod sleeve out of the area where
the fuel tank is mounted.
❑
2) After you get the pushrod sleeve through the slotted former in
the tank area, experiment with different routings of the pushrod
from that point back to the area where the throttle servo will be
located. Once you've decided on the best location for your throttle
servo and route for your pushrod, mount the throttle servo in the
plywood servo tray using the rubber grommets and mounting
screws that came with the servo.
Note: In our installation of the YS-63, we mounted the throttle
servo near the fuselage side (look ahead to next 2 photos to see
our finished throttle pushrod installation). We made a small notch
in the fuselage former that is located at the leading edge of the
wing opening to accomodate the pushrod. It’s a straight shot from
there back to the servo arm.
❑
3) Inside the fuselage, slip the Plywood Throttle Pushrod
Support over the end of the pushrod sleeve. The plywood pushrod
support should be positioned near the end of the throttle pushrod
sleeve. Its job is to aim the end of the pushrod directly at the
throttle servo arm. Feel free to change the overall length of the
pushrod support if necessary to fit your particular installation.
Once you've determined where to mount it, glue the plywood
pushrod support to the fuselage structure.
❑
4) Determine how long the pushrod sleeve needs to be to fit your
installation (we purposely provided it too long so it would work with
practically any installation).
In most cases you will need to
shorten the pushrod sleeve a little bit. As a general rule, the ends
of the pushrod sleeve should be about 1-1/2" away from the servo
arm and the throttle arm. Use a sharp razor blade to cut the
pushrod sleeve to length. Remove the tube and sand its surface
with 220 sandpaper to rough it a little. Reinstall the tube and glue
it in place to the firewall and the plywood pushrod supports.
❑
5) Screw the Threaded Stud with R/C Link into one end of the
1/8" od x 12-1/2" Plastic Pushrod Tube. Use a needle nose pliers
to grip the threaded stud so you can screw it in at least 1/8".
❑
6) At the firewall, insert the plain end of the plastic pushrod tube
inside the plastic pushrod sleeve. Push it in until the R/C link can
be clipped to engine throttle arm. Then reach inside the fuselage