background image

Your 4-STAR 54 is covered with ORACOVER®, a premium quality
covering made in Germany, and sold in the U.S. by Hanger-9 as
Ultracote®.

Colors Used On Your Airplane

ORACOVER® #30 Cub Yellow (Ultracote® # HANU884)

or

ORACOVER® #23 Ferrari Red (Ultracote® #HANU866)

If  sometime  in  the  future  you  need  replacement  covering  or
matching paint for repairs, they are available from your local hobby
dealer or online from Hanger-9.

How To Tighten Loose Covering

After you open your 4-STAR 54 and take all the covered parts out
of their plastic bags, the covering may begin to wrinkle.  This is
not unusual and is no cause for alarm.  Your airplane was built
and covered in a part of the world which has relatively high hu-
midity and therefore, the wood was likely carrying a fair amount
of moisture.  When exposed to drier air, the wood typically loses
this moisture, dimensionally "shrinking" in the process.  In turn,
this may cause some wrinkles.  However, wrinkles are easy to re-
move by just using a hobby type heat iron.  

Caution: Trying to remove the wrinkles by hastily going over them
with a heat gun can lead to more problems.  You should take your
time to carefully go over the entire model with a covering iron, as
we will describe.

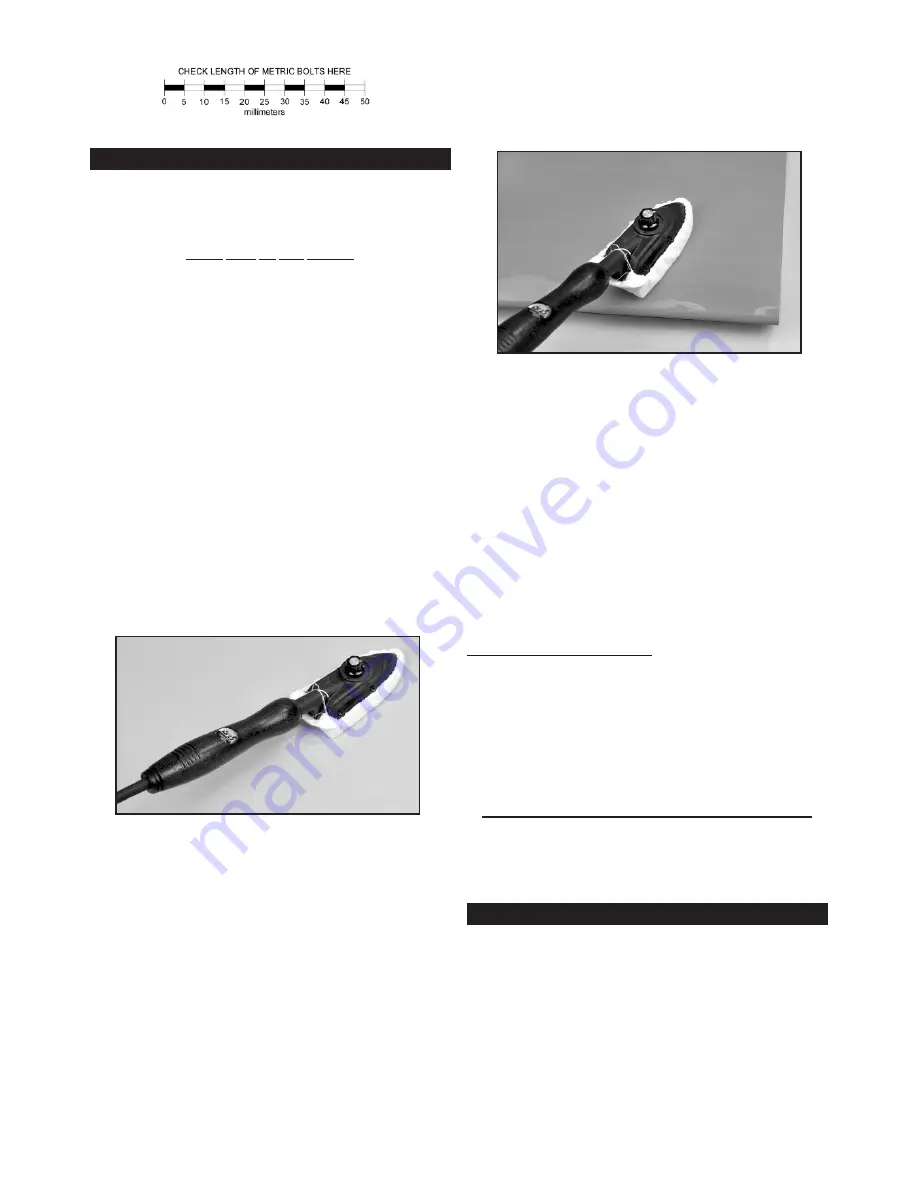
We suggest  using a model airplane covering iron for this process.
Cover the iron's shoe with a thin cotton cloth, such as an old t-
shirt, to prevent scratching the covering as you work.
After covering your iron, the next step is to set the iron to the cor-
rect temperature.  This is critical for achieving a good result!    The
iron should be set to about 

220

O

F - 250

O

F (104

O

C - 121

O

C)

as

measured on the bottom of the iron using a thermometer.  

If you do not have a thermometer, you can find the correct tem-
perature by trial and error.  Set your iron to a medium setting.
Glide the iron over some of the covering that is over solid wood,
such as the sheeted wing center section.  Observe the covering
to see if any bubbles appear.  If bubbles appear, the covering is
getting too hot!  Turn down the temperature of the iron and repeat
the test.
If no bubbles appear, turn up the heat slightly and repeat the test.
Keep adjusting until you “zero in” on the correct temperature.  Find
the temperature that will get the covering to stick down without
forming bubbles or causing the seams to pull away.  

Once your iron is set to the correct temperature, go over the entire
framework of the airplane, making sure that the covering is se-
curely bonded to the structure everywhere the covering comes in
contact with the wood underneath.  This takes some time, but is
worth the effort.

After you have all the covering secured onto the solid areas, turn
the temperature of the iron up to approximately 

300

O

F - 320

O

F

(149

O

C - 160

O

C)

.  This is the correct temperature for shrinking the

covering material.

Use the iron to tighten up any wrinkles in the “open” areas of the
model (no wood underneath the covering).  Glide the iron over the
wrinkle for a few seconds, then remove.  Repeat until the covering
is tight with no wrinkles.

If wrinkles keep coming back on the tail surfaces, you may need
to “ventilate” the areas between the ribs.  Otherwise the air that is
sealed in those relatively small areas will expand when the heat
is applied and actually cause the covering to stretch instead of
shrink.  Use a pin to poke a tiny hole in the covering between each
rib, on the bottom of the part.  That will let the expanding air es-
cape and the covering to shrink properly.

Caution When Using Heat Guns: You can also use a hobby-type
heat gun to shrink the covering, but you must be careful around
seams or color joints.  Getting too much heat on the seams may
cause them to "creep" or come loose.  You must also be careful
when using a heat gun when working around the windshield and
side windows - heat will distort the clear plastic material.

Recommended Temperatures:

To adhere the covering - 220

O

F - 250

O

F (104

O

C - 121

O

C) 

To shrink the covering  - 300

O

F - 320

O

F (149

O

C - 160

O

C)

NOTE: 

In this manual, any references to right or left, refer to your

right or left as if you were seated in the cockpit of the airplane. 

The wings are designed as a 2-piece system, with separate right
and left wing panels joined by an aluminum tube wing joiner and
a hardwood locating pin at the rear.  Due to the high strength of
the wing joiner tube, the wing panels do not need to be perma-
nently glued together.  Gluing them permanently together is op-
tional - your call.  The obvious benefit to leaving the wing panels
separate is the fact that they can be easily transported or stored,
requiring a minimum of space.

To help protect your wings during the following steps we recom-
mend that you cover your work surface with a soft cloth or piece
of foam. 

4

COVERING MATERIAL

WING ASSEMBLY

Summary of Contents for 4-STAR 54 EG ARF

Page 1: ...5 Standard Servos glow 4 Channel with 4 Standard Servos electric Glow Power 2 Stroke 40 46 cu in 6 5 7 5 cc 4 Stroke 40 54 cu in 6 5 8 8 cc Electric Power 500 800 watt Brushless Motor 800 1000 kv 50 75A Speed Control ESC 3 4S 3000 5000 mAh Lipo Battery Pack SIG MFG CO INC PO Box 520 Montezuma IA 50171 0520 www sigmfg com Copyright 2013 SIG Mfg Co Inc KIT NO SIGRC44EGARFR red SIGRC44EGARFY yellow ...

Page 2: ... 2 disable the BEC and install a normal receiver battery pack to run the radio full time or 3 install an aftermarket BEC that is properly rated for your setup INTRODUCTION Congratulations on your purchase of the SIG 4 STAR 54 EG ARF We hope you will enjoy this unique fun scale R C model Assembly of your 4 STAR 54 EG ARF is fast and simple when following the detailed instructions in this manual We ...

Page 3: ...paper Covering Iron Trim Seal Tool Masking Tape Paper Towels Alcohol and or Acetone For Epoxy Clean up COMPLETE KIT PARTS LIST The following is a complete list of all parts contained in this kit Before beginning assembly we suggest that you take the time to inventory the parts in your kit Use the check off boxes pro vided in front of each part description Please also note that the bolts and nuts r...

Page 4: ... or causing the seams to pull away Once your iron is set to the correct temperature go over the entire framework of the airplane making sure that the covering is se curely bonded to the structure everywhere the covering comes in contact with the wood underneath This takes some time but is worth the effort After you have all the covering secured onto the solid areas turn the temperature of the iron...

Page 5: ...ur radio system to mount the servo in place on the servo mount Repeat this procedure to mount the servo in the opposite wing panel HINGING THE AILERONS 2 Note that the CA Hinges are installed but not yet glued in the ailerons and wing panels The installation process for the hinges is the same for all of the control surfaces on this model a If you removed the ailerons and hinges from the wing panel...

Page 6: ...ia drill to open the hole in the servo arm to accept the pushrod wire d Mark and cut off the excess end of the pushrod wire leaving 1 8 of wire protruding below the bottom of the servo arm e Clip a Nylon Snap Keeper in place on the servo end of the pushrod wire Snap the free end of the keeper up and over the protruding end of the pushrod wire underneath the servo arm f Check that the aileron servo...

Page 7: ...ll bit 8 Slide a second wheel collar onto the axle and up to the wheel Leave a small gap between it and the wheel so the wheel will turn freely and then tighten the wheel collar set screw 9 Check the orientation of the landing gear to make sure you know which way is forward The two outer holes for mounting the gear to the fuselage go to the front Then test fit the wheel pants over the wheels and l...

Page 8: ...bi lizer When satisfied with the fit glue the fin in place using slow drying epoxy glue Apply a thin coat of glue to the bottom of the fin and to the exposed wood on the stab With the fin in place sight the model from the front to make sure the fin is absolutely 90 degrees upright to the stab If needed use a little masking tape to hold it in alignment Wipe off any excess glue rubbing alcohol and a...

Page 9: ...e throttle servo in a glow installation Be sure to drill pilot holes through the plywood tray for the mounting servo mounting screws 23 Mount your receiver in a place of your choosing If using a glow engine it is recommended that you wrap the receiver in foam rubber to protect it from vibrations 24 If you are using a receiver battery pack mount your on off switch in the fuselage side Note that the...

Page 10: ...ry not furnished NOTE The mounting of the electric motor in the 4 STAR 54 as sumes that your motor has a typical X or cross mounting plate on the back of the motor Also note that the firewall portion of the laser cut plywood motor mount is adjustable fore and aft to ac commodate different length motors Next we will determine where you should set the firewall for your particular motor 27 Assemble y...

Page 11: ...nd Lock Washers to bolt your motor in place on the plywood motor mount box 33 Install your ESC a Solder appropriate battery connectors not supplied to the battery leads of your ESC b Most ESCs should fit underneath the battery tray behind the firewall If your ESC is too thick to slide in through the wing open ing you may need to enlarge the forward hole in the battery tray to let you install it fr...

Page 12: ...w keeps your motor running cool We recom mend that you make a simple opening at the bottom rear edge of the cowling as shown in the next photo to provide additional air exit area The exact dimensions are not critical Note A Dremel Tool or similar powered rotary hand tool with an assortment of sanding bits is without a doubt the best tool to use for making cutout in the fiberglass cowling However i...

Page 13: ...ind it useful to use a thin straight edge such as a small ruler inserted into the second slot to help guide the strap back up to the top of the tray b Set the plywood fuel tank support in place but do not glue c Install the fuel tank through the back of the plywood tank support Push the tank all the way up to the back of the firewall pulling the 3 fuel lines through the firewall as you go d Strap ...

Page 14: ...the metal pushrod keeper in the carburetor control arm with one hex nut on each side of the arm f Slide the wire pushrod into the airplane from the back until you can install the Z bend in the throttle servo arm g Turn on your radio and adjust the length and travel of the throttle pushrod using the pushrod connector at the carburetor Note You may find it necessary to support the servo end of the o...

Page 15: ...ovements should be considered as starting points As your experience builds the control travel can be adjusted to suit your particular style of flying and to explore the airplane s capabilities All measurements are taken at the widest point of the control sur face Adjust for HIGH RATES first using mechanical means rather than your transmitter end point adustment to get as close as possible to the r...

Page 16: ...and safety of the finished model SIG MFG CO s obligation shall be to replace those parts of the kit proven to be defective or missing The user shall determine the suitability of the product for his or her intended use and shall assume all risk and liability in connection therewith begins moving forward use the rudder as needed to keep the air plane going straight At takeoff speed use a slight amou...

Reviews: