


Siemens Building Technologies
Fire Safety
P/N 315-033290C-7
2
duced level of smoke. Take obstructions created by girders,
joists, beams, air conditioning ducts, or architectural design
into consideration when determining area protection. Refer to
the Initiating Devices chapter of NFPA Standard 72 for Loca-
tion and Spacing requirements for specific types of construc-
tion; e.g. beam, suspended, level, sloped and peaked ceilings.
SFPT-11 DETECTOR PLACEMENT
Locate Model SFPT-11 on the ceiling, at least 4 inches from the
side walls. For an ideal, smooth ceiling condition, place the de-
tectors at a maximum center spacing of 50 feet (2500 square
feet). For FM Approved installations, use maximum center
spacing of 20 feet (400 square feet). Locate detectors 25 feet
from side walls or room partitions.
Actual job conditions and sound engineering judgment must
determine detector spacing. Consider environmental factors
including ambient temperature fluctuation, and the nature of
the fire hazard. Room or area configuration and ceiling type
(sloped or flat, smooth or beamed) also dictates placement.
Should questions arise regarding detector placement, follow
the drawings provided and/or approved by Siemens Building
Technologies, Inc. or by its authorized distributors. This is ex-
tremely important! The detector placements shown on these
drawings were chosen after a careful evaluation of the area
being protected. Siemens Building Technologies, Inc.’s exten-
sive experience in design of the system assures the best
detector placement by following these drawings.
Temperature – Humidity – Pressure – Air Velocity
The operating temperature range for the SFPO-11, SFP-11 and
SFPT-11 detectors is 32°F (0°C) to 100°F (38°C). The thermal
alarm temperature is fixed at 135°F (57°C).Use these detec-
tors in environments where the humidity does not exceed 93%
(non-condensing). Normal changes of atmospheric pressure
do not affect detector sensitivity. For SFPO-11 and SFP-11 open
area 0-1200 ft/min applications, use the appropriate applica-
tion from the FirePrint ASD application list. Use the ASD duct
application for 300-4000 ft/min applications a) in above-ceil-
ing and under-floor plenums, b) inside an air duct, and c) in an
air duct housing using sampling tubes. Follow detector spac-
ing and location requirements in NFPA 72 Chapter 5 for
High
Air Movement Areas
and
Control of Smoke Spread.
When installing Model SFPO-11 and SFP-11 in existing installa-
tions with an existing duct detector housing, order an AD-11UK
Air Duct Upgrade Kit DA-304, P/N 500-695967 and use it in
that installation. This kit includes the required housing cover,
P/N 305-095676. Do not use Model SFPO-11 and SFP-11 with
any other air duct cover.
For air duct and open area applications, the
SFPO-11 and SFP-11 smoke sensitivity range is
indicated on its nameplate.
OPERATION
LED Indicators
The Model SFPO-11 / SFP-11 / SFPT-11 contains an LED indi-
cator capable of flashing either one of three distinct colors:
green, yellow, or red. During each flash interval, the micro-
processor-based detector checks the following:
• For smoke in its sensing chamber
• That its smoke sensitivity is within the range indi-
cated on the nameplate label
• That its critical smoke sensing electronics are
operating.
Based on the results of these checks, the LED indicator
flashes the following:
DETECTOR PROGRAMMING
Each detector on a loop must be programmed to respond to
a unique system address.
• To program the detector address, use the Model
SDPU Device Programming Unit. Refer to the SDPU
Manual, P/N 315-033260C.
• Record the loop and device number (system address)
for the detector on the detector label and on the base to
prevent installing the detector in the wrong base. The
optional SDPU label printer can be used for this purpose.
WIRING
Detector bases for Model SFPO-11/SFP-11/SFPT-11 should be
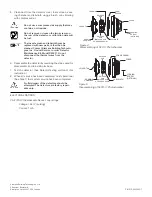
connected as shown in Figure 3.
Detector Mounting
To ensure proper installation of the detector head into the base,
be sure the wires are properly dressed at installation:
• Position all wires flat against the base.
• Take up all slack in the outlet box
• Route wires away from connector terminals.
h
s
a
l
F
r
o
l
o
C
n
o
i
t
i
d
n
o
C
l
a
v
r
e
t
n
I
h
s
a
l
F
)
s
d
n
o
c
e
S
(
1
1
-
O
P
F
S
1
1
-
P
F
S
*
n
e
e
r
G
y
r
o
s
i
v
r
e
p
u
s
l
a
m
r
o
N
y
t
i
v
i
t
i
s
n
e
s
e
k
o
m
S
.
n
o
i
t
a
r
e
p
o
.
s
t
i
m
il
d
e
t
a
r
n
i
h
t
i
w
s
i
4
w
o
ll
e
Y
e
c
i
v
r
e
s
s
e
r
i
u
q
e
r
r
o
t
c
e
t
e
D
s
i
r
o
)
r
i
a
p
e
r
r
o
g
n
i
n
a
e
l
c
(
s
t
i
d
n
o
y
e
b
g
n
i
t
a
r
e
p
o
.
s
n
o
i
t
a
c
i
f
i
c
e
p
s
l
a
t
n
e
m
n
o
r
i
v
n
e
4
d
e
R
m
r
a
l
A
4
s
e
h
s
a
l
F
o
N
r
o
,
d
e
r
e
w
o
p
t
o
n
s
i
r
o
t
c
e
t
e
D
.
r
i
a
p
e
r
s
e
r
i
u
q
e
r
-
e
h
t
n
i
"
d
e
t
a
v
i
t
c
a
e
D
D
E
L
"
g
n
i
t
c
e
l
e
s
y
b
f
f
o
d
e
n
r
u
t
e
b
n
a
c
D
E
L
*
.
l
o
o
t
2
T
C
-
S
F