


2
NOTES:
1.
The maximum distance from the RPM to the PAL-1 is 6 feet. The two modules must be in the same room. Wiring to
the printer must be 14 AWG min., 600V insulation in conduit, and located in the same room as the control panel.
2.
For NFPA 72 Local, Auxiliary and Remote Station configurations, connect the output of the RPM to any
UL ITE listed printer.
3.
The printer must support the EPSON FX command set.
4.
The printer is supervised for paper out, AC loss, and printer parallel cable removal by the RPM.
5A.
For the Panasonic printer
: After loading the paper in the PAL-1 printer, turn off the power and follow the steps below.
a.
While pressing the LOAD PARK button, turn on the power to the PAL-1 printer. Keep pressing the
LOAD PARK button for 5 seconds.
b.
Release the LOAD PARK button.
c.
The current setting will print.
d.
When printing is completed, the ON LINE indicator will be lit. If the ON LINE indicator is not lit, press the ON
LINE button.
5B.
For the Epson LQ2090 printer
: Follow the steps below to enter default-setting mode. If single-sheet paper is
loaded, you'll need to load a new sheet each time the printer ejects a printed page.
NOTE:
For Auto line feed, the default-setting must be On as described in Step e.
a.
Make sure the printer is on and paper is loaded. Then press the Menu buttons (Item
Ï
and Set) until the
printer beeps and both the Menu lights turn on.
The printer enters default-setting mode and prints a line showing which language is currently selected for
printing the instructions.
NOTE:
If the printer does not access default-setting mode, the printer is in lock-out mode. When the lock-out mode
is on, the Pause and Paper Out lights flash simultaneously when the locked buttons are pushed. Follow the
procedure for turning off the lock-out mode on page 3.
b.
If you want a different language, press the Item
Ð
button until the printout shows the language you want
underlined.
c.
Press the Set button to accept the language. The printer prints a line asking if you want to print all the
current settings.
d.
To print a list of all the current settings, press the Set button. The printer prints all the settings and then the
first setting again.
To go through the settings one at a time, press the Item
Ð
or Item
Ï
button. The printer prints the first
setting and its current value.
e.
Press the Set button to scroll through the options until you see Auto line feed. Press the Item
Ð
or Item
Ï
button to select On.
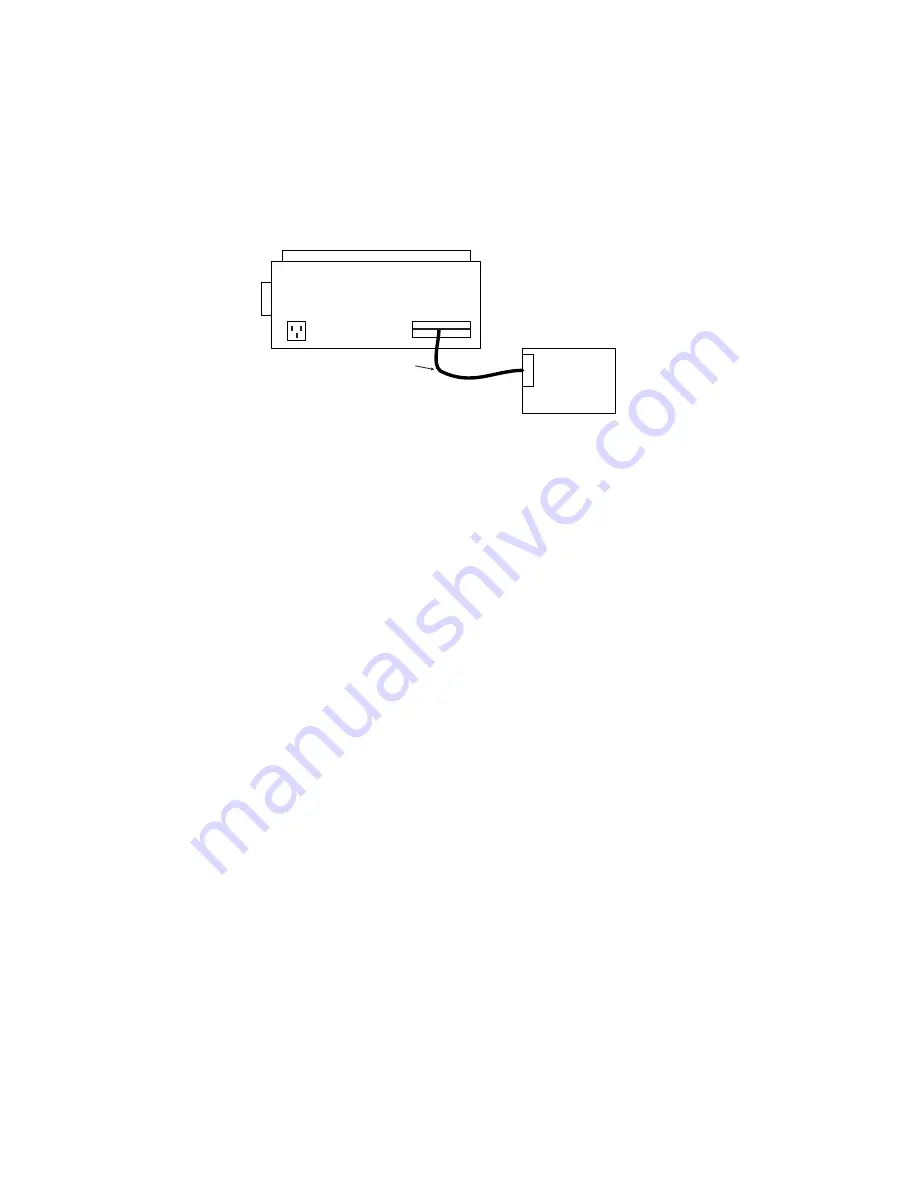
120 VAC
60 Hz.
CENTRONICS
PARALLEL
PAL-1 or ITE LISTED PRINTER
RPM
SPP
CABLE SUPPLIED WITH RPM
SUPERVISED
POWER LIMITED
Figure 3
FireFinder-XLS System
FireFinder-XLS System
1.
The FireFinder-XLS system requires a Siemens model RPM module to interface to a Centronics parallel
printer. When an RPM is used in conjunction with PAL-1, the FireFinder-XLS system provides a supervised
logging printer meeting the requirements of an NFPA 72 Proprietary or UL1076 Security system. The printer
is supervised for paper out, AC loss, and printer parallel cable removal.
2.
Refer to the RPM Installation Instructions, P/N 315-033270, for more details on connecting and
programming a RPM module.
3.
Figure 3 shows the proper installation of PAL-1 with an RPM module.